Tonight at sundown begins Yom Kippur. For 25 hours we will fast. [Ed. note: A WHOLE DAY AND AN HOUR DEATH WHERE IS THY STING?] This “Day of Atonement” (English translation) isn't Hanukkah, but it's the holiest day of the year, and a day to begin the new year with a fresh start.
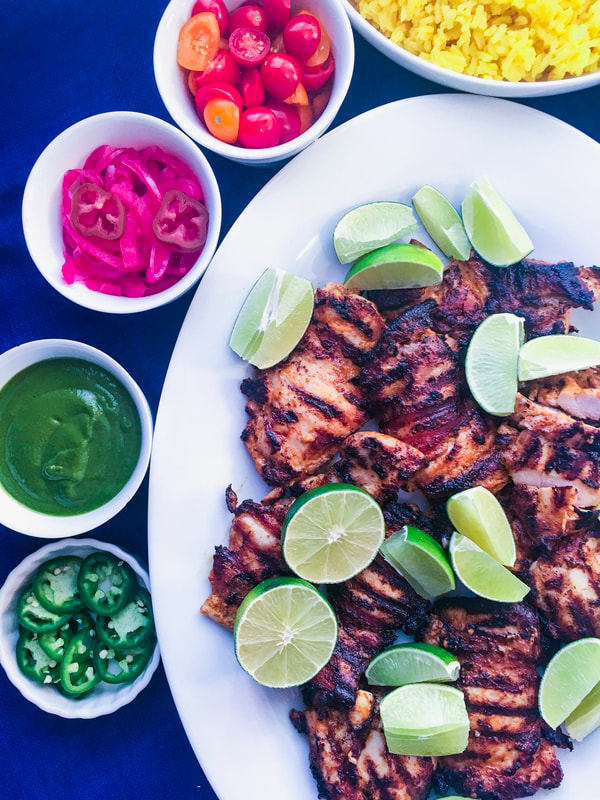
When I was young, my mamala used to make her famous roast chicken before the fast and another one to break fast. We lived in a small town about 200 miles (round trip) from the nearest synagogue in Portland, Oregon. By the time services were over, and it was past sundown, we made it home around 8:00pm and started roasting a chicken we didn't actually eat until 10:00pm. It was a long day and we were all pretty hangry [Ed. note: A technical term.] by that point! Although hardly traditional Jewish fare, this Mexican-marinated roast chicken is the perfect way to start the fast and it will be an easy and equally delicious meal to break fast. Best of all, I prepared everything ahead of time, so I didn't have to start the process after work. 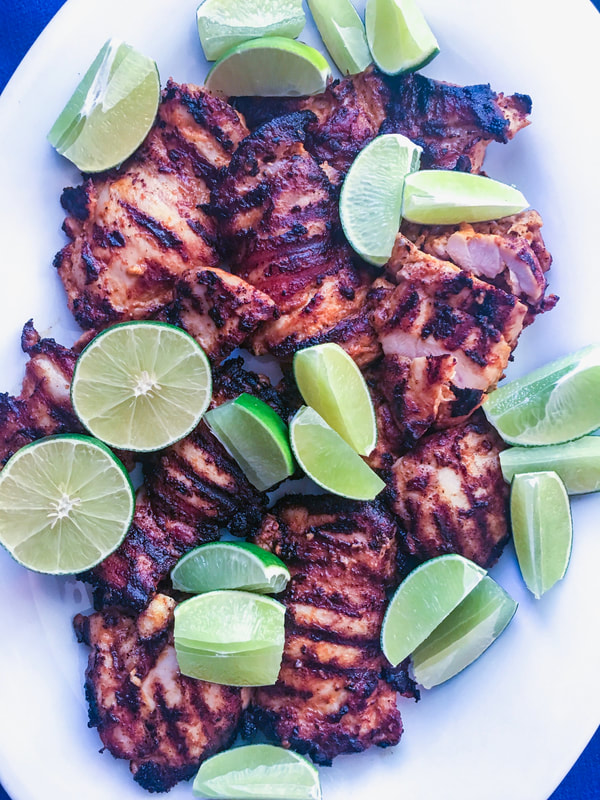
A word about the marinade: you're probably thinking mayonnaise is an odd choice, but it's not. It works. The Best of Fine Cooking explains, "Mayonnaise is the perfect base for marinade as it takes the place of oil and keeps the marinade ingredients suspended. The lime juice cuts through the richness of the smoky chipotle and the beer adds depth of flavor."
The spice level is relatively mild, for my taste. If you like a bit more kick, like the BF and I do, add an additional ¼ - ⅓ cup of purée to the mayo. Serve this chicken with anything! We made burrito bowls, but it's perfect served in a tortilla as a burrito or taco. Our side dishes included saffron rice, black beans, pickled red onions, avocados and a delectable cilantro vinaigrette that was so good, it will have its own blog entry very soon. To all of my tribe, wishing you a meaningful Yom Kippur and an easy fast. 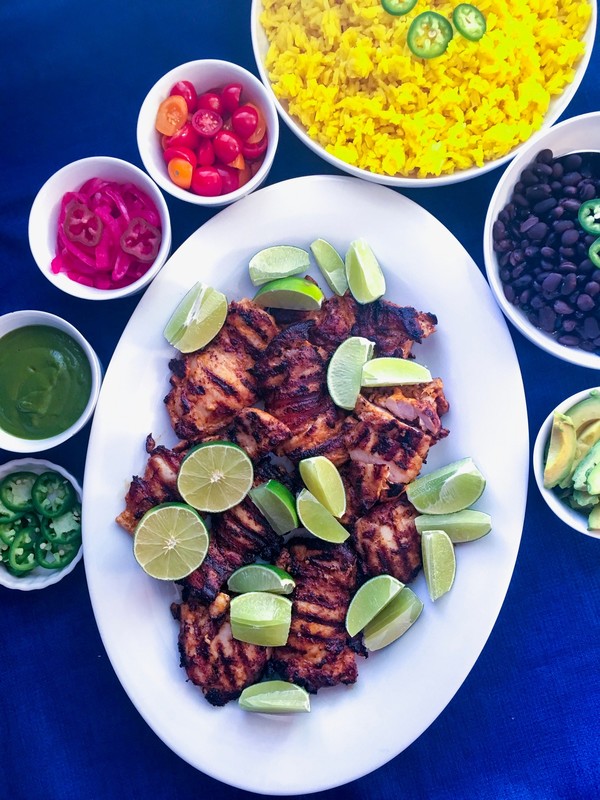
Adapted from: The Best of Fine Cooking, Mexican, 2018
Number of servings: 4-6 Ingredients
Directions
NOTE: You can make the marinade ahead of time. Tightly covered, the marinade (with mayo) will keep in the refrigerator for up to two days.
9 Comments
So. We missed a week. Let me explain.
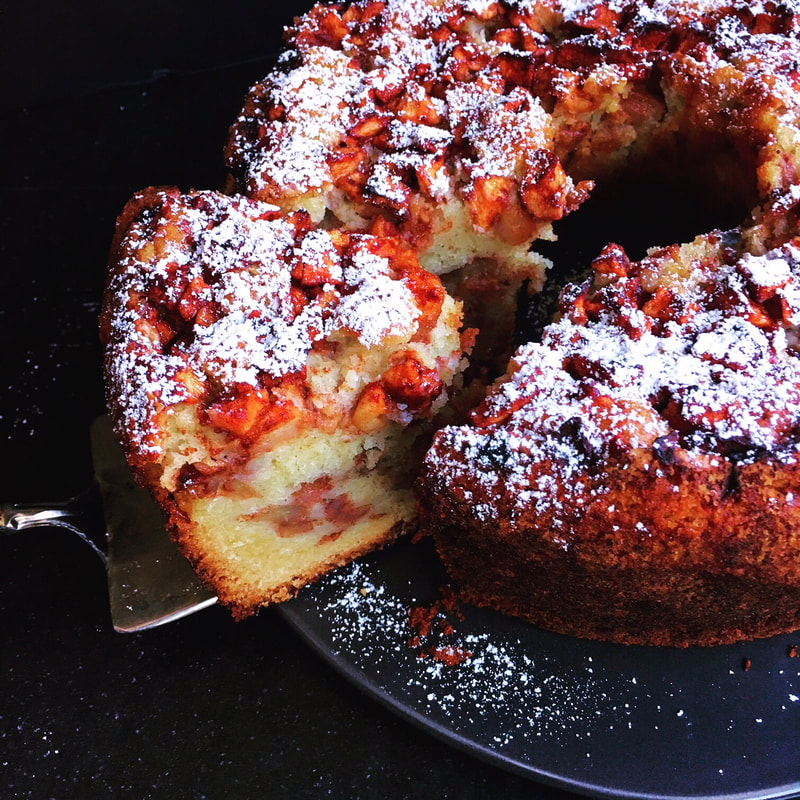
If there is one thing that can throw a serious monkey wrench into a personal-chef business, it's a broken refrigerator. Three weeks of no working fridge in the house, so to the rescue come three friends and their three fridges. (You know who you are and I love you dearly.) The BF and I are driving all over town to these different locations, then out to fulfill all the client orders. Extra time, extra hassle, and then of course problems with new-fridge delivery and oy... Then, a bonus: jury duty. [Ed. note: #@%$#^&*] I was called to attend, but luckily was dismissed on the second day. A side note: in 1993 I served for four weeks during procedures that were deciding whether or not a serial killer was competent enough to stand trial. We determined that he was. So, with all apologies, am late in getting into the Rosh Hashanah spirit. Even though it started on Sunday and ends today, Tuesday, it's not too late to make this lovely apple cake. This will work throughout the rest of fall and winter, and really, the last three weeks have had a "better late than never" kind of mantra. Many years ago I made this for my Momala, and it was an instant favorite (and she is a woman who knows her coffee cakes). The BF enjoyed it for his birthday last year, and of course it was brought out again for this Rosh Hashanah. It doesn't skimp on the apples, the entire house smells like apples, cinnamon, and fall. The BF and I want to wish all our Jewish family and friends a healthy and happy Shana Tova! 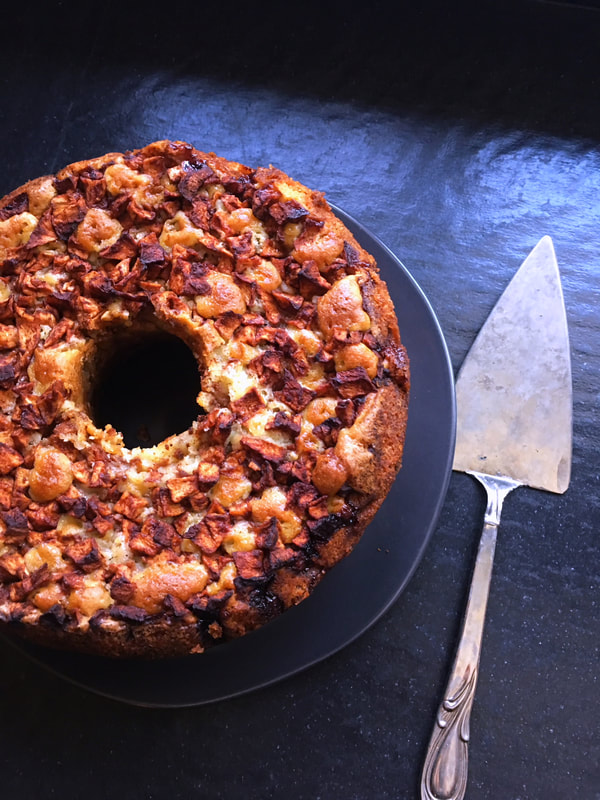
Adapted from: Smitten Kitchen
Number of servings: 12-16 Ingredients For the apples
Directions
DO AHEAD: This cake is awesome on the first day but absolutely glorious and pudding-like on the days that follow, so feel free to get an early start on it. I keep it at room temperature covered with foil. * NOTE: The apples love to hide uncooked pockets of batter, especially near the top. Make sure your testing skewer or toothpick goes not just all the way down to the bottom, but does a shallow dip below the top layer of apples, and make sure it comes out batter-free. Should your cake be browning too fast, before the center is baked through, cover it with foil for all but the last few minutes, while in the oven. 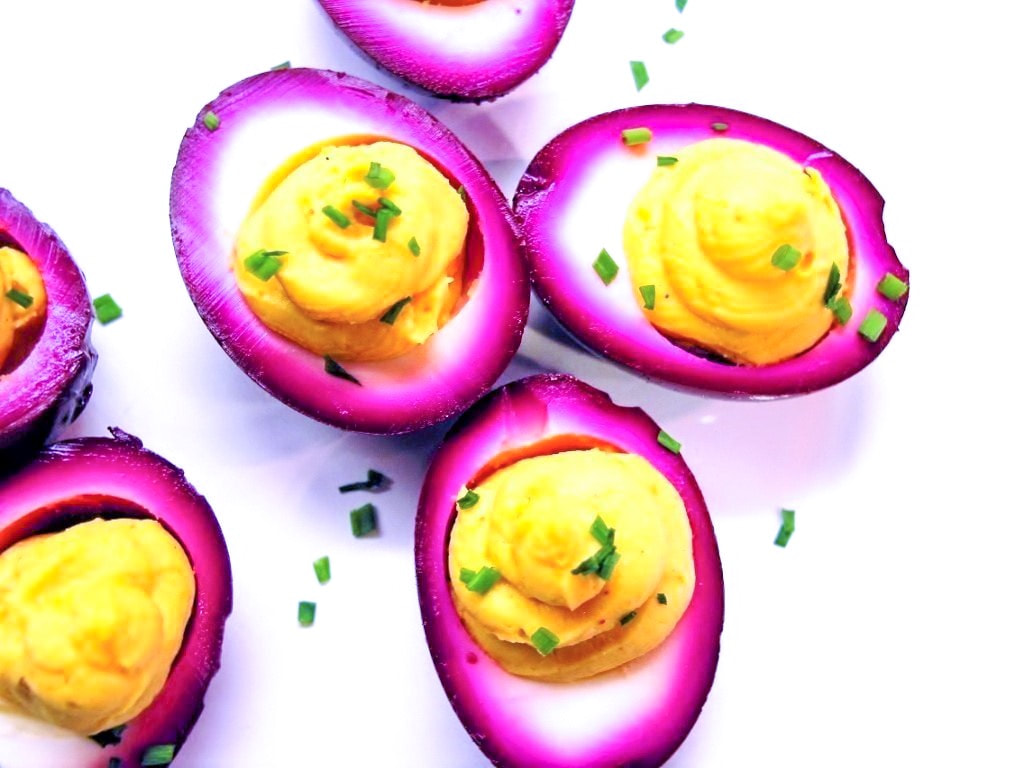
You know that one person in your family that has that annoying habit that drives you and the rest of the clan batshit crazy? [Ed. note: It's a technical term.]
That person was me. Removing the filling of a Hostess Twinkie, Suzy Q, or cupcake. Digging out the fruit at the bottom of a yogurt cup, leaving the sour plain yogurt for the next unsuspecting sibling. Sorry, Mike. Eggs. Mom would go to Defcon 2 as I would surgically remove the yolk of a fried egg and leave behind a perfectly entact white saucer. So it's no surprise that when the BF and I have deviled eggs, the filling gets excavated and he gets the outside white. Except...for this pinkalicious delight, where the outer egg white packs a puckering wallop of flavor (courtesy of the cardamom, anise, peppercorns, and optional jalapeno). This is a nice addition to any Easter or Passover table. In my experience, they're always the first to disappear. Happy Easter, Pesach Sameach. Adapted from: Simply Recipes and The Kitchn (Brine) Number of Servings: Makes 6 whole pickled eggs or 12 deviled egg halves Ingredients Hard Boiled Eggs
Pickled Beet Brine
Deviled Eggs
Directions Hard Boiled Eggs
Pickled Beet Brine
Deviled Eggs
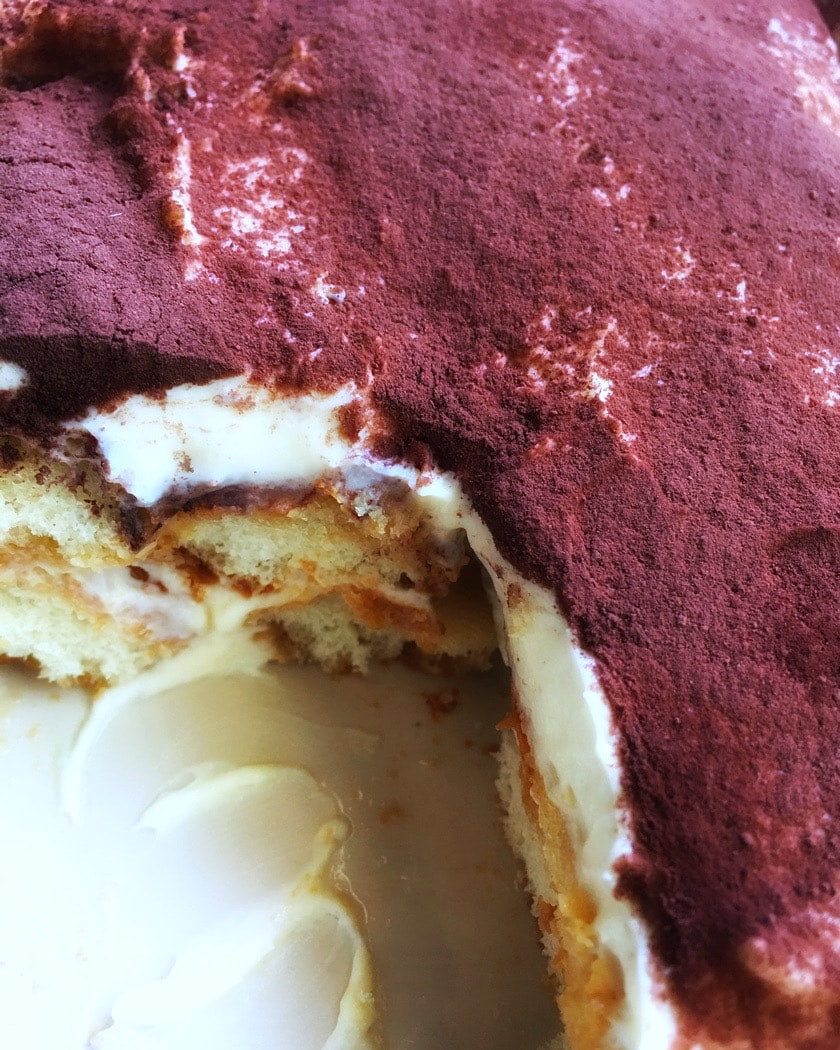
Espresso, check.
Baileys Irish Cream, check. Tiramisu, check. For me, a trifecta of favorites in one dessert. In one bite, even. Boozy and creamy, while managing to be light tasting. The BF has already had too much of it. [Ed. note: <whistling and singing> We have no heads! No we have no heads!] Don't mind him. This takes all of 20 minutes to put together, but needs to chill overnight. Have lost count how many times I've made this for family, friends, and clients. One of my clients who never eats desserts, eats this one. A good friend is like a four-leaf clover, hard to find and lucky to have. - Irish Proverb Happy St. Patrick's Day! 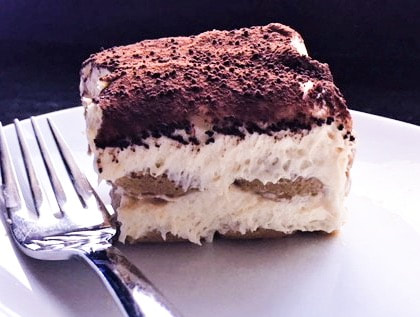
Adapted from: Nigella Lawson, Nigella Express and Jenn Segal, Once Upon a Chef
Number of servings: 12 NOTES: Savoiardi cookies are also called lady fingers. But be sure to buy crisp cookies, not the soft sponge-cake lady fingers sold in the bakery section of your grocery store. Also, this recipe uses raw eggs, so use only fresh, properly refrigerated and clean grade-A or AA eggs with intact shells, and avoid contact between the yolks or whites and the shell. Ingredients
Directions

[Ed. note: We leave you with a little Traditional Irish Folk Song, courtesy of Denis Leary. Cheers and Happy St. Patrick's Day!]
We drink and we die and continue to drink! 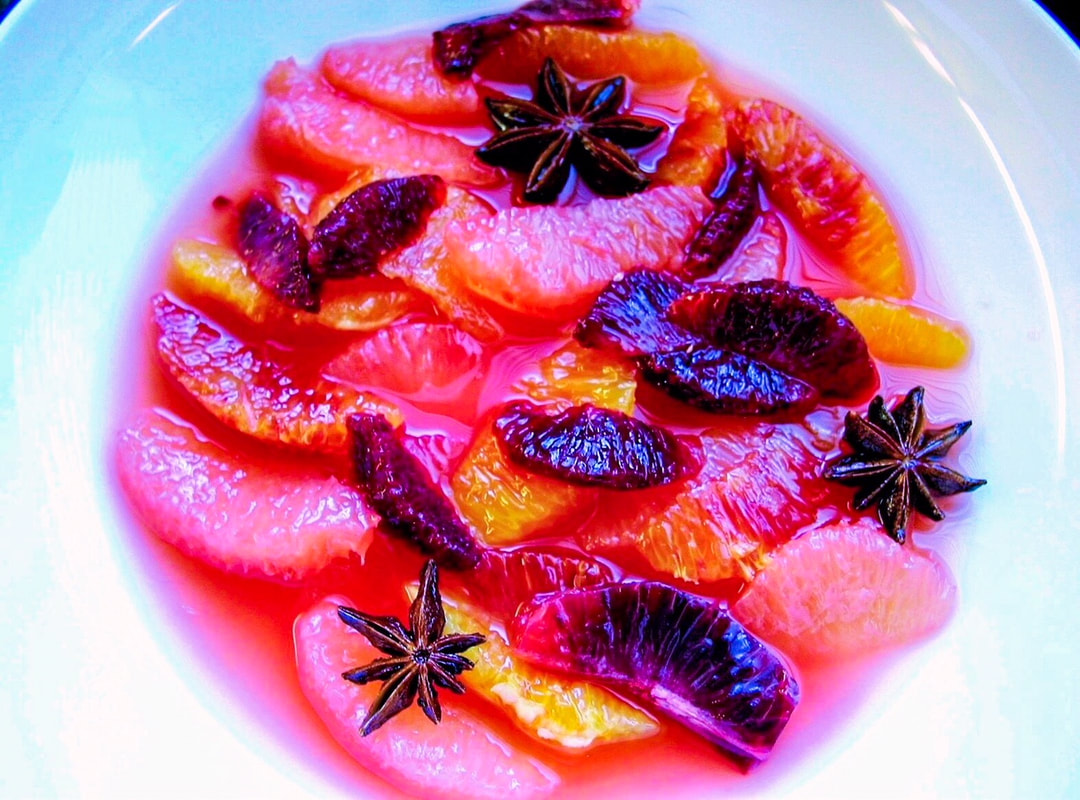
Hope everyone had a wonderful holiday!
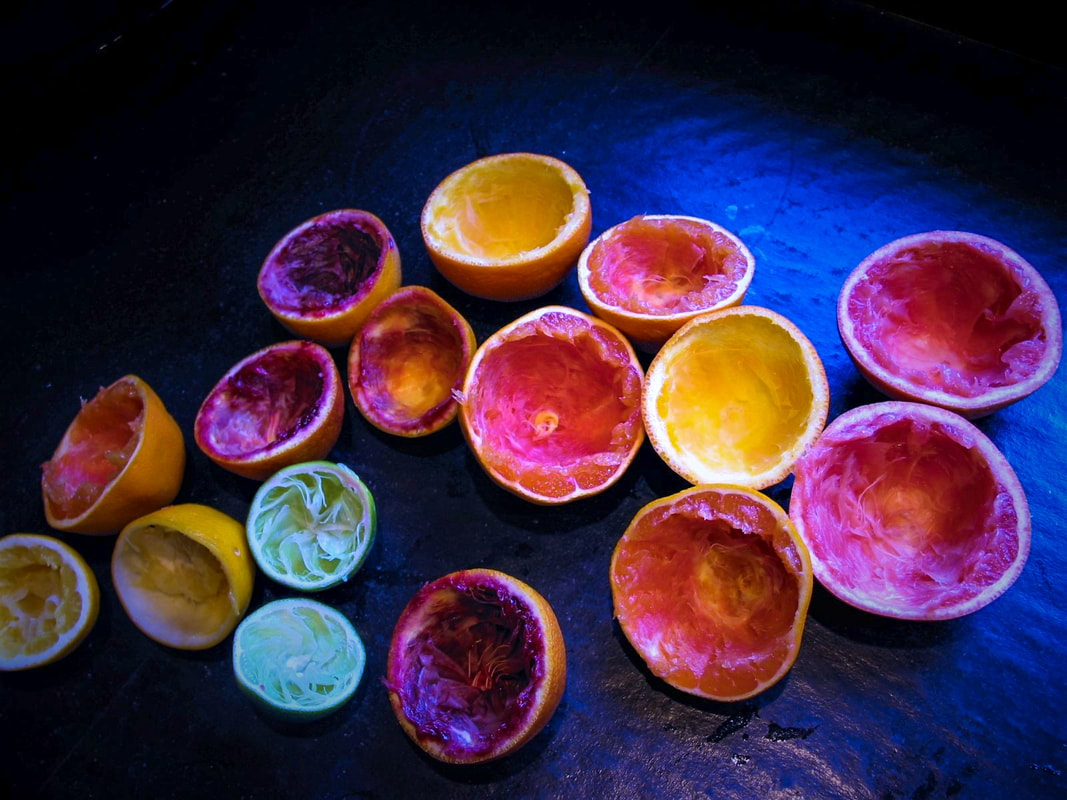
Traditions are discussed a lot here, and everyone has their must-see Christmas movies. For us, it's not December if we haven't watched Bad Santa, A Christmas Story and holiday-themed episodes of South Park, Family Guy and Aqua Teen Hunger Force. [Ed. note: Grow up? You fool!] This year my BF surprised me and found the 1964 Rankin/Bass Rudolph the Red-Nosed Reindeer, which I haven't seen since I was a child. On Christmas Eve we hosted our annual traditional dinner with a small group of dear friends. In previous years I'd made seafood paella, but this year I veered away from that tradition and made cioppino. Although it was delicious, my guests took a vote and it's back to seafood paella in 2018. (Am not complaining. Note to self: don't mess with tradition.) I also made a delightful sugar-free low-carb peppermint cheesecake, and bought a chocolate layer cake wrapped like a gift, because I didn't think all the guests would go for the sugar-free option. Of course, the sugar-free cheesecake won out (and will certainly be featured in a blog post next year). Christmas day was gloriously relaxing. For me, a rare day off. Music and movies playing all day, a leisurely breakfast, gifts to open [Ed. note: I got Joker socks and you didn't], taking our chocolate lab Marlowe for a long romp, and a Christmas Story-inspired Chinese take-out dinner of Peking duck and Chinese greens. The aforementioned "leisurely breakfast" was this gorgeous, colorful, refreshing, jewel-toned citrus salad. Blood oranges and citrus are at their peak right now, so it's the perfect time to make it. Wishing everyone a happy, healthy and adventure-filled 2018. 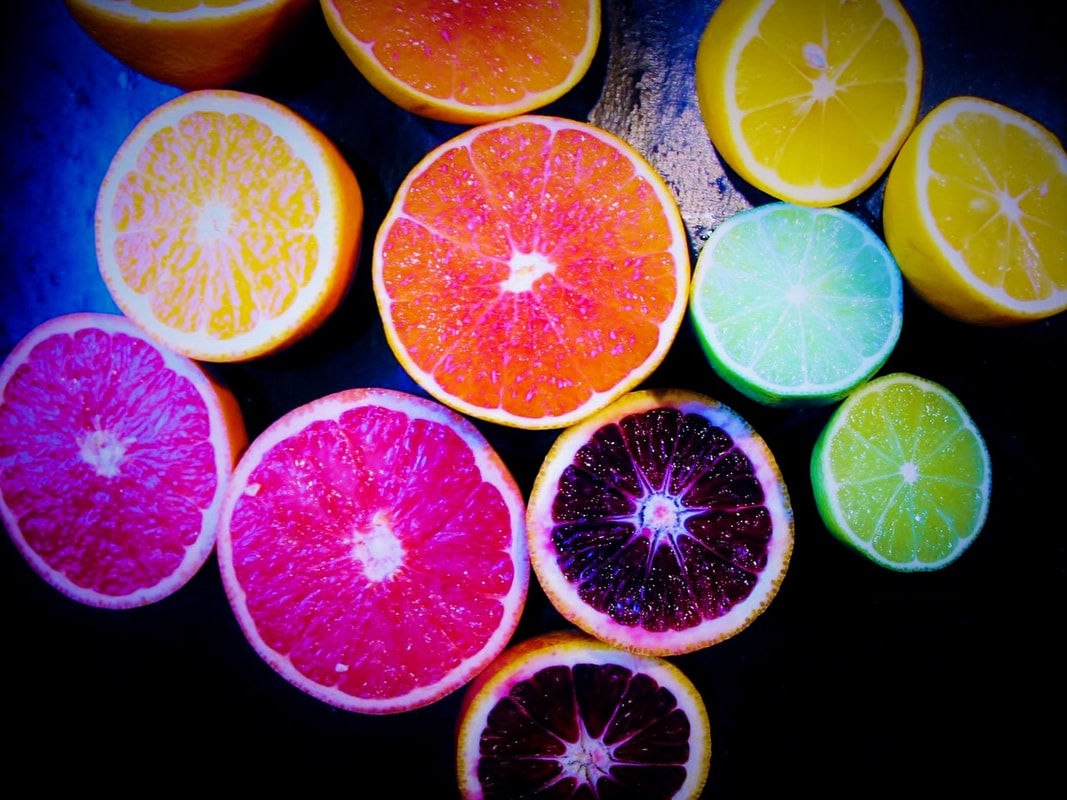
NOTE: I cut the sugar amount in half from the original recipe as my preference is to not over-sweeten, but if that's not of your concern, stick with the original recipe. I also added two Cara Cara oranges, which look like regular navel oranges on the outside, but the inside is red-fleshed, juicy and sweet. You can make this one day in advance. Keep chilled.
Number of servings: 8 Adapted from: Gourmet (December 2008) Ingredients
Directions
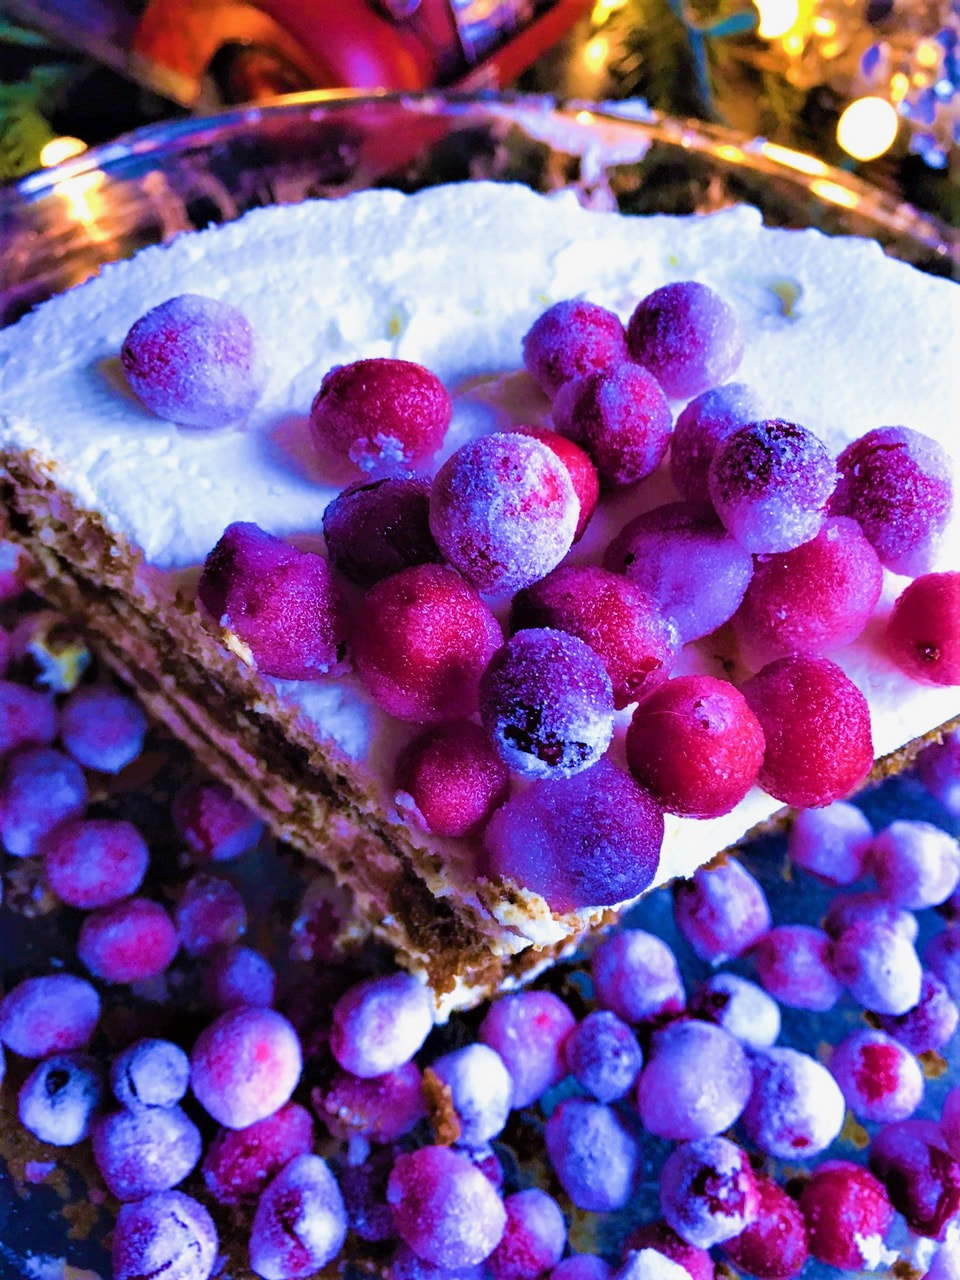
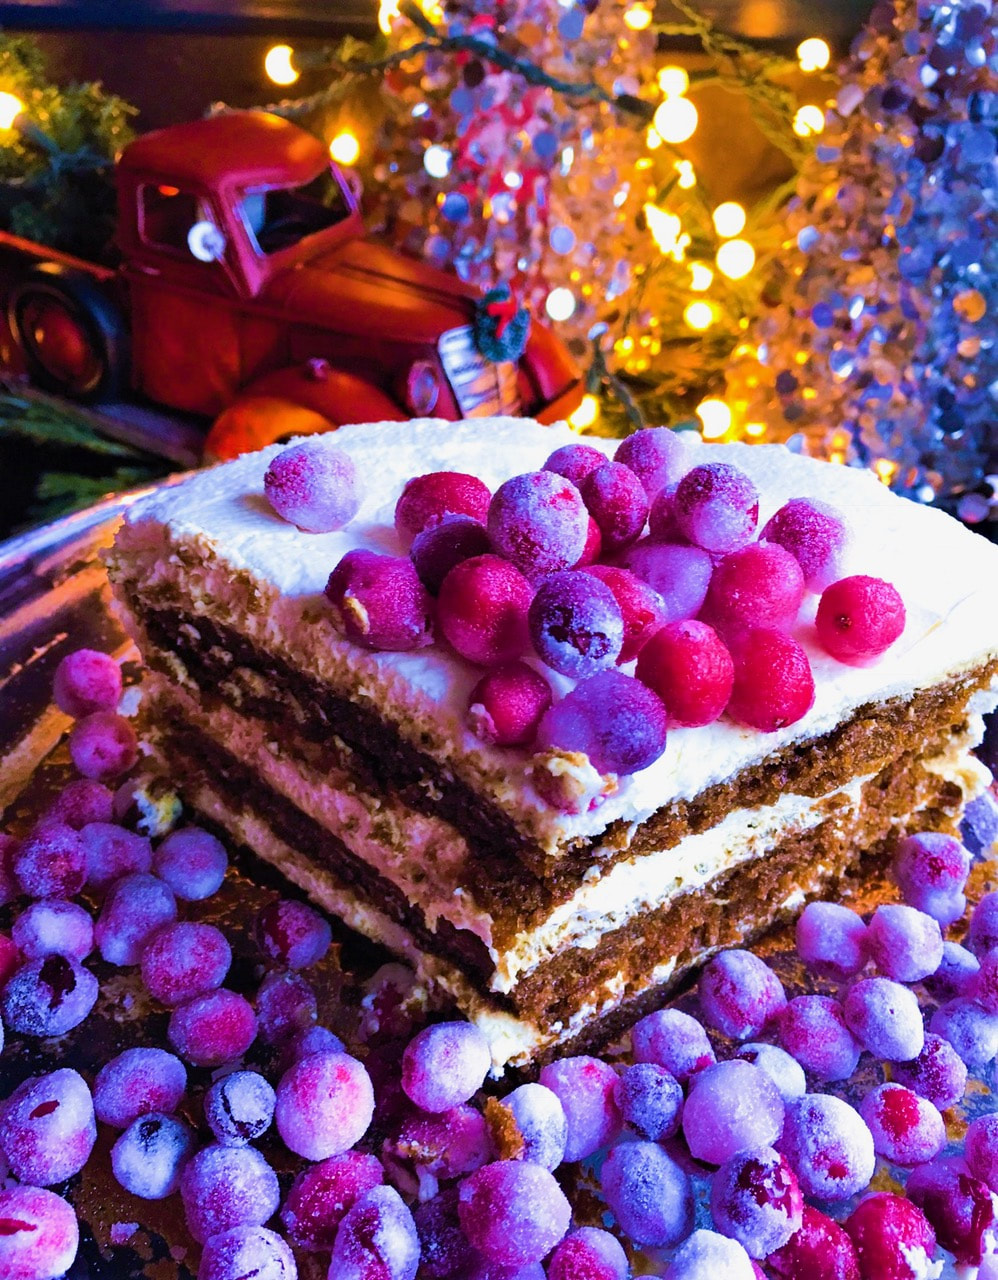
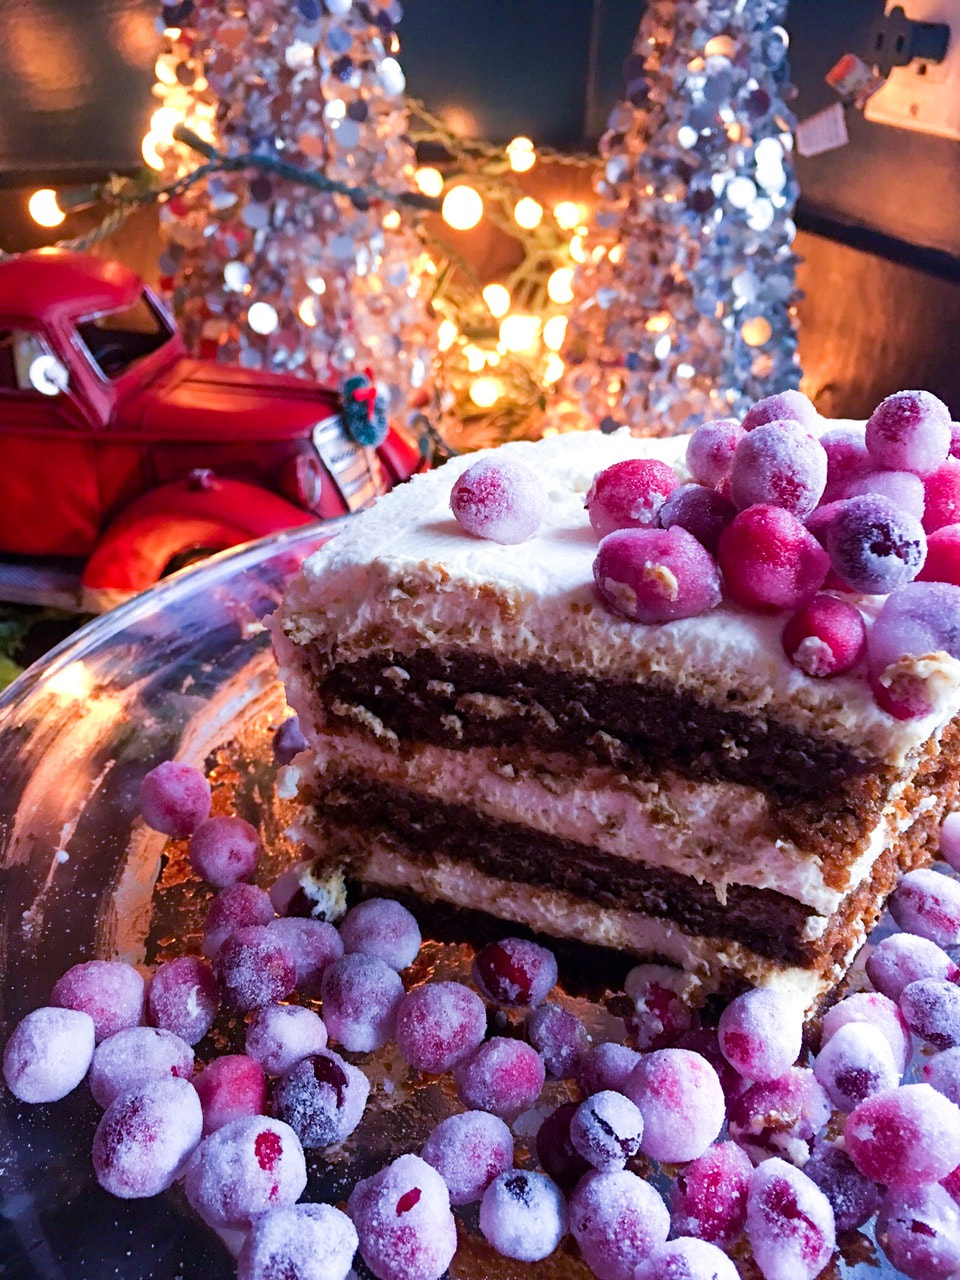
For the last seven years or so, my BF and I have held a Christmas Eve dinner for some very dear friends. For the first few, a new towering cake would be presented, i.e., spice with eggnog buttercream, chocolate with peppermint chocolate ganache and peppermint buttercream, whiskey soaked dark chocolate bundt, gingerbread roulade with eggnog filling, etc.
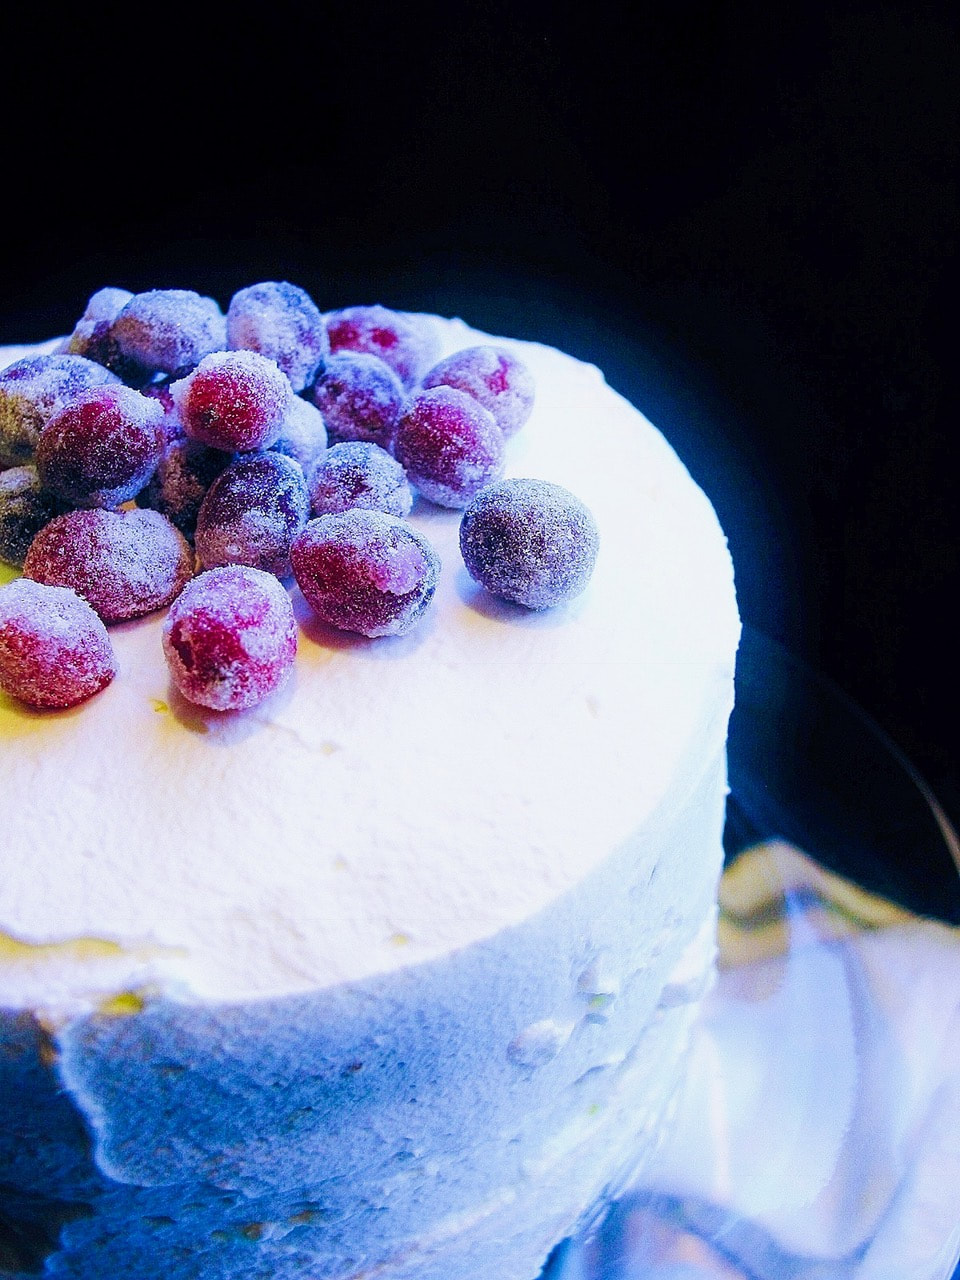
Then, this one. Moist, stout-spiked [Ed. note: HELLO], spicy gingerbread and mascarpone whipped cream icing–it has a deep, dark, mysterious flavor, yet tastes surprisingly light. It tastes like Christmas.
For a while I had been making a similar recipe as a gingerbread loaf, but after discovering this layered-cake version (originally adapted from a Claudia Fleming recipe, who created it while she was pastry chef at Gramercy Tavern in New York; then adapted by Deb Perelman of Smitten Kitchen), I knew the holiday dessert tradition was forever settled. No more auditions.
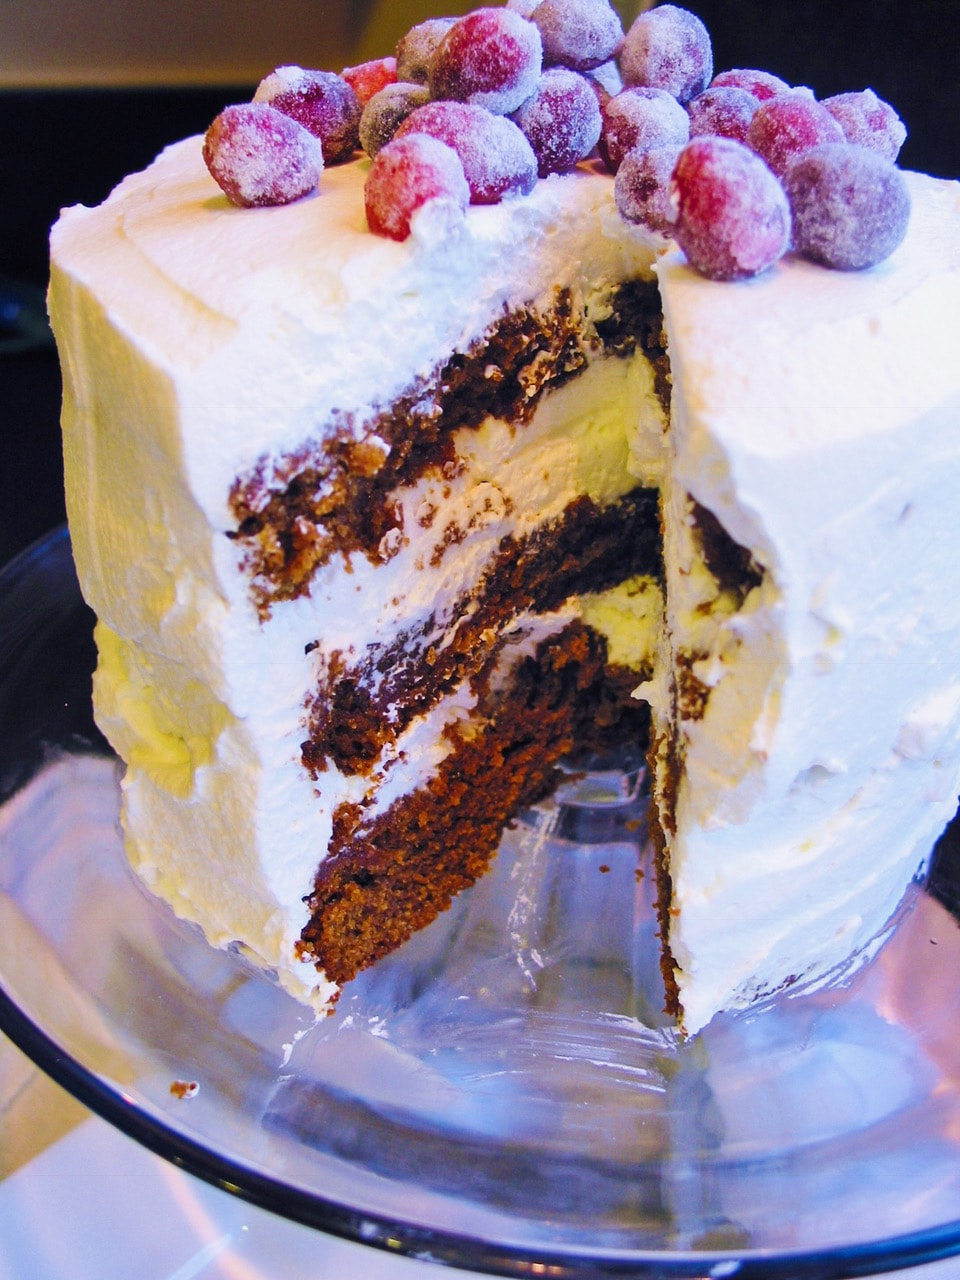
Wishing you and yours a Merry Christmas and Happy Holidays! Number of servings: 8-10 Adapted from: Smitten Kitchen NOTE: You’ll have up to 1 cup more whipped cream than you’ll need, which I use to frost the outside of the cake (not a fan of "naked" cakes, like the original recipe). If you wish to save the cream, it can stay stable for a couple days due to the added mascarpone. Start the cranberries the night before. NOTE: Deb Perelman of Smitten Kitchen says, "This recipe makes three thin cake layers. As most of us have two cake pans, at best, you could also make it into two thicker cake layers, giving it a little more baking time. Or, you could do as I did, which is to hold the last bit of batter in a bowl until the first layer comes out and can be unmolded. It holds up just fine at room temperature for an hour." Ingredients Sugared cranberries
Cake layers
Filling
Directions Sugared cranberries
Cake layers
Whipped mascarpone cream
Assemble cake

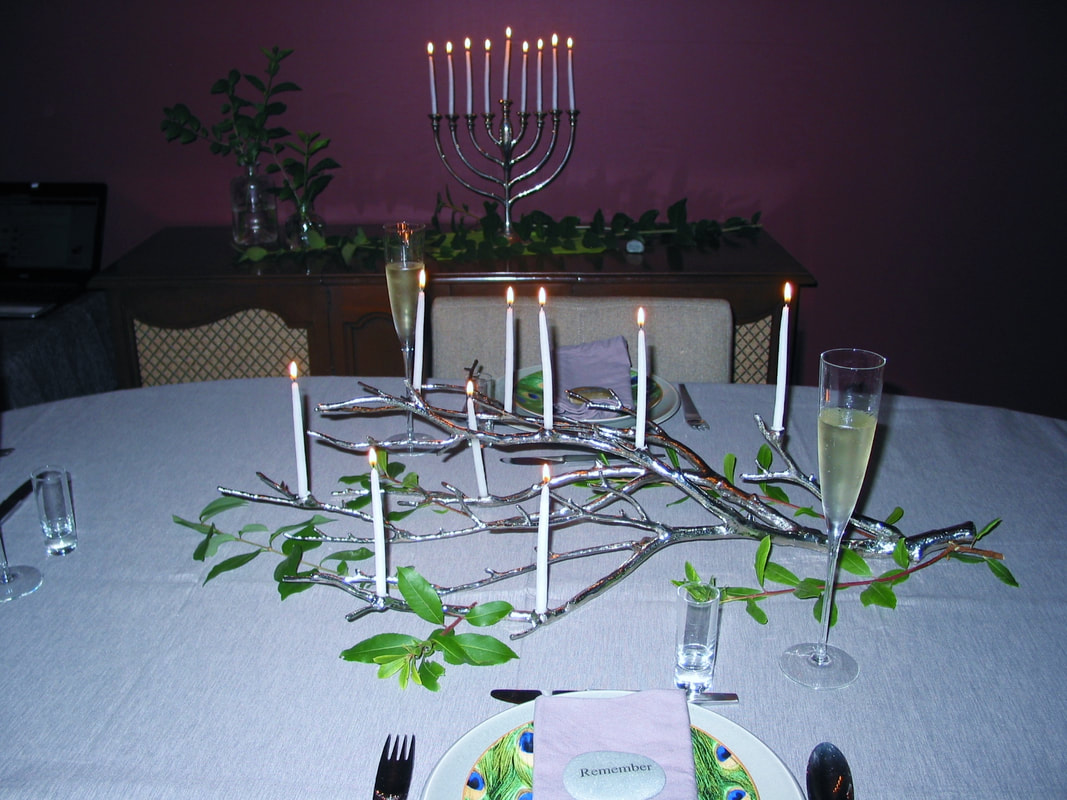
In grade school, my classmates were jealous because they thought I had eight days of extravagant presents for Hanukkah. Truth be told, in our family, as a kid I received gifts for Hanukkah two, maybe three times total. And when we did, my siblings and I all received the same small gifts. It mattered not, as I remember being so appreciative and excited to get these favors, and waiting to light the candles.
The first year we received presents, I was in the second grade, and this is what we all opened on each night: (1) a pencil in our favorite color and with our name; (2) a comb; (3) rabbit's foot; (4) notepad; (5) paperback book; (6) The Sound Of Music album that we all shared; (7) chocolate Hanukkah gelt; and (8) flavored chapstick. Am not sure why I remember that particular Hanukkah so well, but it's embedded in my brain how thrilled we all were to get a pencil with our name on it! To me, it's all about tradition. I loved the traditions as a kid, and love continuing the rituals today. My BF and I still light the menorah. He is typically the one to fetch the pillowed box from the shed, and place the menorahs around the house. 
For years, family food Hanukkah traditions revolved around some sort of brisket, with latkes always making an appearance during the week. More recently, I've been making all variations of short ribs: chipotle, Moroccan, beer braised, etc.
This red wine braised variant, which I've been making for many years, may very well be the favorite. It's easy to make, meltingly tender and savory. The red wine sauce has exceptional depth and flavor, and I love substituting celeriac (celery root) purée in place of potatoes. (For those of you watching the carbs.) Happy Hanukkah! Number of servings: 4 Adapted from: Short Ribs–Bon Appetit (October 2011); Celeriac Purée–Saveur (April 2014) Ingredients Short Ribs
Celeriac Purée
Directions Short Ribs
Celeriac Purée
Family is not an important thing, it's everything.
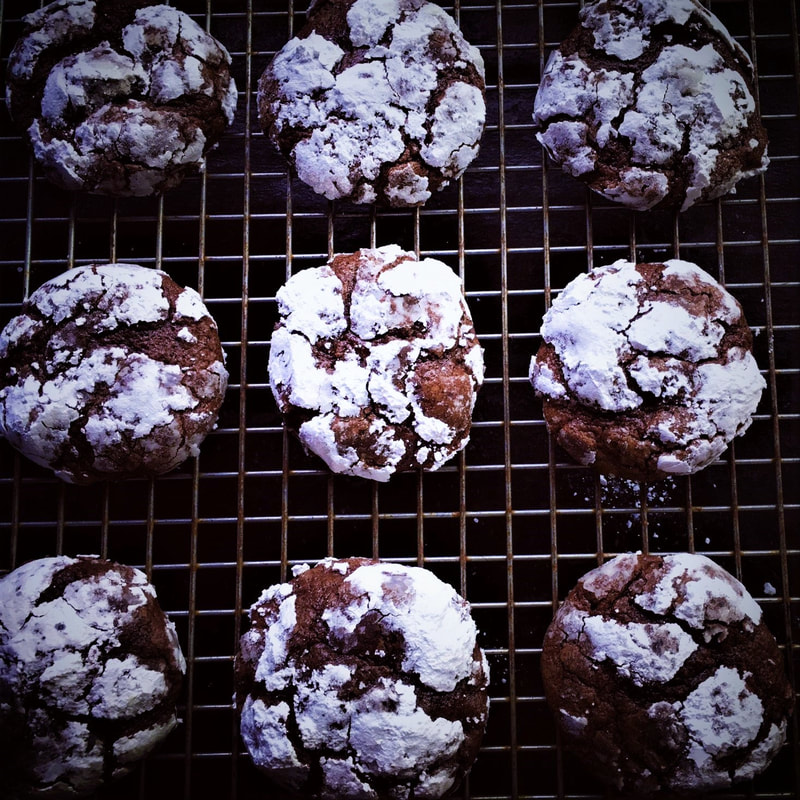
~Michael J. Fox Six years ago today, my beloved momala passed away. The best way we have honored her life and kept her memory alive is to embrace our little family and celebrate each other as often as possible. She used to say, "If you don't have something to celebrate, celebrate anyway." [Ed. note: Spinal Tap keyboardist Viv Savage also said it well, "Have a good time. All the time." youtu.be/WrhzX3dRRiI] Our family recently got a little bigger. My little sister Julie brought the new man in her life, Frank, by for a whirlwind visit, our first time meeting him. Seems there couldn't be a more perfect person for Julie than Frank; they share a love of nature, geology, animals and family. Bonus, he has an encyclopedic knowledge of sports and wine (we were excited to try riesling and pinot noir from his own vineyard), which endears him even more to the BF. [Ed. note: We even coexist with his love for the St. Louis Cardinals and ours for the San Francisco Giants.] We feel like he's been here all along. Unfortunately I ran out of time and could not make cookies for them to take home, but had I been able, these would have been the choice. My momala would have adored them as well. Chocolate and orange coupled and a hint of fresh ginger and brownie texture. It would have sent her over the edge. Dorie Greenspan (this is originally adapted from her book Dorie's Cookies) is an excellent source for all things baking. She mentions that this cookie is best on the day it is made, but I have found it stays fresh, moist and chewy for at least 3 days. So it works well for shipping or gift giving. Number of servings: about 20 cookies Adapted from: Saveur (Dec/Jan 2017) and Dorie's Cookies Ingredients
Directions

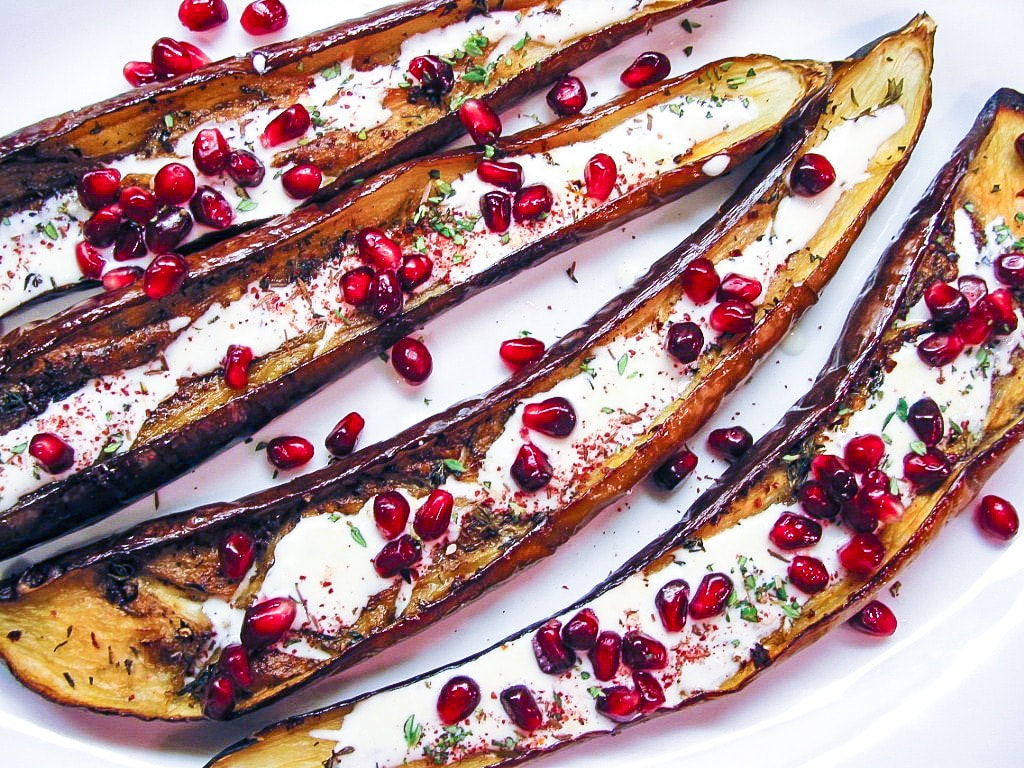
Yotam Ottolenghi says of this eggplant dish, "I can't think of a more rustically elegant (is that a contradiction in terms?) starter." Contradiction? Hardly.
Ottolenghi is an Israeli-Italian chef residing in London, with a flavor palette that's out of this world. This recipe is adapted from his 2010 cookbook Plenty, and I selected it for today's post because of its gloriously gorgeous colorful presentation, not to mention it's delicious and a perfect easy-to-make dish for your holiday table (or anytime). I prepared it for an anniversary dinner party, not as a starter, but as a side dish with grilled lamb chops and naan--it was heavenly. Another advantage for a dinner party: it can be served at room temperature, meaning it's easier to make ahead of time. Adapted from: Plenty by Yotam Ottolenghi Number of servings: 4 as a starter or side dish Ingredients Eggplant
Sauce
Directions
Epilogue Writer Julian Barnes said of mourning, "The thing is—nature is so exact, it hurts exactly as much as it is worth, so in a way, one relishes the pain, I think. If it didn't matter, it wouldn't matter." A friend sent this line in a condolence letter when my momala passed away, and it has resonated ever since. The grieving is commensurate with the loving, a testament to what’s missing. This has been a particularly difficult year for my boyfriend (the blog's man behind the curtain, the one behind the editorial notes), who is grieving the passing of his mom, and today is actually the one-year anniversary. Kathryn Bailey was an accomplished jazz pianist based in the San Francisco bay area, who accompanied everyone from Billie Holiday to the Buddy Morrow Orchestra, Berkeley's Straw Hat Theatre, and Ronnie Cass. We miss you everyday, Kathy. 
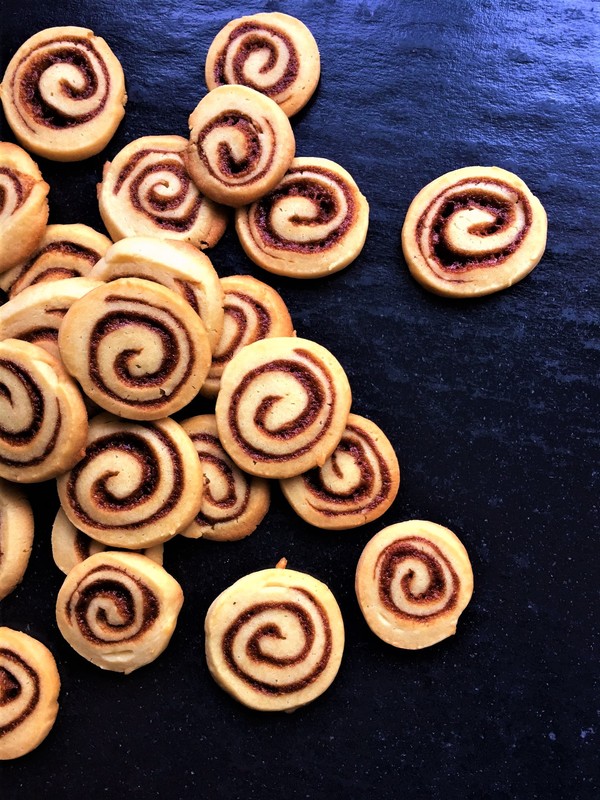
Patience is not my virtue. [Ed. note: I want to comment, but appreciate my life.] Rolling out cookie dough and cutting out cookies with cookie cutters? No patience for it. Hell-o slice-and-bake simplicity!
These cookies are tender, lightly sweetened with honey, and swirled with cinnamon and spice–a perfect holiday cookie that travels and keeps well, perfect for gracing your Hanukkah dessert table, a cookie exchange, or to leave as a nice treat for Santa and his helpers. I have been known to have them for breakfast with coffee, or late afternoon pick-me-up with tea. Winter is coming: let the holiday cookie season begin! NOTE: Although the glaze is delicious, I opted not to use it as I prefer it much better plain (plenty sweet for this household), and if you are going to ship it as a gift it's probably more practical to go glazeless. That said, if you're serving at a party or leaving for Santa, by all means glaze it up. Adapted from: Marbled, Swirled, and Layered, by Irvin Lin Number of servings: 48 cookies Ingredients Cookie Dough
Cinnamon Filling
Glaze
Optional
Directions Cookie Dough
Cinnamon Filling and Baking
Glaze
NOTE: Make sure the butter for cinnamon filling is truly at room temperature or even slightly warmer than that. It makes spreading the filling easier. You can make and freeze this cookie dough for future baking. Once frozen for an hour, place the log in a labeled zip-top plastic bag. Slice and bake cookies at your convenience. Frozen dough should keep for up to 2 months. 
|
AuthorI'm Jacquie, personal chef & recipe developer in the beautiful Pacific Northwest. Lover of books, bourbon, chocolate and movies. Archives
May 2020
Categories
All
|


 RSS Feed
