Moveable Feast
  • home
  • services
  • bio
  • blog
  • contact
  • PHOTOS (summer)
  • photos (winter)
  • PRESS
  • faq

Feast Mode

a moveable feast blog

Salted Butter Chocolate Chunk Shortbread Cookies

1/29/2019

2 Comments

 
Picture
This cookie went viral in autumn of 2017. [Ed. note: At our current pace, that is roughly 27,538 news cycles, since then. Give or take.] At the time, it didn't really look like much of a cookie to me, but I probably should have believed the hype. Have lost count how many times I've made these.

The recipe comes from Alison Roman's cookbook Dining In. In New York magazine’s Grub Street Diet blog, Roman mentioned that she has but one cookie recipe in her book, and it’s for these cookies. She said that it is, “in [her] opinion, way better than a chocolate-chip cookie.” Not sure about that, but I'll tell you that when I make them the BF and I can't stop eating them. [Ed. note: Sweet.]

A few notes that will perfect your cookies:
  • Use a lower protein all-purpose flour such as Gold Medal, not King Arthur.
  • Use a good salted butter (Kerrygold was used here).
  • Do not overbake, even if they look underdone.
  • Chop chocolate in chunks, not shards.
  • Let rest overnight or longer.

PS: A year ago we summoned our Whole30 aspirations with this roasted potatoes and coconut turmeric sauce (www.moveablefeast.me/blog/roasted-potatoes-coconut-turmeric-sauce), then uh well yeah like threw that into the proverbial circular file with some Super Bowl-food Mississippi roast mini cheesesteaks ( www.moveablefeast.me/blog/mississippi-roast-mini-cheesesteaks). [Ed. note: It should be noted that because the game-time food was cheesesteaks that this had everything to do with the Philadelphia Eagles winning said Super Bowl.]
Picture
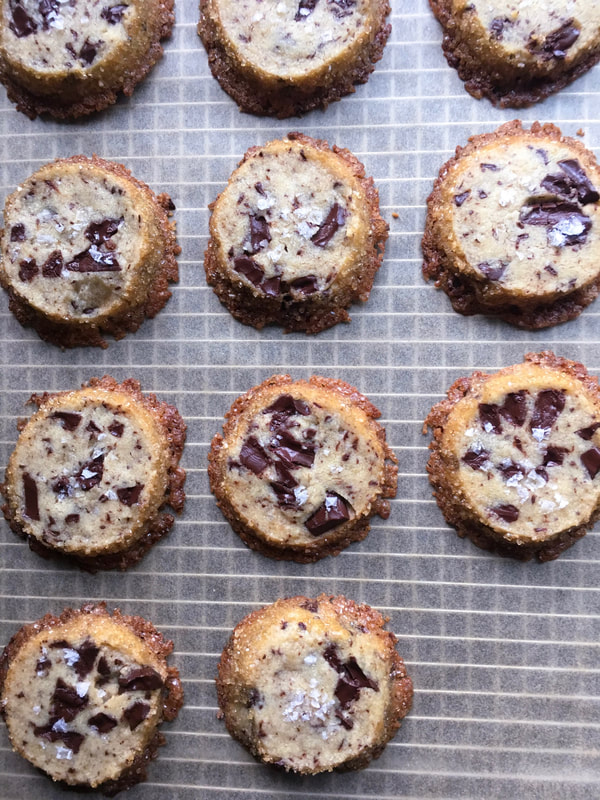
Adapted from: Alison Roman, Dining In and Smitten Kitchen
Number of Servings: 24 cookies

Ingredients
  • 1 cup plus 2 tablespoons (9 ounces or 255 grams) salted butter, cold, cut into small pieces (Kerrygold butter was used here)
  • ½ cup (100 grams) granulated sugar
  • ¼ cup (50 grams) light brown sugar
  • 1 teaspoon (5 ml) vanilla extract
  • 2 ¼ cups (295 grams) all-purpose flour 
  • 6 ounces (170 grams) semi- or bittersweet dark chocolate, chopped (you want chunks, not thin shards of chocolate)
  • 1 large egg
  • Demerara, turbinado, raw, or sanding sugar, for rolling
  • Flaky sea salt for sprinkling

Directions
  1. Beat the butter, granulated and brown sugars, and vanilla with an electric mixer until light and fluffy, scraping down bowl as needed. Add flour, and mix until just combined. Add chocolate chunks, mix until just incorporated. Mixture will look crumbly.
  2. Divide between two sheets of parchment paper, waxed paper, or plastic wrap and use your hands to form the dough halves into log shapes about 2-2 ¼ inches in diameter. Chill until firm, at least 4 hours, but ideally overnight.
  3. When you’re ready to bake the cookies, heat your oven to 350 °F. Line one or two large baking sheets with parchment paper. Lightly beat the egg and open up your chilled cookie logs, and brush egg over the sides. Sprinkle the coarse sugar on the open paper or plastic wrap and roll the logs into it, coating them.
  4. Using a sharp serrated knife, cut logs into ½-inch thick rounds. You’re probably going to hit a few chocolate chunks, so saw gently, squeezing the cookie to keep it from breaking, if needed.
  5. Arrange cookie slices on prepared sheets one inch apart (they don’t spread much) and sprinkle each with a few flakes of salt. Bake for 12-15 minutes, or until the edges are just beginning to get golden brown. They might look soft. Take them out of the oven and let cool slightly before transferring to wire racks to cool.
  6. Plan ahead: the dough can made ahead and stored, tightly wrapped in plastic,  up to one week in the fridge, or one month in the freezer. Baked cookies keep in an airtight container for five days, 
Picture
2 Comments

Mushroom Risotto

1/26/2019

2 Comments

 
Picture
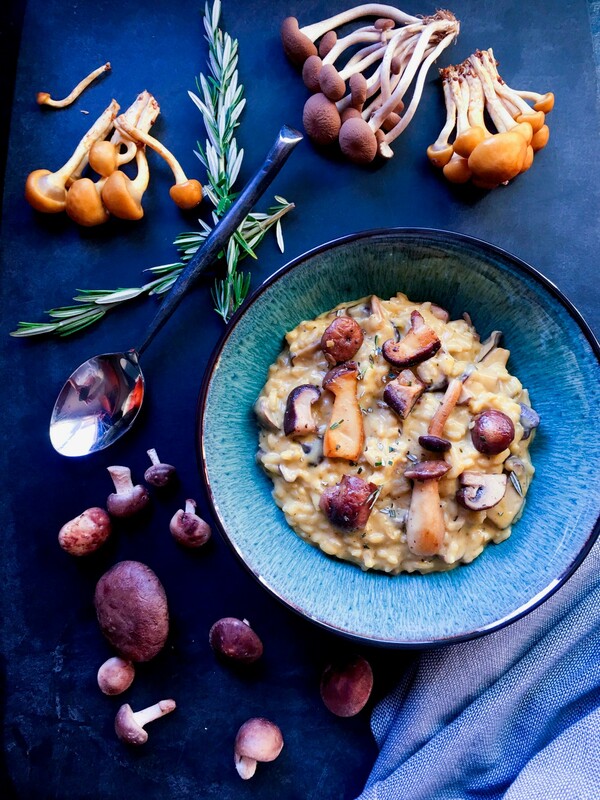
"Guess what? I've got a fever, and the only prescription...is more fungus."
-The Bruce Dickinson (Christopher Walken)
[Ed. note: Yes, yes. We used "fungus" for "cowbell."]

Fungus lovers unite! Since a wee child, I have loved mushrooms. The one veggie that most kids didn't like, I loved. Go figure.

If you're a fungus fiend like me, this dish gives you an excuse to try all those interesting mushroom varieties you see in your produce section, but didn't know what to do with them. Here, nameko, shiitake, trumpet & brown cremini mushrooms were used, but you can use whatever you have available to you. Don't be afraid to experiment. Although, if you use portobello mushrooms, remove the gills.
​
The BF loved this dish. [Ed. note: Don't say that out loud, I told the guys we had cheeseburgers.] It would make a to-die-for Valentines Day or date-night dinner (as the BF and I had). I cut the recipe in half and it made three servings, which was perfect for us for dinner plus a little leftover for the next day. It's also perfect for your favorite person who maintains a gluten-free diet.

A note about this risotto. The original recipe called for goat cheese, which I thought overpowered the entire dish and took away the actual mushroom flavor. Now I love my cheese, but this still felt like overkill. If you feel like it needs a little more creaminess at the end, add one to two tablespoons of whipping cream, mascarpone or crème fraiche. But honestly, I don't think it needs any dairy at all.

Only made a few other changes to the original. Added rosemary from the backyard garden, which I thought it added a zing. Also added about one cup more broth than called for. Perhaps it's the brand of rice I use, but seems I always need more broth than called for.
Picture
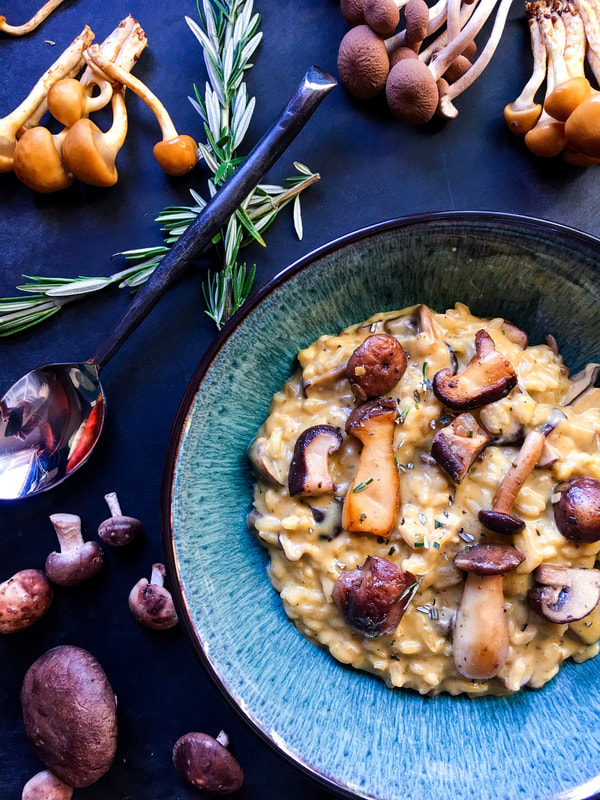
Some more notes about risotto. They can be a bit of a mystery and to be honest, it's not always done right and can be easy to screw up. Below are a few excellent tips and how to avoid some of these common mistakes, from bon appétit assistant food editor Alison Roman.  

Do not use a cold stock
Adding chilly stock to a hot pan will cool everything down and mess up the cooking process. Keep stock at a simmer in a small pan so everything stays hot and cooks evenly.
 
Do not stir it constantly (or not at all)
Stirring the rice constantly will add air into the risotto, while cooling it down and making it gluey. But if you don't stir enough, the rice will stick to the bottom and burn. Agitating the rice is important, because risotto's creaminess comes from the starch generated when grains of rice rub against each other. So stir it often, but feel free to give your arms (and the rice) a break.
 
Do not add stock all at once
If you dump in the stock all at once, you're just boiling rice. By slowly adding stock, you allow the rice to bump up against each other, creating that creamy starch. Wait until the rice absorbs all the stock to add some more. 
 
Do not cook the rice until it's mushy
Like pasta, the rice should be al dente (just cooked, with a little bite to it). If you can mold a risotto into a shape (yes, like some restaurants do) you've cooked it too much. Risotto should have body, but should not be overly mushy and starchy. You're not making rice pudding!
 
Do not use a wide pot
If your pot is too wide, the rice will cook in a thin layer and won't be able to bump and grind enough to generate starch. Another problem: there will be hot and cold spots in your pot, so choose one that fits perfectly over your burner.
 
Do not cook at too low a heat

Yes, risotto is supposed to be a slower cooking process; but if you cook it at too low a heat, it will never cook. The rice should be at a medium simmer throughout cooking.
 
Do not cook vegetables with the rice
Except for your mirepoix (onion, mushrooms, garlic), you should add already cooked vegetables into your risotto after the rice is finished cooking. This is important for tender greens like spinach, delicate herbs like chives, lemon zest, and veggies like asparagus, mushrooms, and legumes. Again, you don't want anything mushy in your risotto. Make sure you cook your vegetables separately before adding them in.
 
Do not add cheese too early
Save things like mascarpone and Parmesan for the end of the cooking process. Fat will break under the heat and it will be, in a word, yucky. When the rice is finished, stir in some fresh whipped cream (unsweetened, of course) to give the risotto a light, silky texture.
Picture
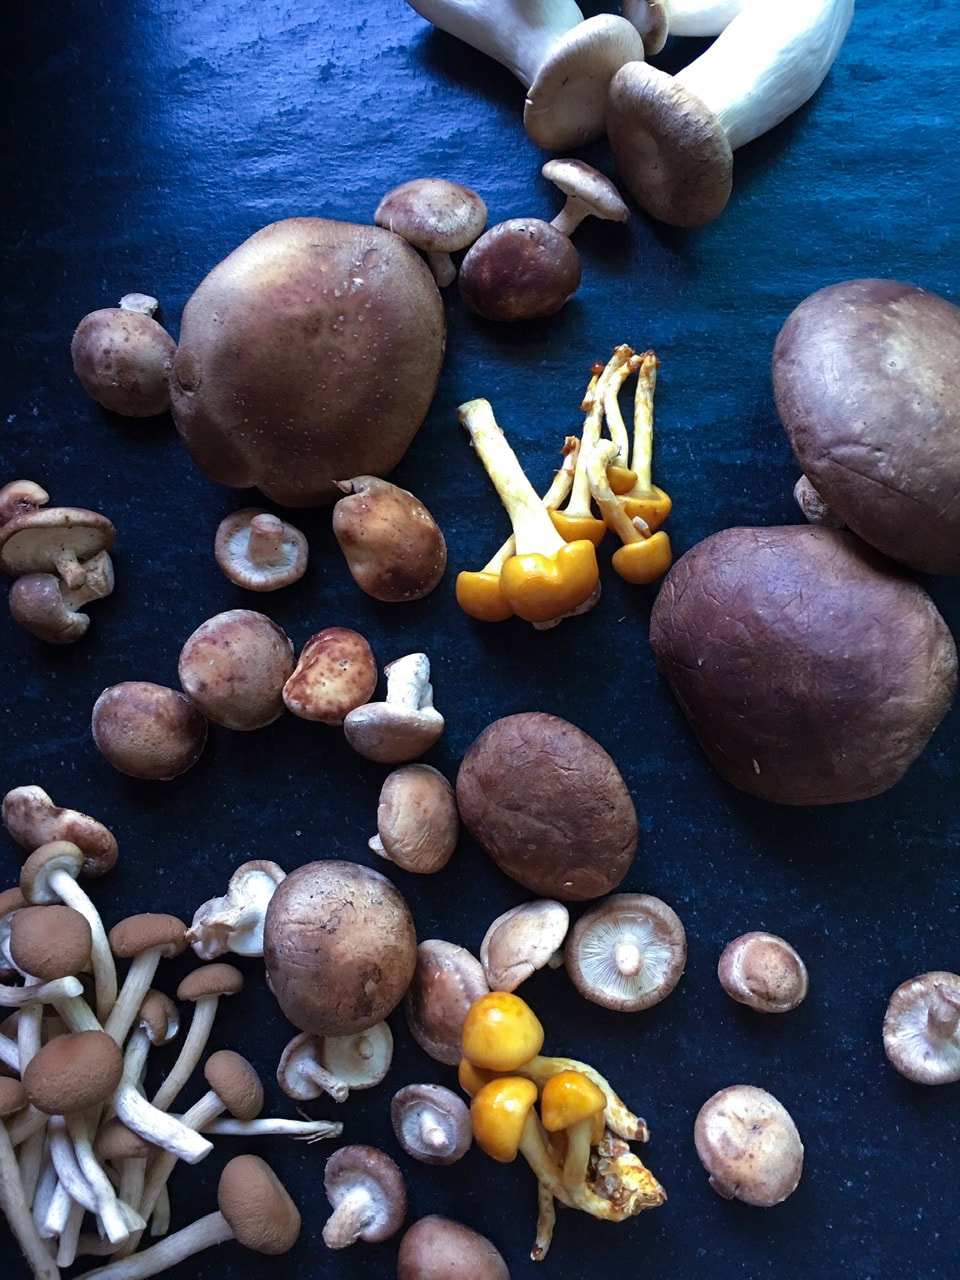
Adapted from: Eva Kosmas Flores, First We Eat
Number of servings: 6
 
Ingredients
  • 10 tablespoons (1 ¼ sticks) unsalted butter
  • 1 medium yellow onion, chopped
  • 2 garlic cloves, minced
  • 1 ⅓ pounds mixed fresh mushrooms (nameko, shiitake, or trumpet & brown cremini), stemmed and halved, quartered, or chopped (if larger mushrooms)
  • 2 teaspoons flake kosher sea salt or kosher salt
  • 1 ½ teaspoons dried or fresh thyme leaves
  • ½ teaspoon ground sage
  • ½ teaspoon fresh rosemary, minced
  • ½ teaspoon freshly cracked black pepper
  • 1 ⅓ cups Arborio rice
  • ½ cup dry white wine
  • 7-8 cups vegetable stock, warmed (you might not use all 8 cups)
  • ¼ cup heavy whipping cream and 1-2 tablespoons mascarpone cheese or crème fraiche (entirely optional)
 
Directions
  1. In a medium size sauce pan, heat broth and keep warm on very low heat.
  2. In a large Dutch oven, melt 4 tablespoons of butter over medium-low heat. Add the onion and garlic and stir to combine. Cook, stirring every minute until the onion has softened and become slightly translucent, about 5 minutes.
  3. Raise heat to medium and add remaining 6 tablespoons of butter. Once the butter has melted, add mushrooms and stir to coat them in butter. Cook, stirring every 2-3 minutes, until the mushrooms have softened, turned a darker shade and released their moisture, 10-15 minutes. Stir in 1 teaspoon of salt, ½ teaspoon thyme, rosemary, sage, and ¼ teaspoon pepper and cook for 5 minutes more. Remove the mushrooms from the pot using a slotted spoon, leaving the melted butter in the pot. Set the mushrooms aside.
  4. Add the rice and wine to pot and reduce heat to medium-low. Cook until the rice is slightly translucent around the edges, about 5 minutes. Add 1 cup of broth and stir. Cook until rice has absorbed most of the liquid, 3-4 minutes. Add another cup of broth and repeat, continuing to add the broth in 1-cup increments, stirring and waiting until rice has absorbed most of the liquid before adding the next cup.
  5. Once 6-7 cups of broth have been added, stir in all but ½ cup of the mushrooms then add the remaining 1 cup broth and stir until all the broth has been incorporated.
  6. If you want to add 1-2 tablespoons mascarpone or crème fraiche, now is the time to do it, or you can skip this step.
  7. Add the remaining 1 teaspoon salt, 1 teaspoon thyme and ¼ teaspoon pepper. Cook, stirring every minute, until liquid has been mostly absorbed by the rice, about 5 minutes more.
  8. Taste to ensure that the rice grains are cooked all the way through. If they’re still a bit firm in the center, cook for a few minutes more, stirring continuously, and taste again.
  9. Once finished, remove from heat and serve into bowls and top with reserved mushrooms.
2 Comments

Jalapeño Lime Chicken Soup

1/15/2019

0 Comments

 
Picture
It's so rainy, windy, and grey here in the San Francisco bay area, it's actually reminding me of my native Oregon. Something that always cures the greyness is soup, and the BF and I have been enjoying this one a lot lately. As you know, am not a fan of eating the same thing two nights in a row, but we're actually going on three! [Ed. note: Oh no not another ToS violation.]

This takes no time at all to put together, and reheats very well. It's also not a super spicy soup, unless you want it to be. Depends on the salsa. I used my favorite Frontera brand Tomatillo Salsa and added one serrano pepper to the jalapeños as the BF and I do enjoy a bit of a kick.

Final note, this is delicious served with white rice in it (or as a side), which helps offset the spiciness.
Picture
Adapted from: A Pinch of Yum
Number of servings: 4-6
 
Ingredients
  • 2 tablespoons olive oil
  • 2 jalapeños, ribs and seeds removed, minced
  • 1 serrano pepper, ribs and seeds removed, minced (optional)
  • Half of a yellow or red onion, minced
  • 4 cups water
  • 1 teaspoon salt (more as needed)
  • 1 pound boneless skinless chicken breasts or thighs (breasts were used here)
  • 2 14-ounce cans white beans (canellini, great northern or corona), drained (one jar corona and one jar canellini were used here)
  • 1 16-ounce jar salsa verde (Frontera brand Tomatillo Salsa was used here)
  • 2 limes (1 juiced and 1 quartered for serving)
  • Fresh limes, cilantro, sour cream, shredded cheese, radishes, avocados, Fresno peppers, tortilla chips for serving
Directions
  1. In a soup pot over medium heat, sauté the onion, jalapeño and serrano pepper (if using) with olive oil until soft and fragrant.
  2. Add the water and salt, and bring to a boil. Add the raw chicken breasts. Cover and cook for 5-10 minutes.
  3. Remove from heat, but leave the lid on so that the chicken continues cooking for another 20 minutes. Remove the chicken breasts, set aside to cool.
  4. Add the white beans and salsa to the pot. Simmer for 30 minutes over medium heat.
  5. While it's simmering, with a serving spoon, scrape across the tip of the broth to remove excess fat and foam.
  6. Shred the chicken and add it back to the pot.
  7. Just before serving, squeeze the juice of one lime into the pot. Cut the remaining lime into wedges for serving. Add the salt; taste and adjust as needed. Serve with fresh cilantro, sour cream, and shredded cheese.

PS: One year ago the BF/editor made me seriously LOL when he snuck in a Gollum/Lord-of-the-Rings GIF into a recipe for baked cod (www.moveablefeast.me/blog/baked-cod-with-sherry-herbs). [Ed. note: #SorryNotSorry]
0 Comments

Cabbage Borscht

1/9/2019

8 Comments

 
Picture
This Russian cabbage borscht is another winter warm-up secret weapon. Not to be confused with borscht made with beets or various meats and winter vegetables; while that is good, this soup is pure Jewish comfort food. Just a handful of simple ingredients, mainly cabbage.

When I was a kid, momala made a cabbage borsht flavored with short ribs or brisket. Once the meat finished cooking, she would shred and add it back into the soup. After pouting, I would pick out all the meat and leave the cabbage. Then I would complain. A lot. (Cabbage: not a favorite.) My childhood best friend loved the soup, so much so that momala would joke that she was the rightful daughter, not me. Today, I would never dream of doing that. Cabbage is actually my favorite part.

However, this version is different from my mom's soup, but an homage all the same. Kept her addition of golden raisins for the sweetness, but I made this version more brothy and added caraway seeds, V8 juice and cayenne for a little kick. Also, everything is finely chopped or minced rather than chunky. Always have to mention, the BF absolutely loves this soup. [Ed. note: Can confirm.]

You can even make this vegan by using vegetable instead of chicken broth.

Healthy, flavorful, delicious, inexpensive and it freezes very well. Makes a delightful lunch or perfect dinner paired with Russian rye or black bread. [Ed. note: HOW ABOUT VODKA OKAY JUST KIDDING]

​What's not to love? Momala would be proud!
Picture
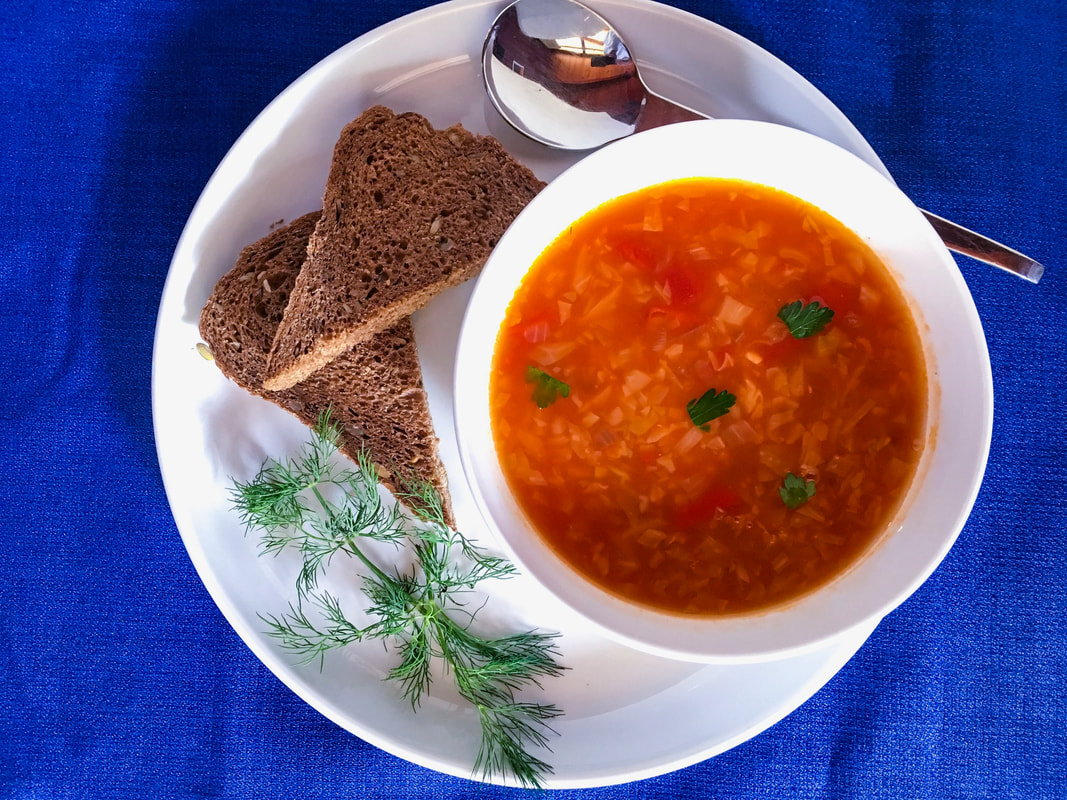
Number of Servings: 10-12 cups

Instructions
  • 1 teaspoon grapeseed or canola oil
  • 1 cup yellow onion, finely chopped
  • ½ teaspoon kosher salt
  • 1 ¼ pounds cabbage, cored and finely chopped or shredded
  • 3 garlic cloves, minced
  • 1 14.5-ounce can diced tomatoes
  • 1  11.5-ounce can original or spicy V8 tomato juice
  • 1  cup golden raisins
  • 8 cups chicken or vegetable broth
  • 1 tablespoon caraway seeds (optional, but highly recommended)
  • 2 teaspoons ground caraway (optional, but highly recommended)
  • ¼ teaspoon cayenne pepper (optional)
  • 1 ½  tablespoons sugar (optional)
  • Salt

Directions
  1. Heat oil on medium setting. Add onion, salt and sauté until soft. Do not brown the onions.
  2. Add garlic and cook for 1 minute.
  3. Add tomatoes, V8 juice, broth and bring to a boil.
  4. Turn down to a simmer and skim. Take as much foam and impurities off as you can.
  5. Add cabbage, cayenne, caraway seeds, and ground caraway, if using.
  6. Cover and simmer for 20 minutes.
  7. Add golden raisins and 1 ½ tablespoons sugar, if using.
  8. Simmer, uncovered 5-10 minutes or until raisins are plump and softened.
  9. Taste and adjust for seasoning. It needs salt!!!!
8 Comments

Roasted Carrot Lentil Salad with Radishes and Tahini Dressing

1/3/2019

2 Comments

 
Picture
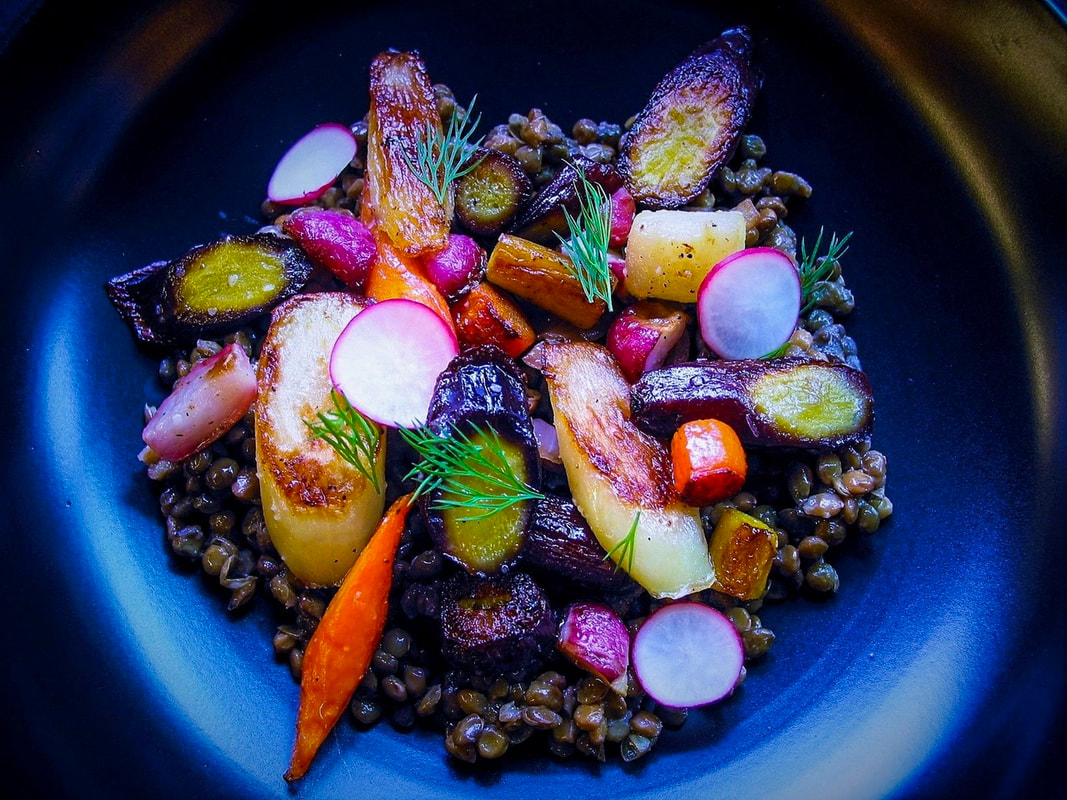
Did you learn to cook anything new last year? Among many discoveries, I found that roasted radishes are a revelation. A delicious and fantastic complement to carrots, can't believe I have never tried them roasted before. [Ed. note: Calling the proper authorities, this has to be a violation of some kind.]

If you're not a fan of lentils, make the roasted carrots and radishes with tahini sauce. You won't be sorry. It makes a wonderful lunch, side or main course.
​
​NOTE: I'm relying more and more on Trader Joe's pre-steamed lentils, usually located with the fresh produce. It's such a time saver and the lentils are firm, yet tender, which is exactly what you want. If you want to make lentils from scratch, I have included instructions below.

PS: Last year we got a little tipsy on this citrus champagne bundt cake (www.moveablefeast.me/blog/citrus-champagne-bundt-cake) and recovered nicely thanks to this ginger turmeric detox broth (www.moveablefeast.me/blog/ginger-turmeric-detox-broth).
Picture
Adapted from: A Beautiful Plate
Number of servings: approximately 4

Ingredients
Lentils
  • 1 cup dried French green Le Puy lentils, sorted (or 1 package pre-cooked Trader Joe's lentils)
  • 3 cups water
  • 1 small yellow onion, cut into quarters
  • 2 cloves of garlic, smashed, divided
  • 1 dried bay leaf
  • ¾ teaspoon kosher sea salt
  • 1 tablespoon extra virgin olive oil
Carrots & Radishes
  • 2 bunches of rainbow carrots (8-10 medium carrots), scrubbed well and trimmed (leafy stem tops cleaned well and reserved for garnish)
  • 7-8 red radishes, stems trimmed and scrubbed well, divided
  • 5-6 garlic cloves, skin-on
  • 2 tablespoons extra virgin olive oil
  • 1 teaspoon kosher sea salt
  • ¼ teaspoon freshly ground black pepper
  • ¼ of a red onion, very thinly sliced
Tahini Dressing
  • ¼ cup tahini paste
  • 3 tablespoons freshly squeezed lemon juice
  • ½ teaspoon kosher sea salt
  • ¼ teaspoon freshly ground black pepper
  • 3–4 tablespoons warm water (depending on thickness of tahini paste)

Directions
Lentils
  1. Use your favorite pre-cooked lentils or place the dried lentils in a medium saucepan. Cover with cold water and allow lentils to soak for one hour.
  2. Drain the lentils and  return to the same saucepan. Add 3 cups of water, the quartered onion, smashed garlic, bay leaf, and ¾ teaspoon salt. Bring lentils to a boil, reduce the heat to  simmer, and cook lentils for 25-30 minutes, or until tender.
  3. Drain in a fine-meshed sieve and discard the onion, garlic, and bay leaf. Place in a large serving bowl to cool. Toss with a tablespoon of olive oil.
Carrots & Radishes
  1. Meanwhile, preheat oven to 425 °F. Slice the carrots into ½-inch rounds (the skinny ends can be left in larger chunks; try to keep the carrots as consistently sized as possible) and cut the radishes into quarters (reserving one radish for garnishing).
  2. Place carrots and radishes on a large sheet pan, along with the garlic cloves (leave the skin on), and toss with the 2 tablespoons of olive oil, 1 teaspoon salt, and ¼ teaspoon freshly ground black pepper.
  3. Roast for 20-30 minutes, tossing the vegetables every 10 minutes or so, or until carrots and radishes are caramelized and tender. Remove the roasted garlic cloves from their skin (discard the skin, but keep the cloves) and allow vegetables to cool to room temperature. [Ed. note: ROOM TEMPERATURE] Add the roasted vegetables and garlic to the cooked lentils, along with the sliced red onion, and toss gently to combine. Season to taste with salt and pepper.
Tahini Dressing
  1. In a small bowl, whisk together the tahini paste, lemon juice, salt, and pepper. It should be thick. Add 3-4 tablespoons of hot water (depending on your brand of tahini paste, you might need more or less to achieve the right consistency) and gently whisk until smooth. It should have the consistency of a thick salad dressing, able to drizzle easily from a spoon.
  2. Using a mandolin or sharp knife, cut the remaining radish into very thin slices. Roughly chop some of the reserved leafy stem tops of the carrots, roughly ¼ cup or so.
  3. Garnish the salad with the sliced radish and chopped carrot stem tops. Drizzle with the tahini dressing and serve at room temperature. [Ed. note: R-O-O-O-O-M TEMPERATURE] This salad makes great leftovers and can be served cold from the fridge.
Picture
2 Comments

    Author

    I'm Jacquie, personal chef & recipe developer in the beautiful Pacific Northwest. ​Living life with my wildly funny boyfriend and dog Marlowe. Lover of books, bourbon, chocolate and movies.​

    Archives

    May 2020
    February 2020
    January 2020
    November 2019
    October 2019
    September 2019
    August 2019
    July 2019
    May 2019
    April 2019
    March 2019
    February 2019
    January 2019
    December 2018
    November 2018
    October 2018
    September 2018
    August 2018
    July 2018
    June 2018
    May 2018
    April 2018
    March 2018
    February 2018
    January 2018
    December 2017
    November 2017
    October 2017
    September 2017
    August 2017
    July 2017

    Categories

    All
    Ahi
    Apple
    Apple Pie
    Avocado
    Bars
    BBQ
    Beans
    Beef
    Beets
    Black Bean
    Blackberry
    Blueberries
    Borscht
    Bread
    Brownies
    Brussels Sprouts
    Bundt
    Butter
    Butternut Squash
    Butterscotch
    Cabbage
    Cake
    Caramel
    Carrot
    Challah
    Champagne
    Cheesecake
    Chicken
    Chili
    Chinese
    Chinese New Year
    Chocolate
    Christmas
    Cinco De Mayo
    Citrus
    Cocktail
    Coconut Rice
    Comfort Food
    Cookies
    Corn
    Cranberries
    Crostata
    Crumble
    Cupcakes
    Curry
    Dessert
    Easter
    Egg
    Egg Nog
    Eggplant
    Fish
    Ginger
    Gingerbread
    Gluten Free
    Grain Free
    Green Sauce
    Gumbo
    Halibut
    Halloween
    Hannukah
    Healthy
    Holiday
    Holidays
    Ice Cream
    Indian
    Kale
    Key Lime
    Kohlrabi
    Kosher
    Lamb
    Latkes
    Lemon
    Lentil
    Low Carb
    Mac & Cheese
    Malt
    Mango
    Mango Salsa
    Mardi Gras
    Martini
    Memorial Day
    Mexican
    Miso Chicken
    Moroccan
    Mushrooms
    Naan
    Nectarine
    Noodles
    Olive Oil
    Parsnips
    Passover
    Pasta
    Pavlova
    Peanut Butter
    Penne
    Peppermint
    Pesto
    Pie
    Pizza
    Plums
    Pluot
    Pork
    Potatoes
    Pots De Creme
    Pudding
    Pumpkin
    Pumpkin Cake
    Quinoa
    Rajma
    Raspberries
    Ratatouille
    Risotto
    Root Beer
    Salad
    Salmon
    Salmon Bowl
    Salsa
    Sauce
    Scallops
    Shortbread
    Short Ribs
    Shrimp
    Side Dish
    Soup
    Soy Sauce Eggs
    Spicy
    Spiralized
    Steak
    Strawberries
    Sugar Free
    Summer
    Sweet
    Sweet Potatoes
    Tacos
    Tart
    Thanksgiving
    Tomatoes
    Turkey
    Valentine's Day
    Vegan
    Veganuary
    Vegetable
    Vegetarian
    Veggie Burger
    Whole30
    Whoopie Pies
    Yams
    Yellow Bell Pepper
    Yu Choy

    RSS Feed

Powered by Create your own unique website with customizable templates.
  • home
  • services
  • bio
  • blog
  • contact
  • PHOTOS (summer)
  • photos (winter)
  • PRESS
  • faq