Moveable Feast
  • home
  • services
  • bio
  • blog
  • contact
  • PHOTOS (summer)
  • photos (winter)
  • PRESS
  • faq

Feast Mode

a moveable feast blog

Chocolate Olive Oil Cake (Vegan)

3/14/2019

6 Comments

 
Picture
Set out to make a cake made with olive oil to see what it would taste like. One bowl. No eggs. No dairy. Vegan. [Ed. note: Vegan? Chocolate cake? Is this allowed?] Why yes! Yes it is. In fact, because of the olive oil it's so incredibly moist, with a deep dark-chocolate flavor, it made me swoon. [Ed. note: Taking notes.]

This has been called a Wacky cake or Depression Cake (en.wikipedia.org/wiki/Depression_cake), as during those years milk, sugar, butter and eggs were either expensive or scarce. Now my love of cake-making with oil instead of butter runs deep. I have baked many a cake with grapeseed or canola oils (both flavorless), but this was my first foray into using olive oil. The result is a far more moist dessert that keeps exceptionally well. Deb of Smitten Kitchen says, "On day four in the fridge, ours was as moist as day one, basically a miracle."

Using olive oil, for some strange reason, just never seemed right. I think of olive oil as being savory, but I was wrong. It truly works here.

NOTES:
  • The cake base is vegan. The glaze is vegan if you use dairy-free chocolate chips. I made it with regular chocolate chips as that is what I had on hand.
  • I doubled the amount of glaze as I wanted the whole cake to be covered not just the top.
  • Cake keeps in the fridge for up to one week!
  • When measuring your unsweetened cocoa, highly recommend weighing it on a scale or fill your measuring cup by using a spoon. Do not use your measuring cup to scoop with or you'll use far too much cocoa powder and that will result in a very dry, chalky cake.

Adapted from: Smitten Kitchen
Number of Servings; 8-12

Ingredients
Cake
  • 1 ½ cups (195 grams) all-purpose flour
  • ¾ cup (60 grams) unsweetened cocoa, any variety, sifted if lumpy (NOTE: Do not scoop with your measuring cup. First aerate with a spoon and then fill measuring cup with a spoon and level off with a knife.)-Can use natural or Dutched cocoa. I used Dutched. Try to use something dark.
  • 1 ½ teaspoons baking soda
  • ½ teaspoon fine sea salt
  • ¾ cup (150 grams) granulated sugar
  • ¾ cup (145 grams) dark brown sugar
  • ½ cup (120 ml) olive oil
  • 1 ½ cups (355 ml) water or coffee (coffee was used here)
  • 1 tablespoon (15 ml) cider vinegar or white vinegar
Glaze (this amount will make a nice glaze for the top of your cake. If you want the whole cake covered-double this amount.)
  • ¾ cup (135 grams) semisweet chocolate chips 
  • 2 tablespoons (10 grams) cocoa powder
  • 3 tablespoons (45 ml) olive oil
  • 1 tablespoon (20 grams) light corn syrup (for shine)
  • A pinch or two of flaky sea salt

Directions
Cake
  1. Heat oven to 350 °F. Line bottom of 9-inch round cake pan with a fitted round of parchment paper and coat the bottoms and sides with nonstick cooking spray.
  2. Whisk together flour, cocoa, baking soda, salt and granulated sugar in the bottom of a large mixing bowl. Add brown sugar and olive oil, and whisk to combine. Add water and vinegar, whisk until smooth.
  3. Pour into prepared pan. Bake for 30-35 minutes (don't overbake!), or until top is springy and a tester inserted in the center comes out with just a few sticky crumbs (but not wet or loose batter). Cool the cake in the pan on a wire rack for 10 minutes, then cut around it with a knife to ensure it is loosened, and flip it out onto a cooling rack to cool the rest of the way.
Glaze
  1. Combine chocolate, cocoa powder, olive oil, corn syrup, and salt in a medium bowl and microwave to melt, in 15-30 second increments, stirring between each until just melted.
  2. Whisk until smooth. Pour over completely cooled cake and use spatula to gently nudge it down the sides.
  3. Cake keeps at room temperature [Ed. note: ROOM TEMPERATURE] for 2-3 days and up to a week in the fridge. 
6 Comments

Salted Butter Chocolate Chunk Shortbread Cookies

1/29/2019

2 Comments

 
Picture
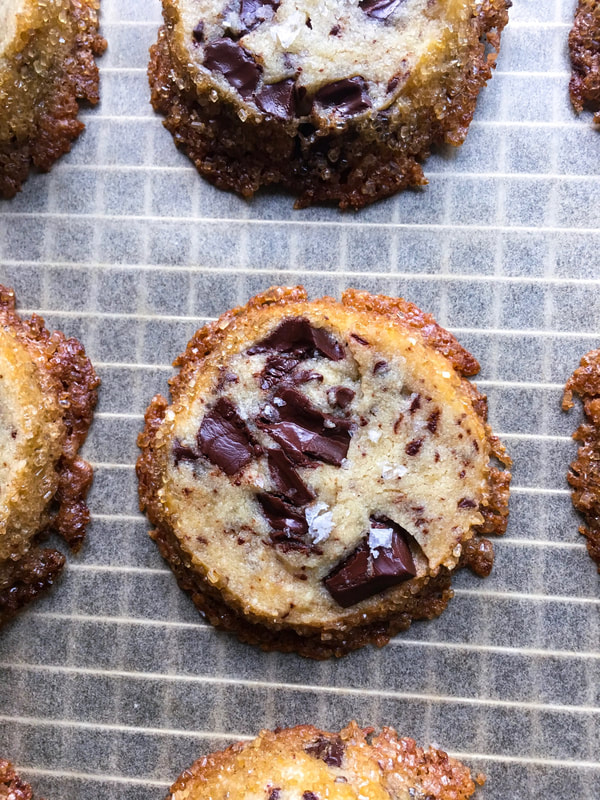
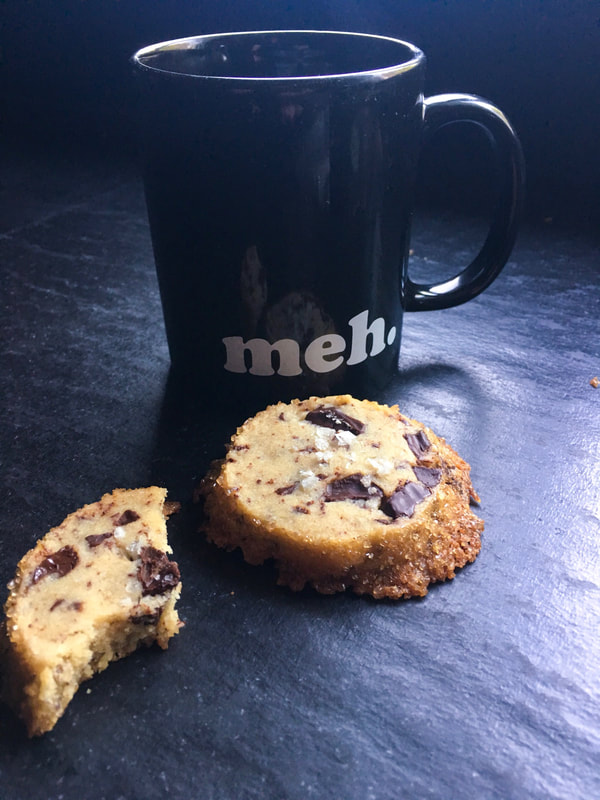
This cookie went viral in autumn of 2017. [Ed. note: At our current pace, that is roughly 27,538 news cycles, since then. Give or take.] At the time, it didn't really look like much of a cookie to me, but I probably should have believed the hype. Have lost count how many times I've made these.

The recipe comes from Alison Roman's cookbook Dining In. In New York magazine’s Grub Street Diet blog, Roman mentioned that she has but one cookie recipe in her book, and it’s for these cookies. She said that it is, “in [her] opinion, way better than a chocolate-chip cookie.” Not sure about that, but I'll tell you that when I make them the BF and I can't stop eating them. [Ed. note: Sweet.]

A few notes that will perfect your cookies:
  • Use a lower protein all-purpose flour such as Gold Medal, not King Arthur.
  • Use a good salted butter (Kerrygold was used here).
  • Do not overbake, even if they look underdone.
  • Chop chocolate in chunks, not shards.
  • Let rest overnight or longer.

PS: A year ago we summoned our Whole30 aspirations with this roasted potatoes and coconut turmeric sauce (www.moveablefeast.me/blog/roasted-potatoes-coconut-turmeric-sauce), then uh well yeah like threw that into the proverbial circular file with some Super Bowl-food Mississippi roast mini cheesesteaks ( www.moveablefeast.me/blog/mississippi-roast-mini-cheesesteaks). [Ed. note: It should be noted that because the game-time food was cheesesteaks that this had everything to do with the Philadelphia Eagles winning said Super Bowl.]
Picture
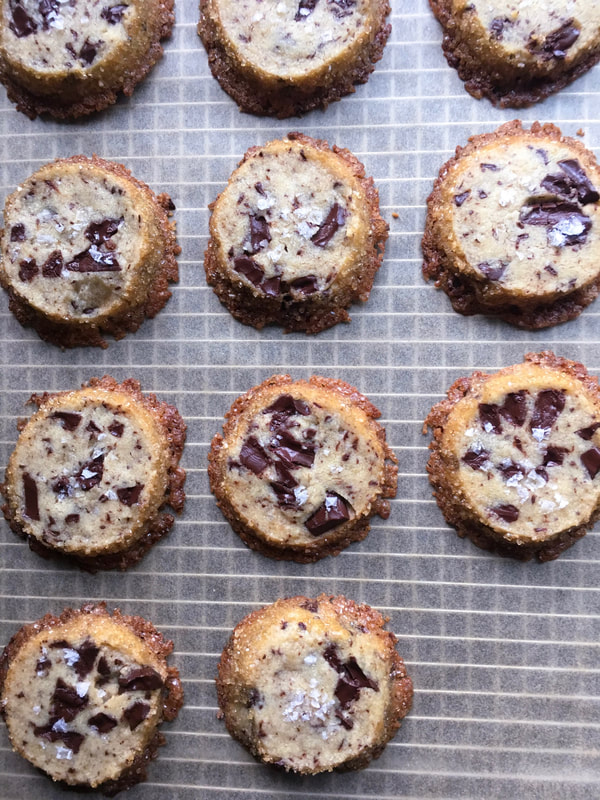
Adapted from: Alison Roman, Dining In and Smitten Kitchen
Number of Servings: 24 cookies

Ingredients
  • 1 cup plus 2 tablespoons (9 ounces or 255 grams) salted butter, cold, cut into small pieces (Kerrygold butter was used here)
  • ½ cup (100 grams) granulated sugar
  • ¼ cup (50 grams) light brown sugar
  • 1 teaspoon (5 ml) vanilla extract
  • 2 ¼ cups (295 grams) all-purpose flour 
  • 6 ounces (170 grams) semi- or bittersweet dark chocolate, chopped (you want chunks, not thin shards of chocolate)
  • 1 large egg
  • Demerara, turbinado, raw, or sanding sugar, for rolling
  • Flaky sea salt for sprinkling

Directions
  1. Beat the butter, granulated and brown sugars, and vanilla with an electric mixer until light and fluffy, scraping down bowl as needed. Add flour, and mix until just combined. Add chocolate chunks, mix until just incorporated. Mixture will look crumbly.
  2. Divide between two sheets of parchment paper, waxed paper, or plastic wrap and use your hands to form the dough halves into log shapes about 2-2 ¼ inches in diameter. Chill until firm, at least 4 hours, but ideally overnight.
  3. When you’re ready to bake the cookies, heat your oven to 350 °F. Line one or two large baking sheets with parchment paper. Lightly beat the egg and open up your chilled cookie logs, and brush egg over the sides. Sprinkle the coarse sugar on the open paper or plastic wrap and roll the logs into it, coating them.
  4. Using a sharp serrated knife, cut logs into ½-inch thick rounds. You’re probably going to hit a few chocolate chunks, so saw gently, squeezing the cookie to keep it from breaking, if needed.
  5. Arrange cookie slices on prepared sheets one inch apart (they don’t spread much) and sprinkle each with a few flakes of salt. Bake for 12-15 minutes, or until the edges are just beginning to get golden brown. They might look soft. Take them out of the oven and let cool slightly before transferring to wire racks to cool.
  6. Plan ahead: the dough can made ahead and stored, tightly wrapped in plastic,  up to one week in the fridge, or one month in the freezer. Baked cookies keep in an airtight container for five days, 
Picture
2 Comments

Salted Espresso Fudge Brownies

10/17/2018

2 Comments

 
Picture
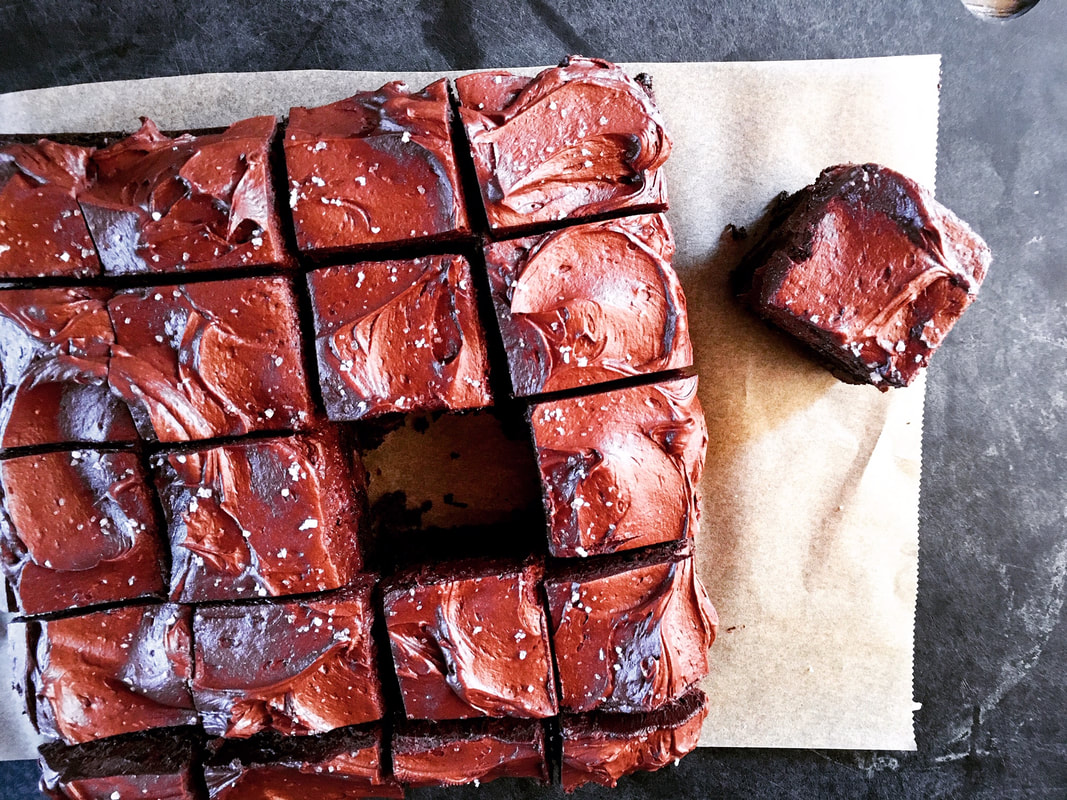
There are brownies, and there are HEAVY DUTY brownies like these. The kind of brownies that discourage driving or operating complicated machinery, immediately afterward. Brownies that make your primary care physician gasp in horror at the blood test results.

Heavy. Duty. Brownies.

Not only intensely decadent and fudgy, these also have a hit of espresso. [Ed. note: WAIT A MINUTE YOU DIDN'T TELL ME THAT BEFOREHAND WHY AM I FLYING DID YOU SEE THAT ROLLER-SKATING ELEPHANT IS THIS MUCH FUN LEGAL]

However the most important aspect of this dessert is the frosting-to-brownie ratio, which you can properly see in the photo below. Am all about the frosting. As far as I'm concerned there can never be enough, and if you're the same these won't disappoint.
Picture
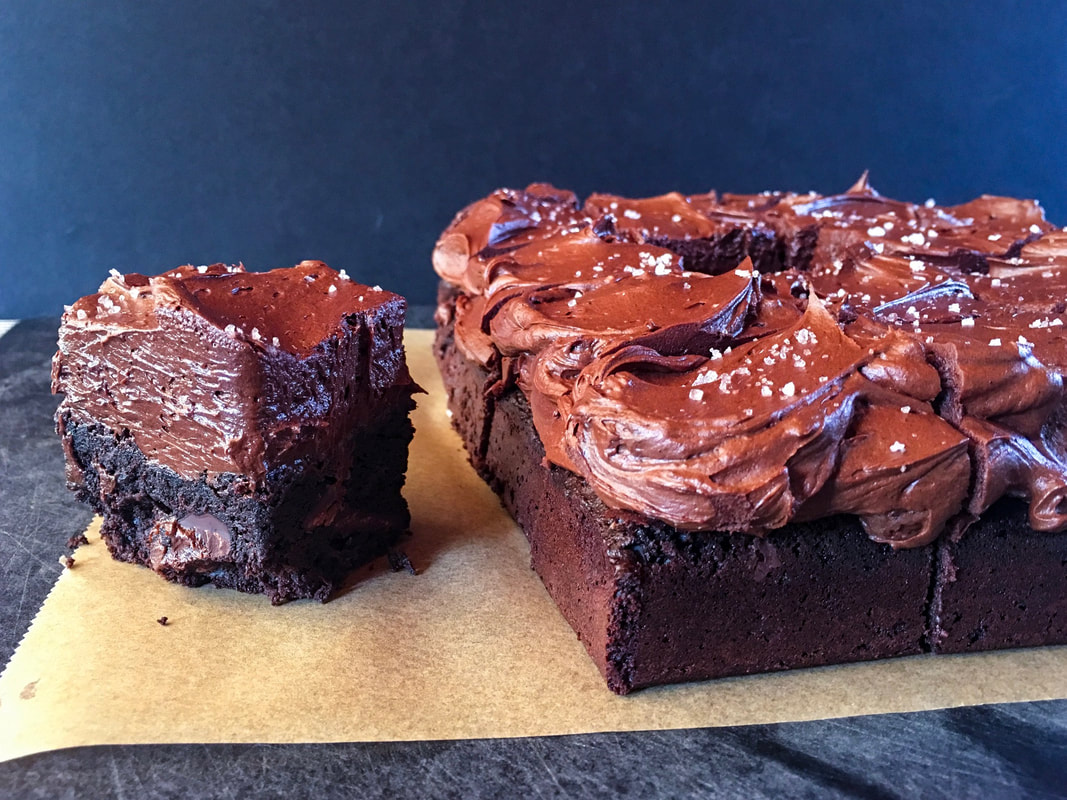
You could wait until Halloween to treat yourself to this, but if you make it now I won't tell. (It actually freezes very well, if you want to put some of it away for later.)

All of the usual "healthy" disclaimers, well, yeah. Kind of out the window. But you knew that at the title, right?
Picture
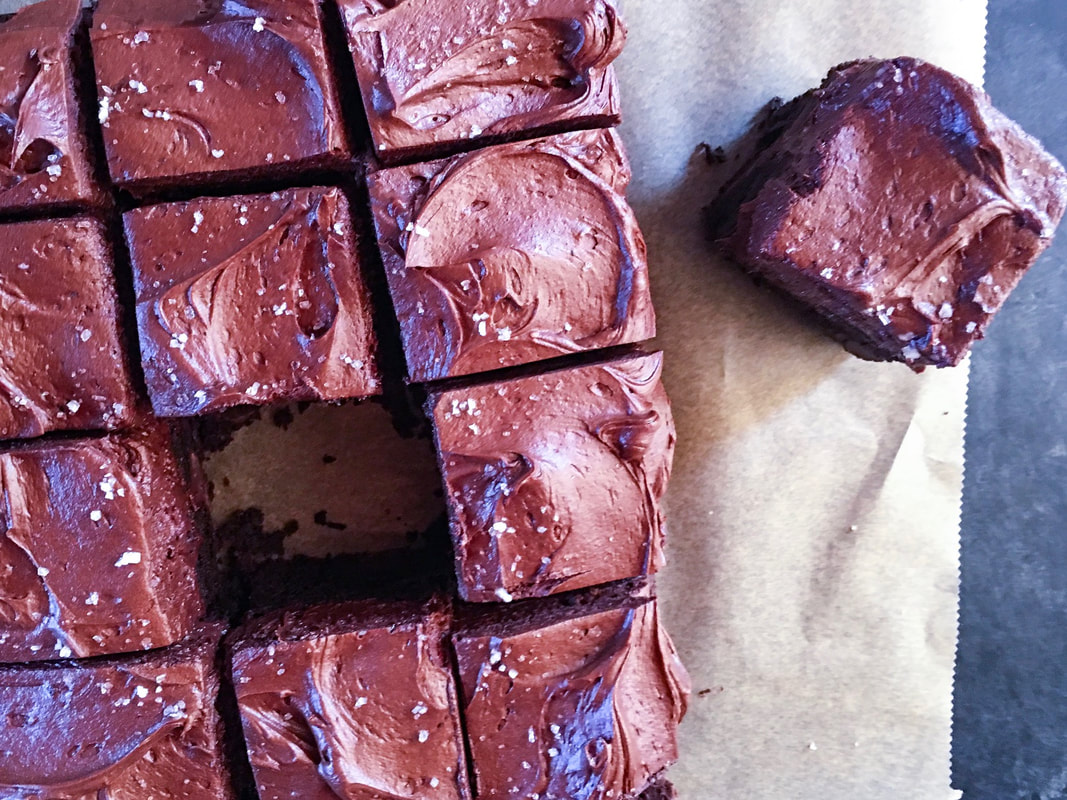
Look at that frosting, and check out the chocolate chips in there. [Ed. note: WEEEEEEEEEEEEEEE]

The recipe was adapted from Thalia's blog Butter & Brioche. Didn't really change a thing. And I even kept her measurements in grams, as you really want to be extra careful of amounts. If you over-measure the flour, you will have a disappointingly dry brownie. If you're serious about baking, I strongly recommend buying a kitchen scale (have a Oxo digital food scale that kicks ass).

Enjoy!

PS: Because we can't be all sweets all the time, last year's countdown to Halloween included a vegan garam masala carrot soup (www.moveablefeast.me/blog/vegan-garam-masala-carrot-soup).
Picture
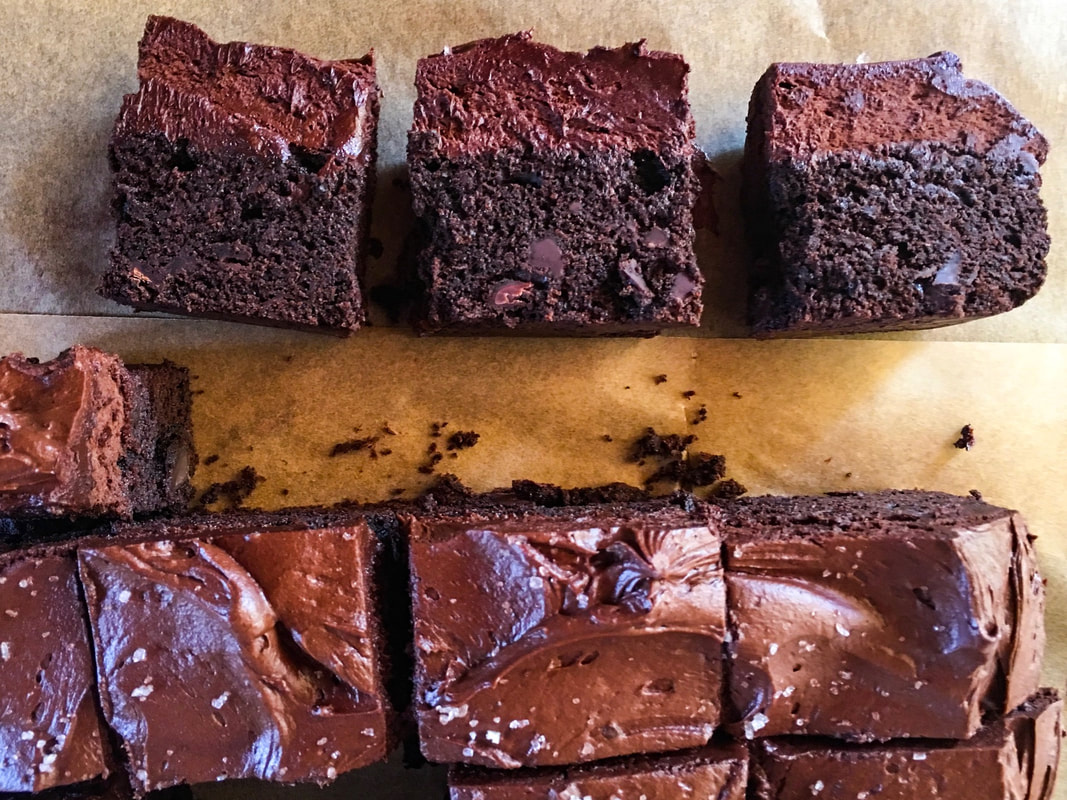
Adapted from: Butter & Brioche
Number of servings: Makes one 8 x 8" pan 

Ingredients
Brownies
  • 85 g all-purpose flour
  • 1 tsp espresso powder
  • ½ tsp baking powder
  • ½ tsp salt
  • 175 g unsalted butter, cubed
  • 300 g granulated sugar
  • 3 large eggs
  • 75 g dutch processed cocoa powder (make sure to use dutch processed)
  • 1 tbsp vanilla bean extract
  • 200 g dark chocolate chips (70% cocoa solids were used here, but you could use a chocolate that’s a little lighter in percentage. Do not use milk chocolate. Specifically, I used 100 g of dark chocolate chips and 100 g Callebaut dark chocolate block, chopped into small chunks or small squares.)
Frosting
  • 120 g dark chocolate, finely chopped
  • 200 g unsalted butter, at room temperature
  • 400 g confectioners’ sugar
  • 100 ml heavy cream
  • 50 g dutch processed cocoa powder
  • 2 tsp espresso powder
  • 1 tsp vanilla bean extract
  • Flaked salt or fleur de sel, for finishing

Directions
Brownies
  1. ​Pre-heat the oven to 350 °F. Grease and line a 8 x 8" square baking pan with non-stick parchment paper. Let the paper slightly overhang the sides.
  2. Whisk together the flour, espresso powder, baking powder and salt. Set aside.
  3. Put the butter and sugar into a medium-sized saucepan. Heat over medium-low, whisking often, until the sugar is dissolved and mixture is shiny and smooth. Do not allow it to bubble or foam. If you have a candy thermometer, you can tell it is ready when it registers at 122 °F.
  4. While the butter mixture is melting over the stove, whisk the eggs, cocoa and vanilla in the bowl of a stand mixer fitted with the whisk attachment until it is glossy and flows like lava, about two minutes. Set the mixer speed on medium and slowly stream in the melted butter mixture. Whisk until evenly combined. Pause mixing and sift over the dry ingredients. Again, whisk until just combined.
  5. Remove the bowl from the stand mixer. Use a large wooden spoon or rubber spatula to fold in the chocolate chips until evenly incorporated throughout the batter. Pour the mixture into the prepared baking pan and use an offset palette knife to smooth out the top.
  6. Bake for 20-25 minutes, or until the brownie is firm around the edges and just set in the middle (do not overbake). A wooden skewer inserted into the middle should not come out clean but with a few moist crumbs attached.
  7. Remove from the oven and allow the brownie to cool completely in its pan. Once cool, coat the top of the brownie with the salted espresso frosting before sprinkling with salt and serving.
Frosting
  1. First, melt down the chocolate. Place chocolate into a medium-sized heat-proof bowl set over a saucepan filled with a few inches of barely simmering water. Do not let the bottom of the bowl touch the water below. Heat over medium-low, stirring often, until melted and smooth. (I microwaved the chocolate in 30 second intervals.) Remove from the heat and set aside to cool slightly.
  2. Meanwhile, in the bowl of a stand mixer fitted with the beater attachment, beat together butter and sugar on medium speed until pale and fluffy, about four minutes. Set the mixer speed to medium-low and slowly stream in the melted chocolate. Return the speed back to medium and beat until well combined, a further two minutes. Beat in the cream, cocoa, espresso, and vanilla until incorporated. Increase the mixer speed to medium-high and beat for a further minute, or until the frosting is lightened in color, smooth, and aerated.
  3. When you’re ready to frost the cooled brownies, use an offset palette knife or the back of a metal spoon to thickly spread the frosting over the top of the brownie. At this point, I like to chill the brownie for about half hour to slightly set the top so it’s easier to cut, but you could serve the brownies straight away. Make sure to sprinkle over a little pinch of flaked salt or fleur de sel, right before serving.
Picture
2 Comments

Root Beer Float Cupcakes

8/4/2018

6 Comments

 
Picture
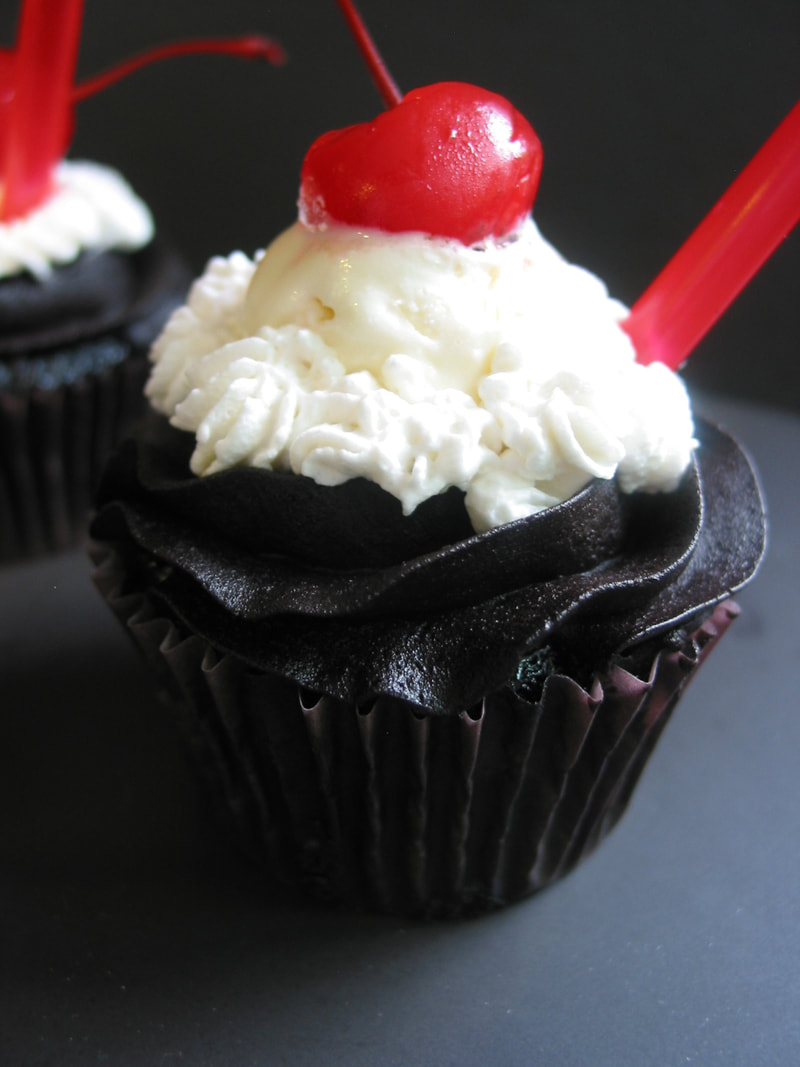
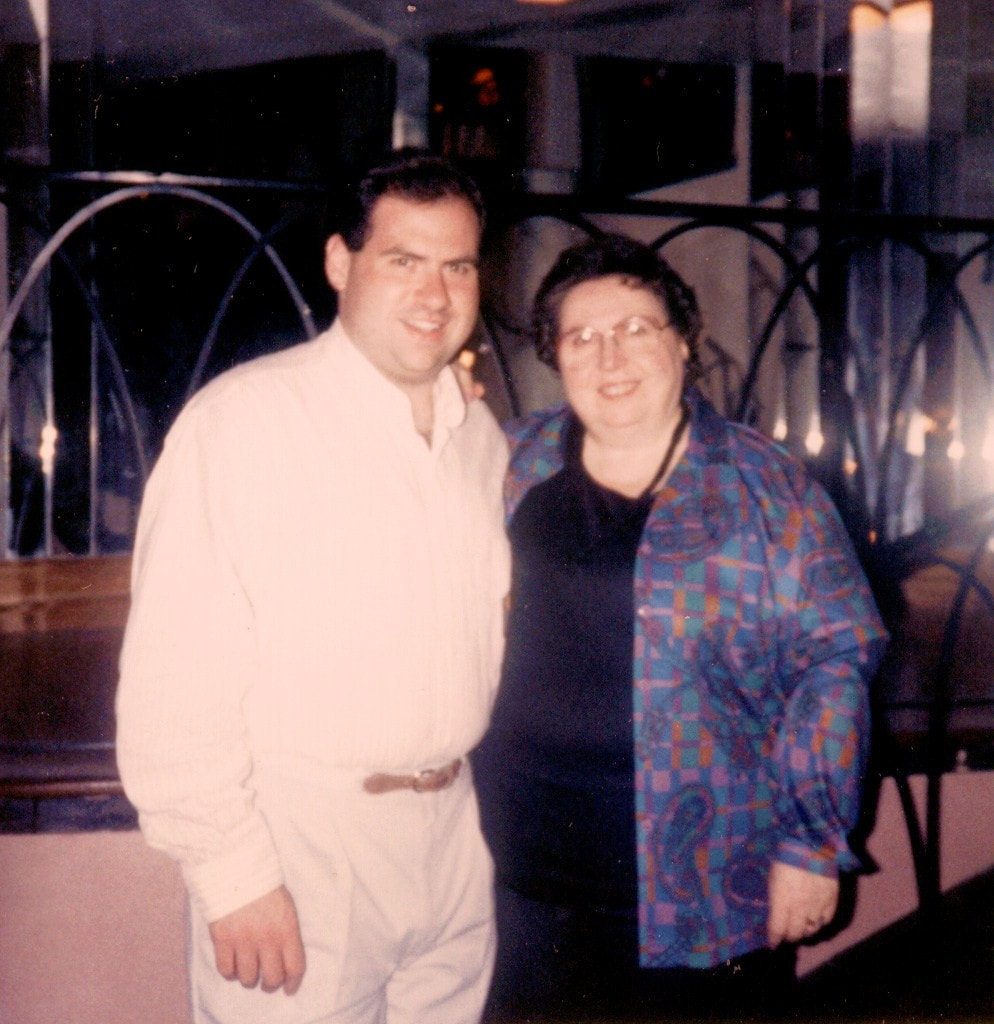
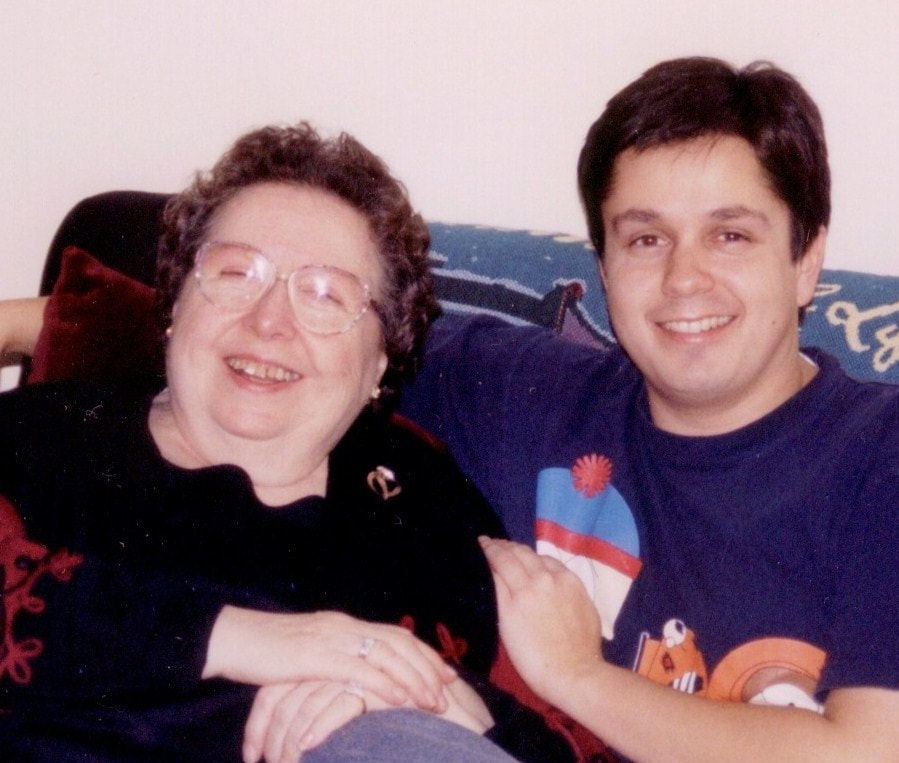
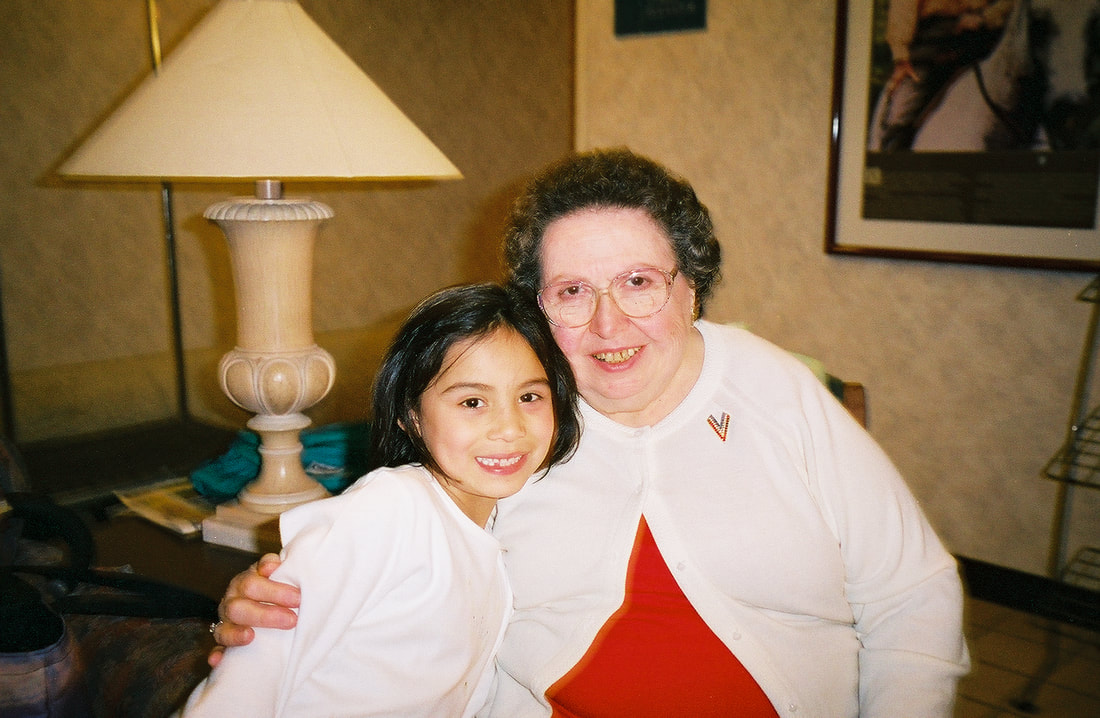
"Life is short. Take the trip. Buy the shoes. Eat the cake."
- Unknown
​
​Today is mamala's birthday, and as with my BF-mom's birthday, we gather here today to celebrate their collective sweet tooth.

Mamala passionately loved root beer floats and "black cows" (made with Coke instead of root beer), quintessential summer treats. Are they as nostalgic for you as they are for me? If so, what was your first memory of them? (Feel free to comment below!)

​Even though I was lucky enough to grow up with an A&W in my hometown (it's still there), growing up we didn't frequent it too often. Mamala made her own floats at home, and oh how I loved watching her make them. One scoop of vanilla ice cream in a frosted glass. Root beer poured just so. The carbonation would foam up instantly, but never overflowed. She had the touch. I also remember she used a long, slender soda spoon to give it a slight stir.

I made it home for almost all of her birthdays, but one year it wasn't possible and the BF and I Fed Exed these root beer float cupcakes (frosting in a separate container, ice cream not included) to my sister and mom. They were delighted, and a little surprised, to discover what was in the box.
Picture
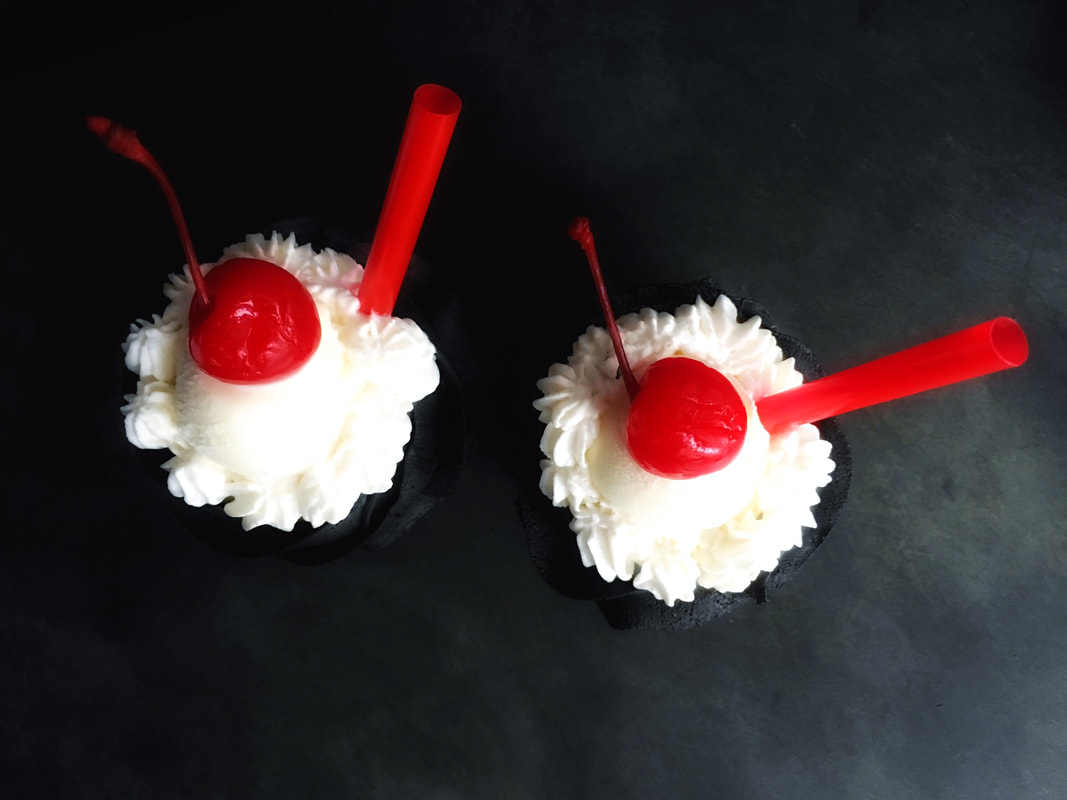
My first attempt at this was as a full-sized bundt cake, as was originally written in one of my favorite cookbooks, Baked: New Frontiers in Baking, by Matt Lewis and Renato Polafito. When I spied the cupcake version on the Smitten Kitchen blog, knew I had to make it for mamala. I added the root beer fudge frosting.

If you don't have time to make individual cupcakes, make it into a bundt, frost it and serve ice cream on the side. Either way, you won't be sorry.
Picture
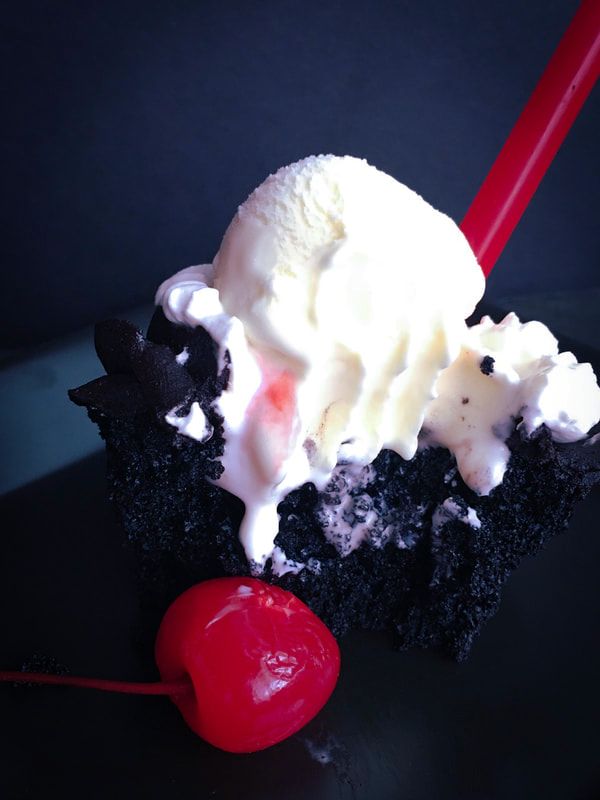
Adapted from: Matt Lewis and Renato Polafito, Baked: New Frontiers in Baking and Smitten Kitchen (cupcakes)
Number of servings: 22 cupcakes or one (10-inch) bundt cake

Ingredients
Cupcakes
  • 2 cups root beer (do NOT use diet root beer). Or, as suggested in Baked, if you can find root beer schnapps, replace ½ cup of that instead of root beer for more pronounced flavor.
  • 1 cup dark unsweetened cocoa powder
  • ½ cup (1 stick or 4 ounces) unsalted butter, cut into 1-inch pieces
  • 1 ¼ cups granulated sugar
  • ½ cup firmly packed dark brown sugar
  • 2 cups all-purpose flour
  • 1 ¼ teaspoons baking soda
  • 1 teaspoon salt
  • 2 large eggs
Root Beer Fudge Frosting
  • 2 ounces dark chocolate (60% cacao), melted and cooled slightly
  •  ½ cup (1 stick) unsalted butter, softened
  • 1 teaspoon salt
  • ¼  cup root beer
  • ⅔ cup dark unsweetened cocoa powder
  • 2 ½ cups powdered sugar
Toppings
  • 1 ½ cups heavy whipping cream (Or canned real whipped cream like Reddi-wip to save time. Gasp! I know.)
  • 3 tablespoons powdered sugar
  • ½ teaspoon vanilla extract
  • Pint of vanilla ice cream (you’ll have some leftover, you’re welcome)
  • Maraschino cherries (optional)

Directions
Cupcakes
  1. Preheat oven to 350 °F.
  2. Line 22 cupcake cups with paper liners.
  3. In a small saucepan, heat root beer, cocoa powder and butter over medium heat until butter is melted. Add the sugars and whisk until dissolved. Remove from heat and let cool.
  4. In a large bowl, whisk flour, baking soda, and salt together. In a small bowl, whisk the eggs until just beaten, then whisk them into the cooled cocoa mixture until combined. Fold the liquid and flour mixtures together in the large bowl. The batter will be slightly lumpy, this is okay. If you overbeat it, it will get tough.
  5. Fill cupcake liners about ⅔ to ¾ full (a ¼ cup scoop or measuring cup filled mine perfectly) and bake cupcakes, rotating trays back-to-front and top-to-bottom halfway through, until a tester inserted into the center of each comes out clean, about 17 minutes. Transfer from pan to a wire rack to cool completely.
Root Beer Fudge Frosting
  1. Put ingredients into a food processor. Pulse in short bursts until frosting is shiny and smooth.
  2. Place frosting in a piping bag.
Assemble Cupcakes
  1. Whip heavy whipping cream with powdered sugar and vanilla until it holds soft peaks. You can do this with an electric mixer. Place whipped cream in a piping bag, if desired.
  2. Use knife tip to cut a small cone out of the top-center of each cupcake; feel free to snack on these, I won’t tell. [Ed. note: I'm considering it.]
  3. With the frosting piping bag, swirl a small amount around rim of each cupcake (don't cover the small hole you carved out).
  4. Using a spoon or a small cookie scoop, nest a scoop of ice cream in each indent. Surround ice cream with dollops of whipped cream. Top with a cherry, if using.
  5. To keep cupcakes in a holding pattern while you assemble remaining ones, you can put them in the freezer, but try to do so for no more than 5 minutes or the whipped cream will harden.
  6. Eat immediately. [Ed. note: This is not a drill.]

NOTES:
  • You can make this easy on yourself and bake in a 10-inch Bundt pan. Butter and dust pan with flour, knock out excess flour. Pour batter into bundt and bake for 35-40 minutes at 325 °F. Transfer from pan to wire rack to cool completely. Gently loosen sides of cake from pan and turn it out onto rack. Use a spatula to spread fudge frosting over the crown of the bundt in a thick layer. Let frosting set before serving, with ice cream on the side.
  • Tastes best to let the cupcakes/bundt sit overnight to let the root beer flavor intensify.​
  • If 22 cupcakes are too much, you can easily halve the recipe down to 11 cupcakes. Don't halve the frosting though.

PS: One year ago...
www.moveablefeast.me/blog/lush-chocolate-cake-with-chocolate-malt-frosting
Picture
6 Comments

Strawberry Brownie Cake

7/4/2018

2 Comments

 
Picture
"Chocolate doesn't ask silly questions, chocolate understands."
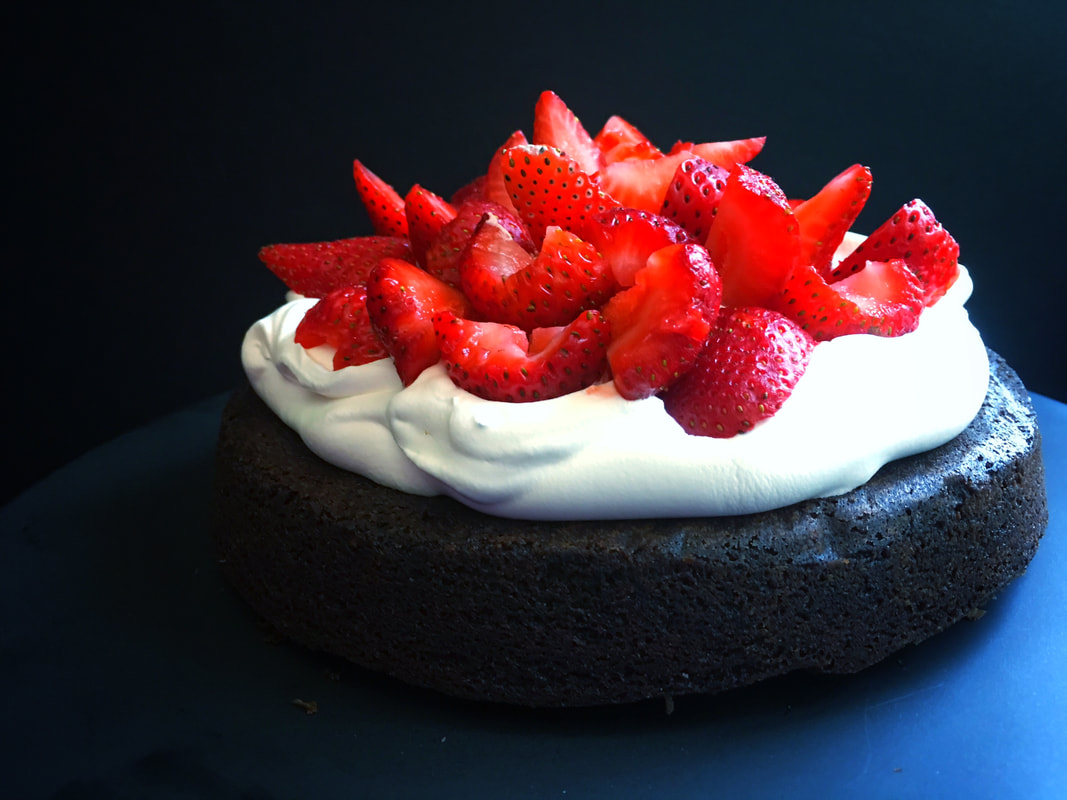
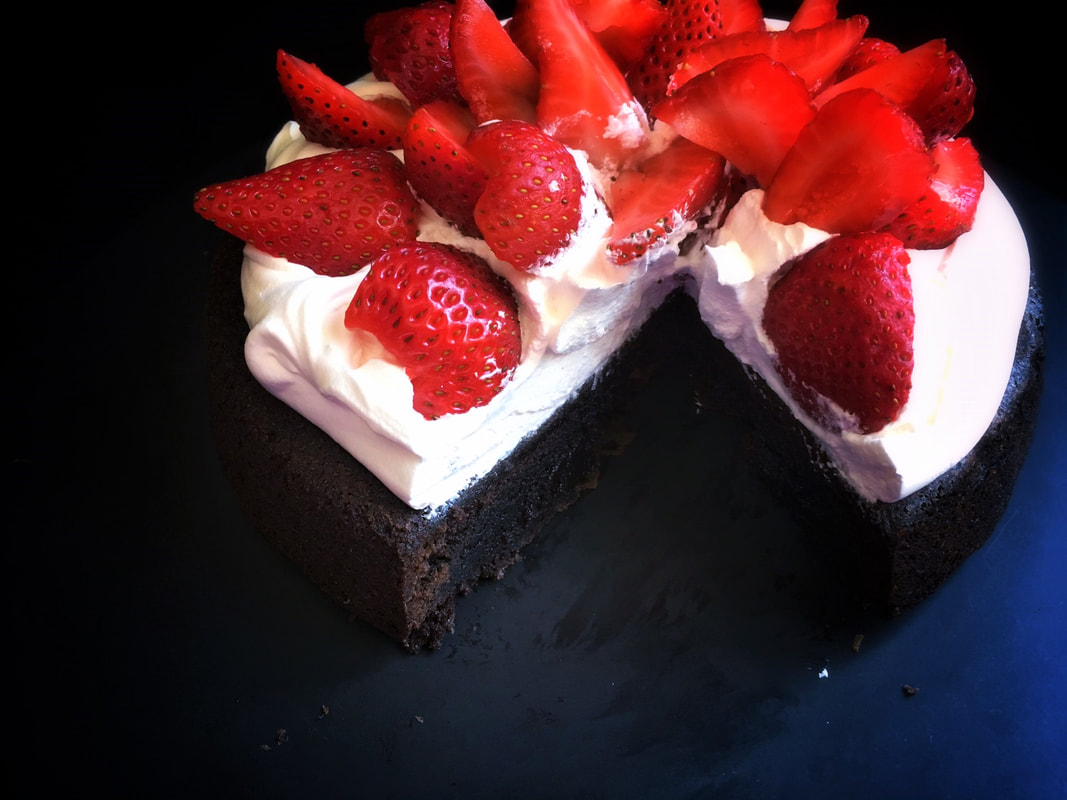
-author unknown

You don't see too many chocolate desserts in the summer. Usually it's all about summer fruit pies, tarts, crostatas, cobblers, crisps, ice cream, sorbets. Nothing against them, all delicious, but my soul still craves chocolate. So this is an attempt at the best of both worlds. Even the BF loves it and he's not exactly fond of mixing fruit with cake. [Ed. note: As The Offspring once eloquently opined, gotta keep 'em separated. (I'm just kidding, this is really good.)]

​The best part of this dessert is that it's the best hack of the summer.

I make every single meal for my clients and family from scratch. Every day. But once in awhile, especially in the summer heat, it's nice to make things a little easier for the BF and me. Here you can be versatile, feel free to use your favorite boxed brownie mix (Duncan Hines Dark Chocolate Fudge Brownies "Extra Thick and Fudgy" was used here) or a time-tested from-scratch recipe. You can make homemade whipped cream or Cool Whip, I won't tell. Like another berry better than strawberries? Go for it.

For years, I had prepared this dessert with homemade brownies and fresh whipped cream. Then one night a friend came over for an impromptu dinner. I was short on time, knew the guest couldn't eat dairy, and hates coconut milk. So out came the boxed brownie mix (no butter) and Cool Whip (no cream), and it was awesome. She loved it.

It also held up better in the warm weather than homemade and did not wilt or weep in the fridge.  The BF and I had leftovers for a few days and there wasn't a single crumb left.

Hope you enjoy this one over a very Happy Fourth of July! Not only is it our nation's birthday, but it's also our rescue lab Marlowe's fifth. [Ed. note: She doesn't look a day over four.]

And as a final note, it is also a year since I started this blog, the one-year blogaversary, and I want to sincerely thank you for reading. Feel free to reach out to me here, or on Instagram, Facebook, or Twitter (links above).

Cheers!

Flashback to blog #1: ​www.moveablefeast.me/blog/crispy-salmon-with-strawberry-salsa
Picture
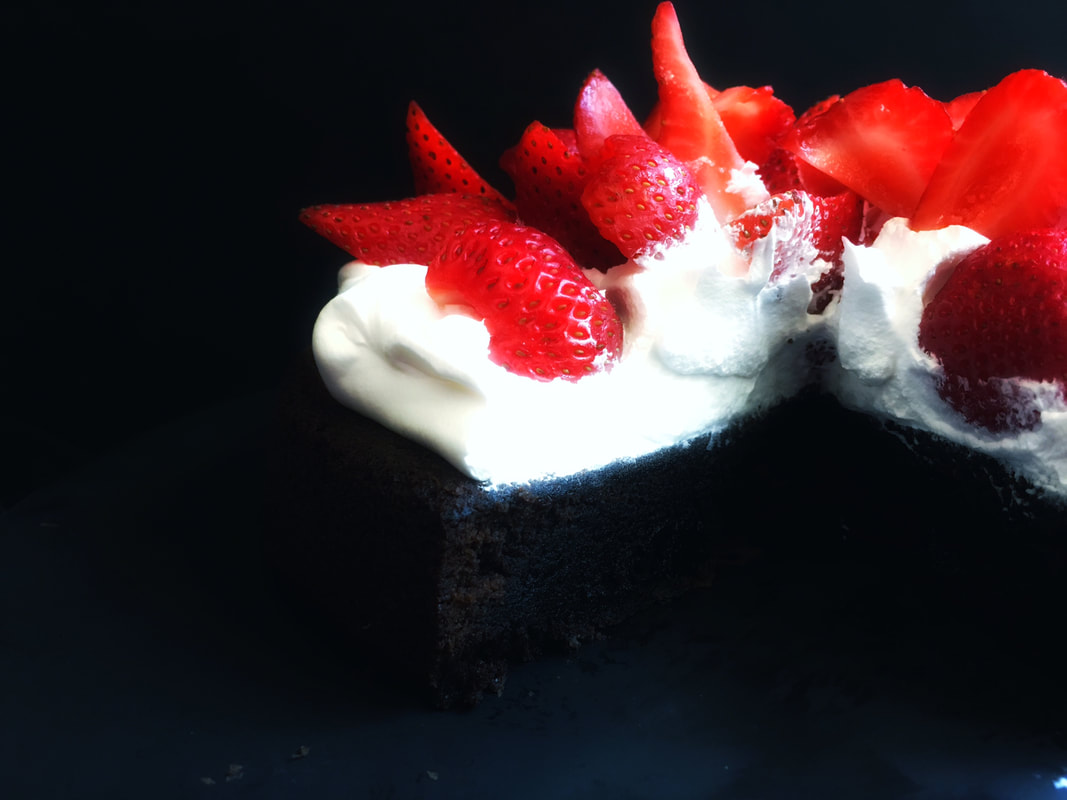
Number of Servings: 4-6

Ingredients
  • 1 box brownie mix (Duncan Hines Dark Chocoalte Fudge "Extra Thick and Fudgy" Brownie Mix was used here)
  • 1 large egg
  • ⅓ cup canola oil
  • ⅓ cup water
  • ½ cup sour cream
  • ½ cup prepared whipped cream (homemade or use Cool Whip for a non-dairy option)
  • ½ pint strawberries, hulled, halved and quartered

Directions
  1. Preheat oven to temperature indicated on the brownie mix box. Lightly butter an 8-inch (20-cm) round cake pan. Cut out a round piece of parchment and place in bottom of pan. Lightly butter top of parchment (I use a pastry brush).
  2. Using an electric mixer, combine brownie mix, egg, water, and oil.
  3. Pour the batter into the prepared pan and bake according to the box instructions. I baked mine between 31-33 minutes. Do not overbake. 
  4. Let cool completely on a wire rack, then turn out of the pan. Peel off the parchment.
  5. Put brownie cake on a serving platter.
  6. Fold the sour cream into the whipped cream. Spoon the mixture on top of the brownie cake and top with berries. Alternatively, top with Cool Whip.
  7. Slice and serve with additional berries and whipped cream if desired.
Picture
Picture
Born on the Fourth of July. Happy Fifth Birthday Marlowe!
Picture
2 Comments

White Chocolate Bark with Strawberries & Pistachios

4/12/2018

2 Comments

 
Picture
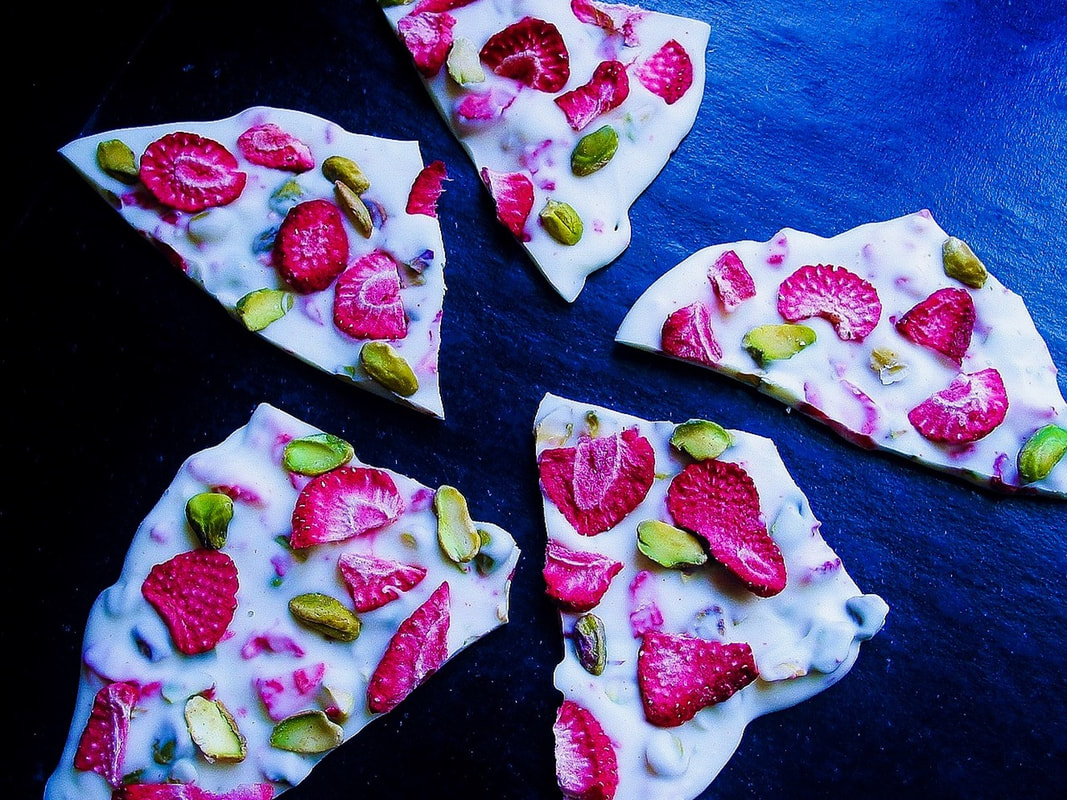
All apologies, as the BF and I have been under the weather this week. Somehow, in over a quarter century of knowing each other, this is the first time we have been sick at the same time. [Ed. note: It's not like we were trying to set a record or anything.] We are slowly coming out of our funk.

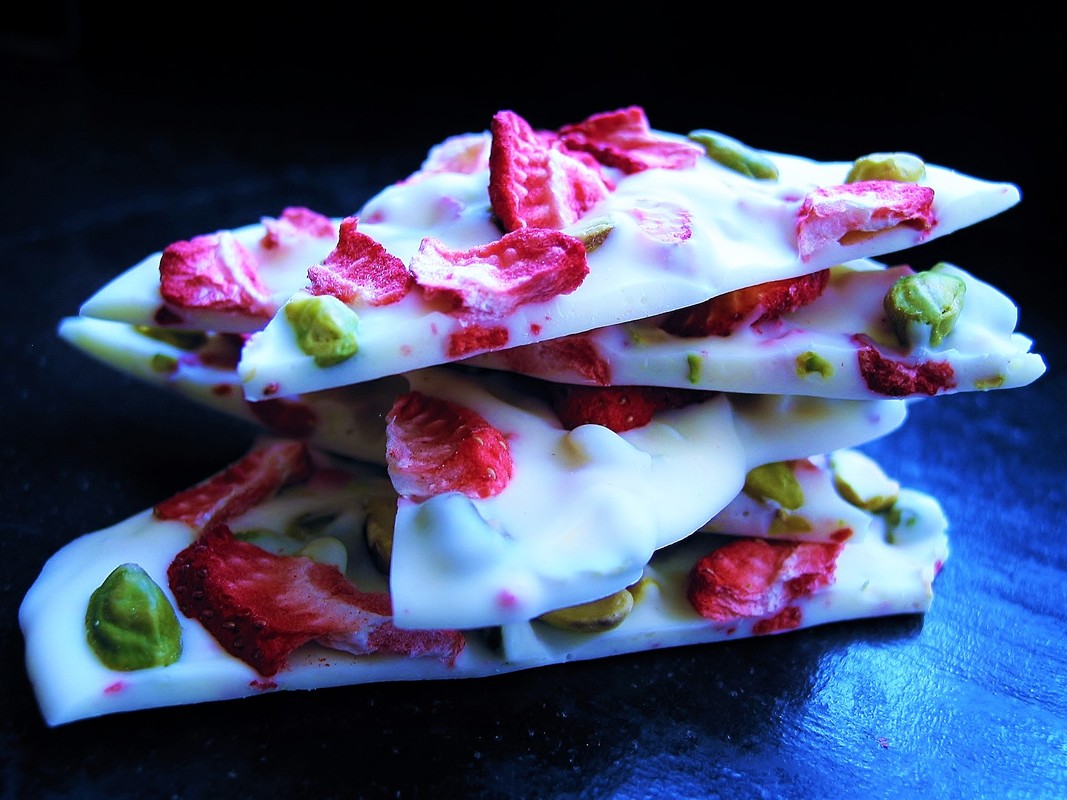
​A more pleasant subject: strawberries! While fresh strawberries are not quite in season yet—soon!—this dessert actually uses the freeze-dried variety, which pack a supremely flavorful punch. So easy to make, we're talking roughly a half hour, this made a perfect little housewarming gift for a friend and her hubs.

Adapted from: Leelalicious
Number of servings: 2 small servings

Ingredients
  • 1 bar Lindt White Chocolate (4.4 ounces)
  • ¼ cup freeze dried strawberries
  • ¼ cup roasted & salted pistachios, shelled and roughly chopped

Directions
  1. Place parchment paper on a small baking sheet.
  2. Chop chocolate bar into small pieces. Melt in double boiler or microwave. I put my chocolate in microwave and set for 20 second bursts. Stir. Do not over cook.
  3. Stir in half the strawberries and half the pistachios into the melted white chocolate.
  4. Pour chocolate out onto parchment paper, spread out and flatten with a spatula. Sprinkle with remaining pistachios and strawberries on top.
  5. Keep in fridge until thoroughly chilled. Break or cut into pieces.
Picture
2 Comments

Chocolate Peanut Butter Tart

3/6/2018

2 Comments

 
Picture
You got chocolate in my peanut butter!
You got peanut butter on my chocolate!


For those that don't know, Reese's made a thousand (it seems) variations on this theme.
Everyone from my generation has seen a version of this commercial. And they're right, some things really do pair well together. Even bring out the best in one another.

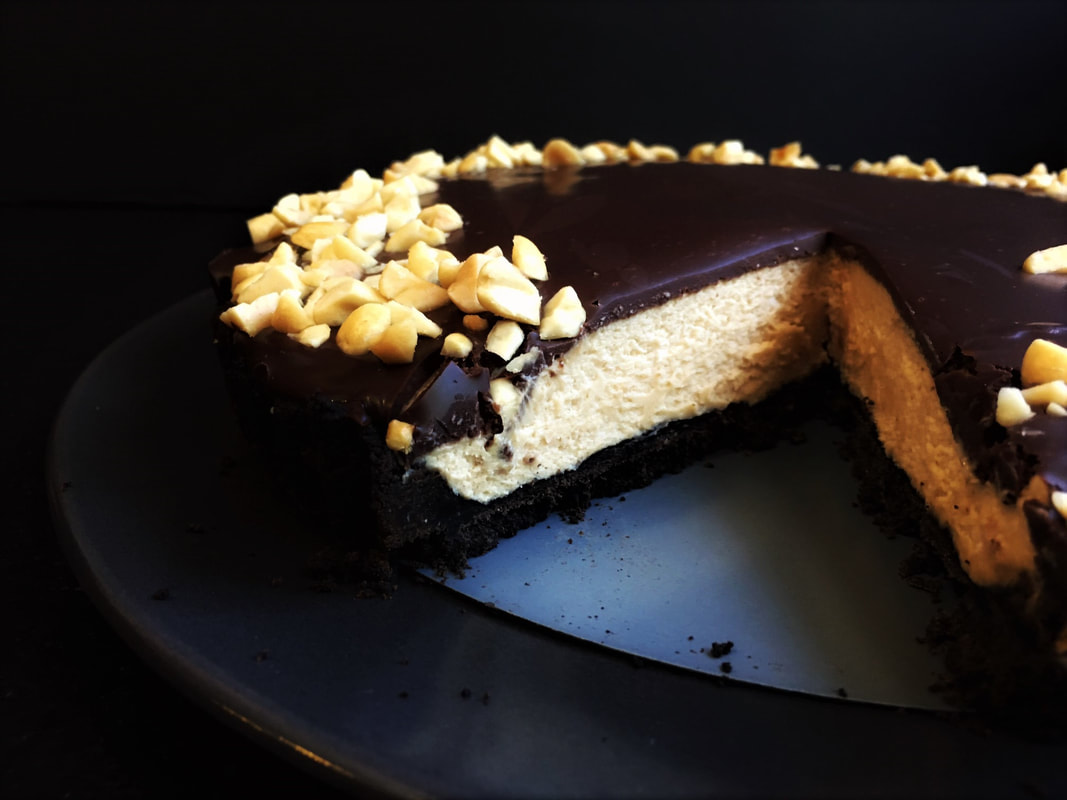
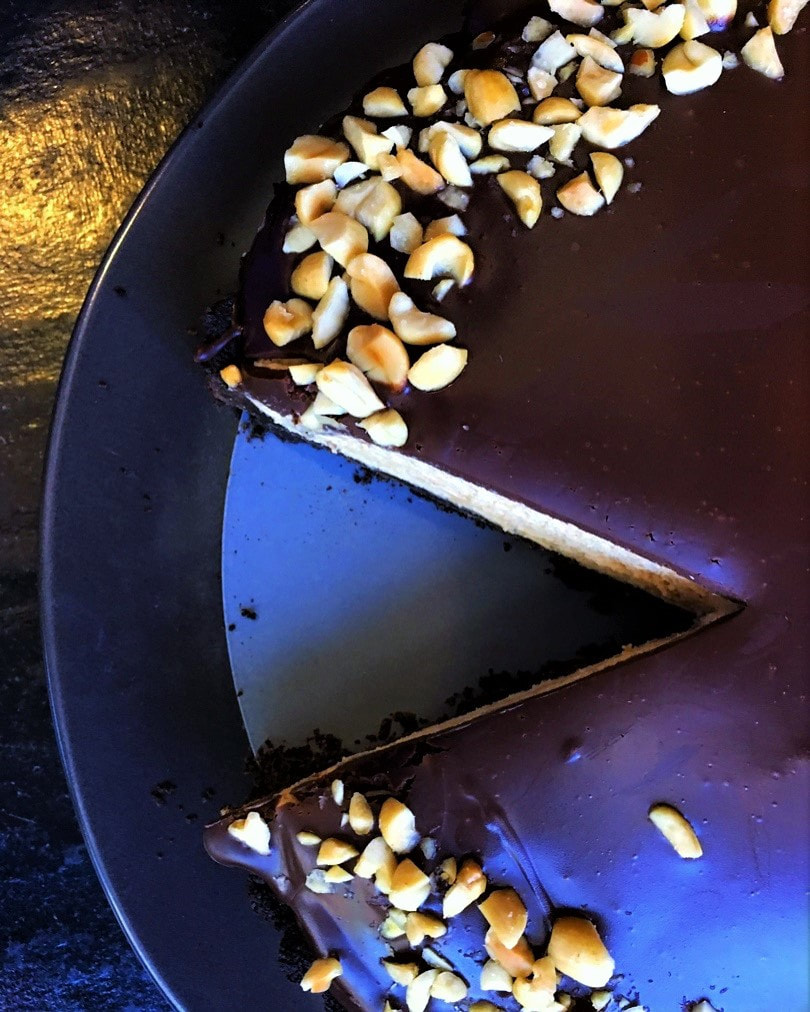
The BF and I have never been die hard peanut butter fans. I didn't grow up with PB&J sandwiches and hated all things peanuty, while he was...what's the phrase? [Ed. note: Psychotically nonplussed.]

I have since learned the error of my ways. Peanut butter and chocolate is to die for, and this tart is like a giant Reese's Peanut Butter Cup in pie form–only way better.
Picture
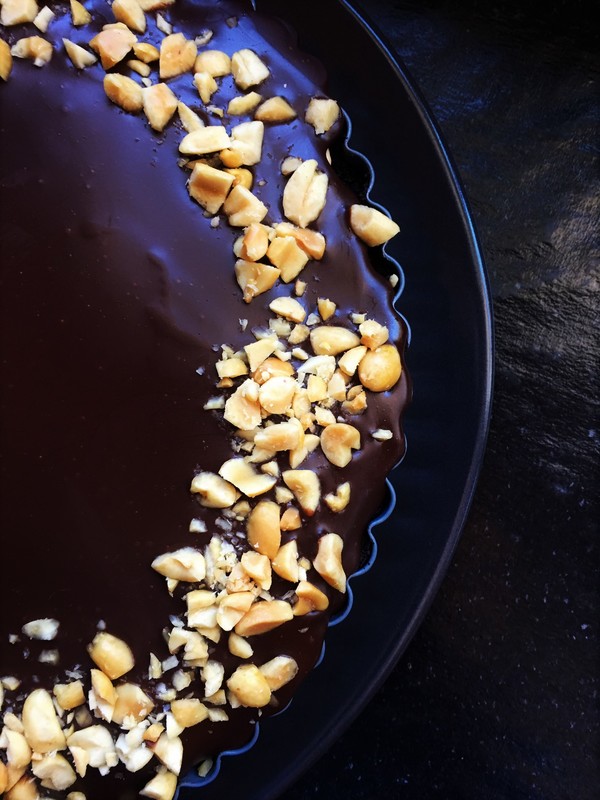
I first made this last year and was shocked at how good it turned out. Silky, creamy, decadent. The BF even loved it, which of course is something I always aim for. Now, it's a go-to for parties, celebrations, catering events, and lo and behold, I keep getting invited back whenever I bring it!

​If you have a peanut butter lover in your life, make this for them (or for you). You won't be sorry.

​You can even make individual parfaits out of this recipe. Place crumbled cookie crust on bottom of your chosen vessel. Spoon the peanut butter filling over the crumbled cookie. Top with ganache and chopped  peanuts. See photo below.
Picture
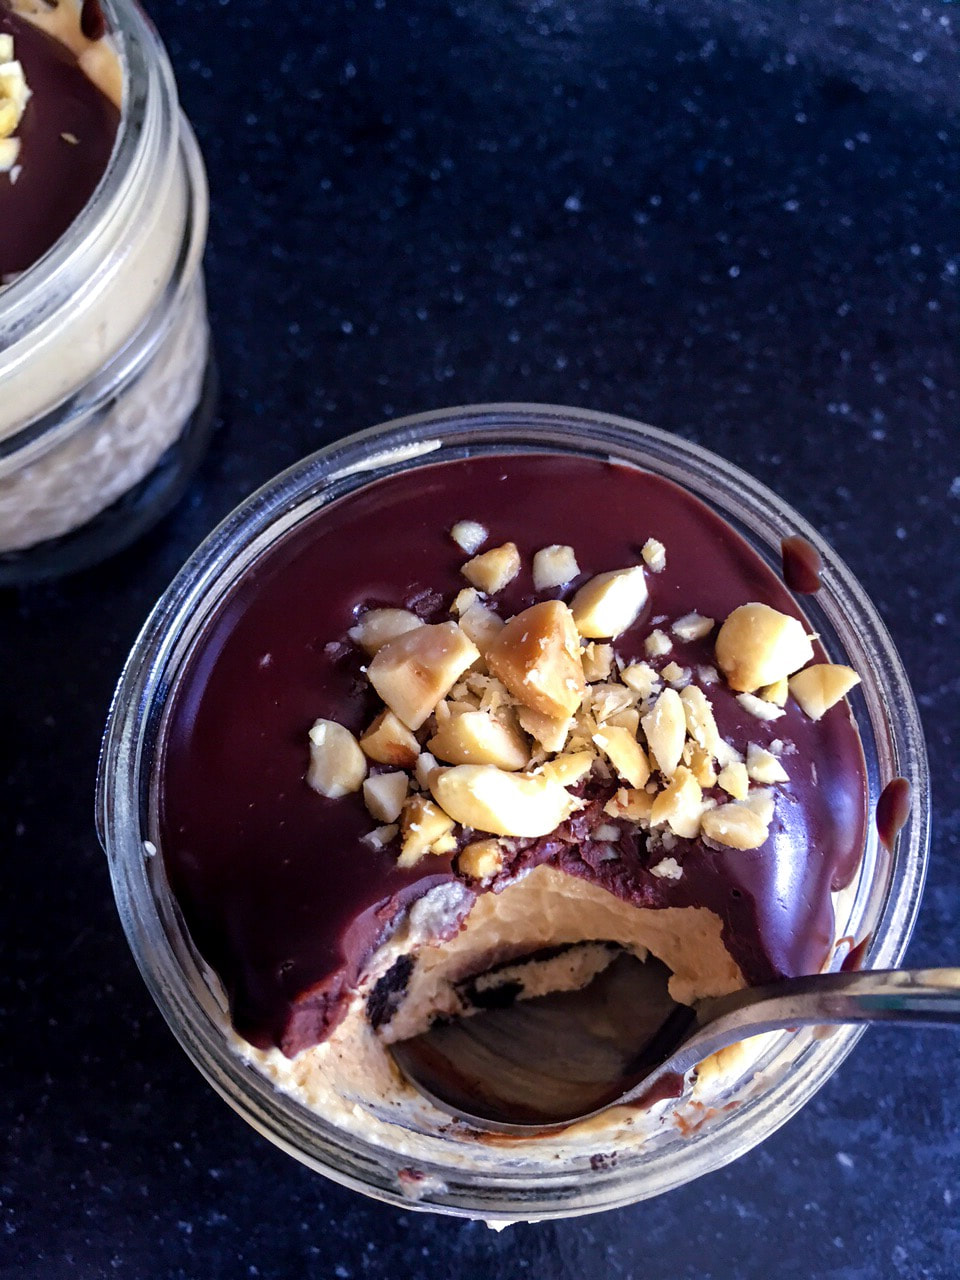
Adapted from: Jenn Segal, Once Upon a Chef
Number of Servings: 10

Ingredients
​Chocolate Tart Crust
  • 4 ounces semisweet chocolate, chopped (use good quality, i.e., Ghirardelli)
  • 4 tablespoons unsalted butter, cut into tablespoons
  • 8 ounces Nabisco Chocolate Wafers (about 32 cookies from a 9-ounce package), finely ground in a food processor to make 2 cups of crumbs
Peanut Butter Filling
  • 8 ounces cream cheese, at room temperature
  • 1 cup smooth peanut butter (I use creamy Jif)
  • 1 cup sugar
  • 2 teaspoons vanilla extract
  • 1 cup cold heavy cream
Chocolate Topping
  • 4 ounces semisweet chocolate, chopped (good quality, i.e., Ghirardelli)
  • ½ cup heavy cream
  • ¼  cup salted roasted peanuts, chopped

Directions
Chocolate Tart Crust
  1. Preheat oven to 375 °F.
  2. In a medium glass bowl, combine the chocolate and butter and microwave at high power in 20-second intervals until the chocolate is just melted. Stir well, then stir in the cookie crumbs.
  3. Press the cookie crumbs evenly over the bottom and up the rim of a 10-inch tart pan with a removable bottom. (Be sure not to make the crust too thick in any one spot, especially around the rim. Keep it thin throughout, otherwise it will come out too hard.)
  4. Bake the crust for 10 minutes, then cool on a rack.
Peanut Butter Filling
  1. In a large bowl, using a hand-held electric mixer, beat the cream cheese with the peanut butter, sugar and vanilla extract until blended.
  2. In another large bowl, using an electric mixer, whip the chilled cream until firm. Fold one-third of the whipped cream into the peanut butter mixture to loosen it, then fold in the remaining whipped cream.
  3. Spoon the filling into the crust, smoothing the surface. Refrigerate uncovered for about 1 hour.
Chocolate Topping
  1. In a medium glass bowl, combine the chocolate with the heavy cream and microwave at high power in 20-second intervals until chocolate is just melted and cream is hot.
  2. Stir the chocolate topping until blended, then let cool to barely warm, stirring occasionally.
  3. Spread chocolate topping over the chilled peanut butter filling and sprinkle chopped peanuts around the edges of the pie. Chill uncovered in refrigerator for 3 more hours.
To Serve
  1. Carefully remove the rim from the pan by gently pressing upwards on the bottom while holding the rim in place. (If using a springform pan, run a thin knife around the crust to loosen it, then remove the springform ring.)
  2. Use a sharp knife to cut the pie into wedges. Run the knife under hot water and dry it between each cut. Serve chilled or slightly cooler than room temperature.
NOTE: This pie can be made a day ahead, then covered and refrigerated until ready to serve.
Picture
2 Comments

Chocolate Oblivion Truffle Torte

2/11/2018

0 Comments

 
Picture
On this Valentine's Day, are you aiming for someone's heart through their stomach? Don't let the ingredients and directions of this recipe scare you, this is actually way less daunting than it appears. [Ed. Note: But you don't have to disclose that information if you're truly looking to impress.]

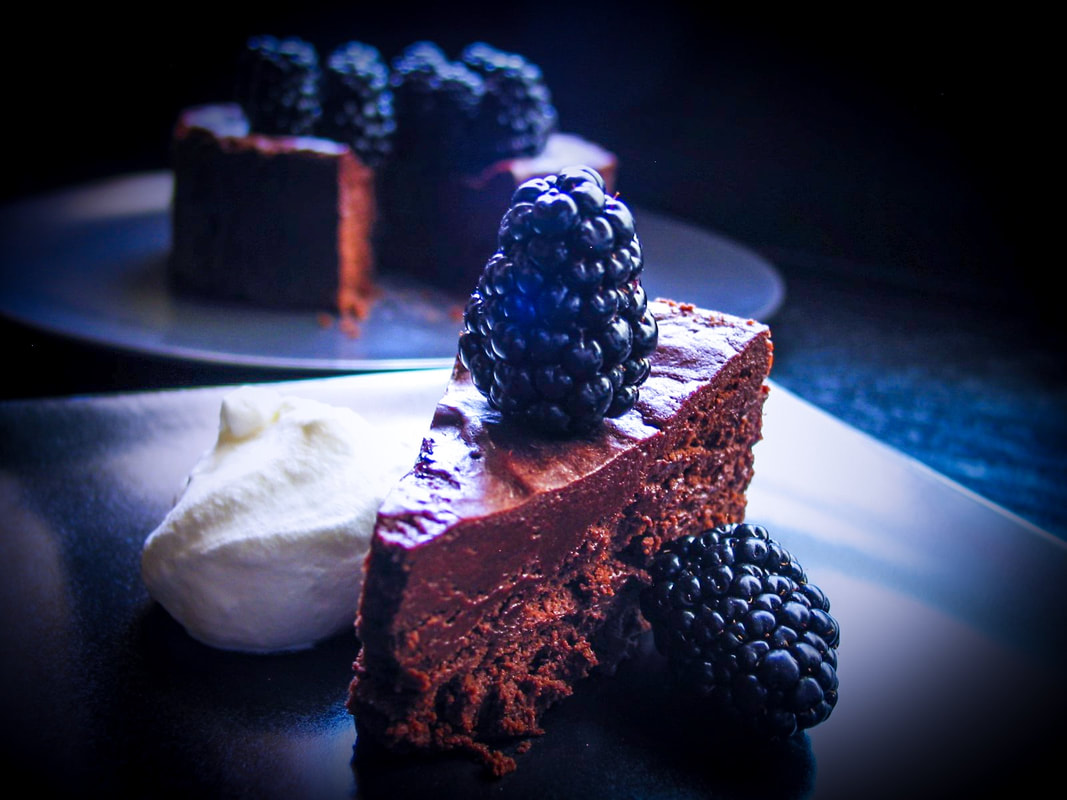
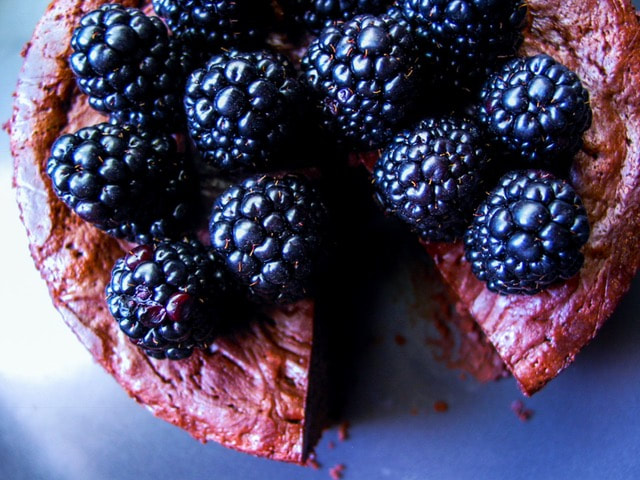
The key to the torte's simplicity is that it's made from just three ingredients: chocolate, butter, and eggs—and it only bakes for 15 minutes. I made this for the BF, myself and a few friends in a 6-inch springform pan, but am giving the recipe as originally presented (in an 8-inch springform pan) from the brilliant Rose Levy Beranbaum's The Cake Bible. I happen to love flourless tortes and have made so many different kinds, and this is certainly one of my favorites. Not to mention gluten free!

Beranbaum says this is her favorite way to eat chocolate, "It's the purest form of chocolate—when you just have a chocolate bar, you can't taste the chocolate until it starts melting in your mouth. But this is just the right texture so that the minute you put it in your mouth, the flavors start exploding. It's like the creamiest truffle wedded to the purest chocolate mousse. It's the right consistency and there's nothing to interfere. There's no flour. Egg gives it texture, but it also enriches it further—it gives it a fuller flavor. And then of course butter doesn't do any harm either!"
(Source: food52.com/blog/15895-the-magic-of-the-3-ingredient-chocolate-oblivion-truffle-torte-as-told-by-rose-levy-beranbaum)

It's creamy. moussey, and sinfully decadent. And seriously, who cares about clichés, nothing's beating chocolate on Valentine's Day. 
Picture
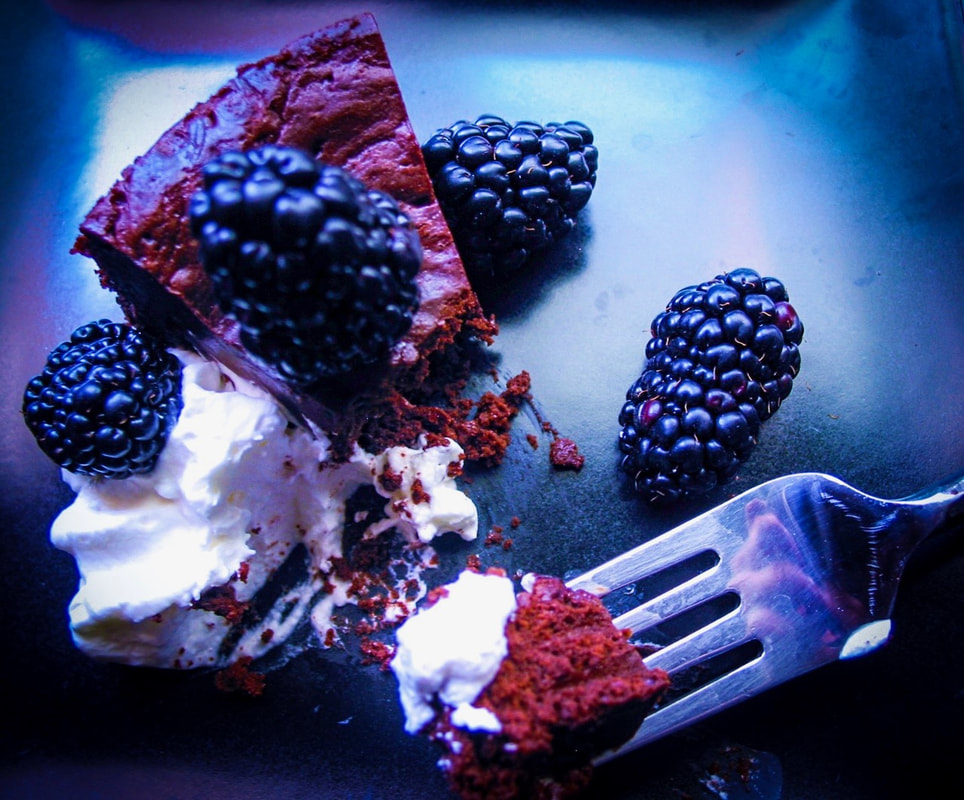
NOTES: It's very important to have the eggs and butter at room temperature. Since there are only three ingredients, use the best chocolate and butter that you can (Scharffen Berger chocolate and Plugra European butter were used here). Finally, be sure to serve the torte at room temperature, not chilled. Read through the entire recipe before starting; while it is deceptively easy to make, there are lots of side notes that are important to its success.

Adapted from: Rose Levy Beranbaum's The Cake Bible and Food 52
Number of servings: makes one 8-inch torte, serves approx 16 (depending on slice size)

Ingredients
  • 1 pound (454 grams) bittersweet chocolate, no higher than 62% cacao
  • ½ pound (2 sticks, or 227 grams) unsalted butter, room temperature
  • 6 large eggs (300 grams, out of shell), room temperature 
  • Whipped cream for topping (optional)
  • Blackberries or raspberries for topping (optional)
  • Equipment: One 8-inch spring-form pan at least 2 ½ inches high, buttered, and bottom lined with buttered parchment; outside of pan wrapped with a double layer of heavy-duty foil. One 10-inch cake pan or roasting pan to serve as a water bath.
Directions
  1. Heat oven to 425 °F.
  2. In a large heat-proof bowl set over a pan of hot (not simmering) water (do not allow bottom of the bowl to touch the water), place the chocolate and butter and allow it to stand, stirring occasionally, until smooth and melted. (You can also use a microwave on higher power, stirring every 20 seconds.)
  3. In a large mixer bowl, set over a pan of simmering water, heat the eggs, stirring constantly with a wire whisk, until just warm to the touch. Immediately remove the bowl to the stand mixer and with the whisk attachment on high speed, beat about 5 minutes, until triple in volume and the eggs are billowy and lighter in color. (If using a handheld electric mixer, beat the eggs over simmering water until they are hot. Then remove them from the heat and beat for about 5 minutes or until cold.)
  4. Use a large wire whisk or rubber spatula to fold half the eggs into the chocolate mixture until almost evenly incorporated. Fold in remaining eggs until almost no streaks remain. Use rubber spatula to finish folding, scraping up the mixture from the bottom to ensure that all the heavier chocolate mixture gets incorporated.
  5. Scrape the mixture into the prepared pan and set it in the larger pan. Place it in the oven and surround it with 1 inch of hot water. Bake for 5 minutes. Loosely cover with a sheet of buttered foil and bake another 10 minutes. (It will wobble when moved.) Remove the cake pan from the water bath and allow it to cool for about 45 minutes. Cover tightly with plastic wrap and refrigerate it until very firm, at least 3 hours.
  6. Unmold the cake: Have ready a serving plate that has at least an 8-inch flat center portion and an 8-inch or large flat loose bottom of a tart pan or plate, covered with greased plastic wrap.
  7. Use a torch, hair drier, or a hot damp towel to wipe the sides of the pan.
  8. Run a thin metal spatula around the sides of the torte and release the sides of the springform pan. Place the plastic-wrapped plate on top and invert the torte onto it. Heat the bottom of the pan and remove it. Peel off the parchment and reinvert torte onto the serving plate.
  9. Serve: It is most moussey and delicious at room temperature. Cut the torte, using a thin-bladed knife dipped in hot water, between each slice. Accompany with raspberry sauce, fresh raspberries and/or whipped cream if desired.
Picture
0 Comments

Happy Birthday to ME Chocolate Cake and Chocolate Sour Cream Frosting

2/3/2018

12 Comments

 
Picture
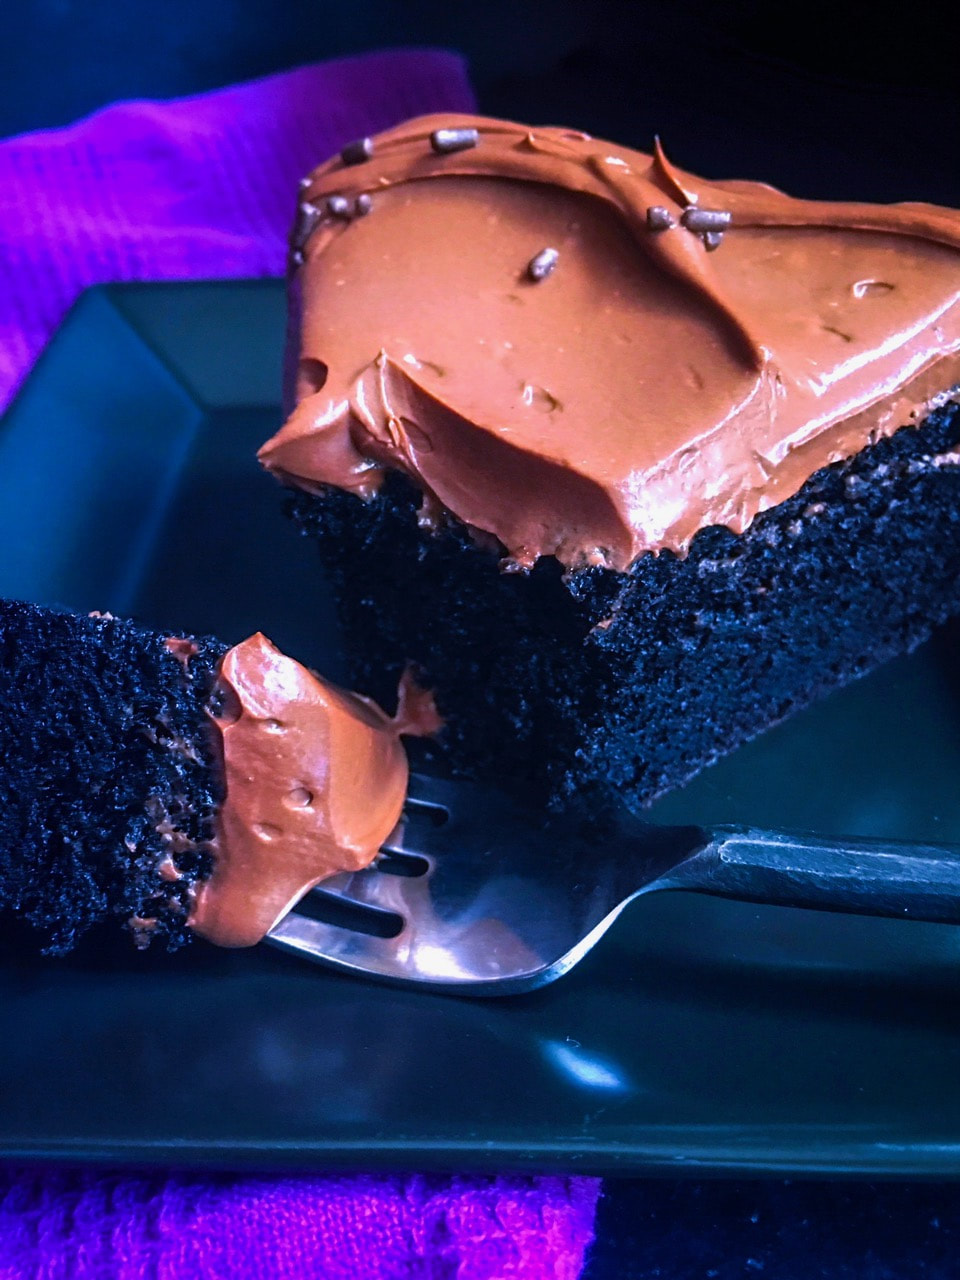
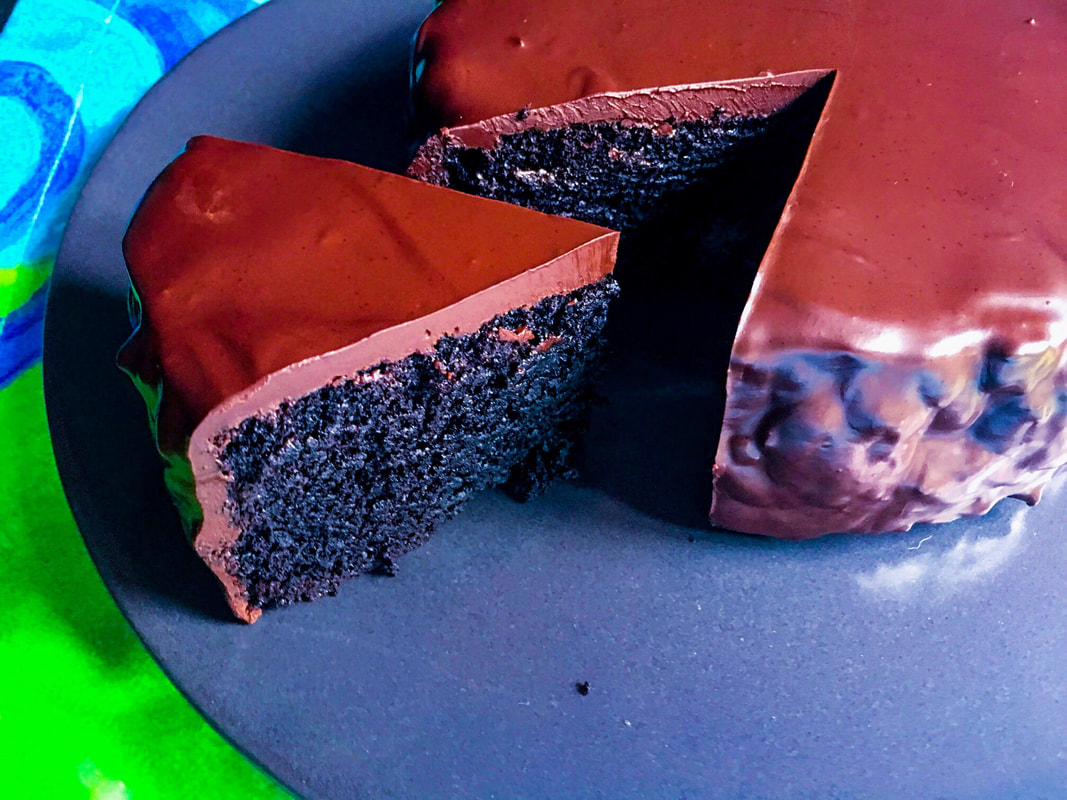
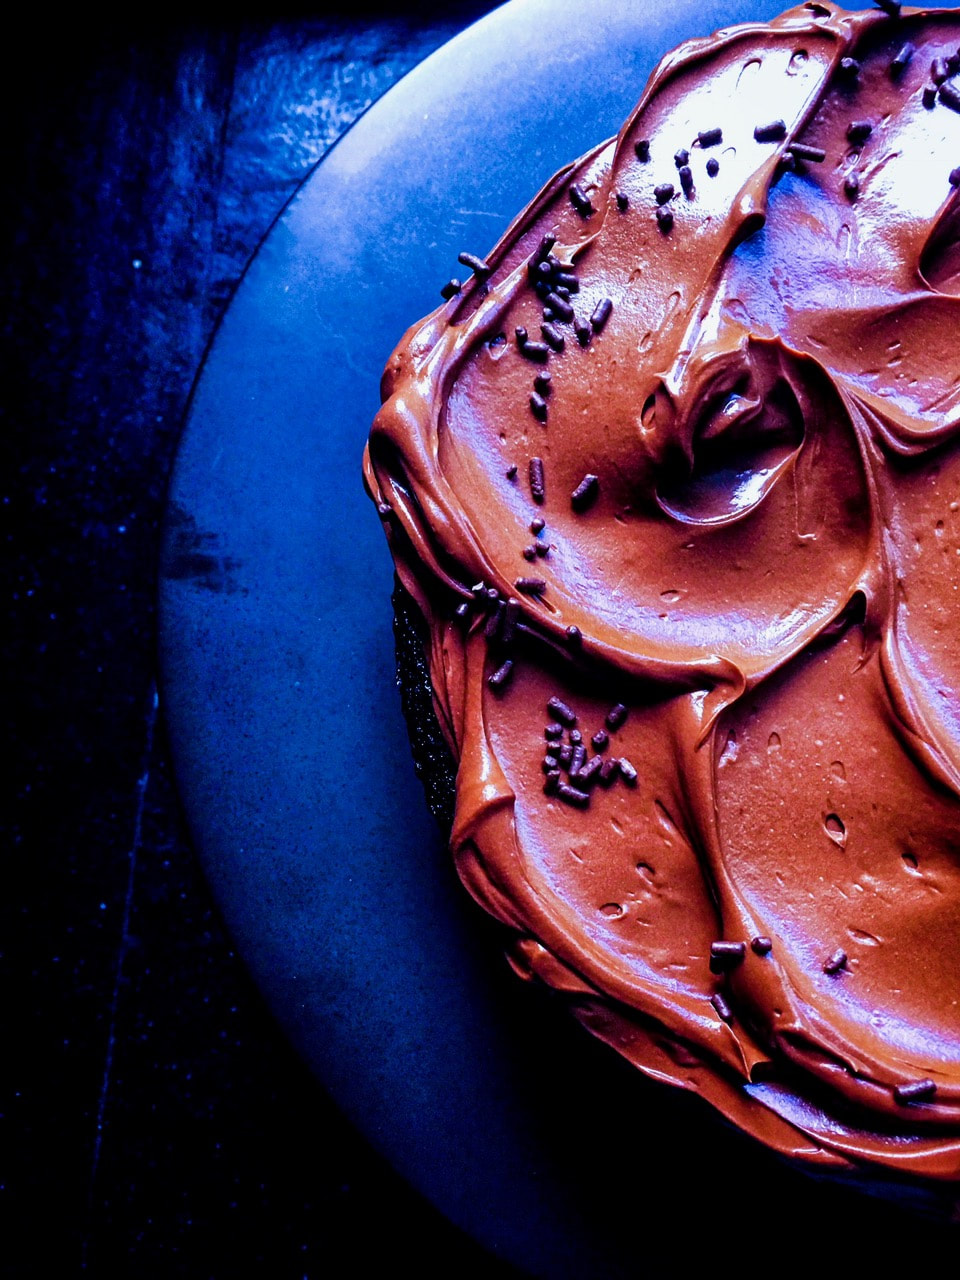
I baked my own birthday cake. 

What? You don't do that? It's not that my BF didn't offer to buy me the best dessert in town. [Ed. Note: Save your letters! Jeez.] It's just that I was feeling exceptionally specific, and wanted it to taste deep, dark, intensely chocolatey and extra-extra moist. We don't partake in rich desserts very often, so when we do, it needs to be amazing or it's not worth it. Many times we've found ourselves drooling over beautiful confections, only to be nonplussed by the taste. [Ed. Note: Breathtakingly meh™.]

The reason this cake is my go-to is that it has a creamy chocolate bite, and the sour cream frosting has an impressive tang that really sets it off. Also noteworthy, the frosting has neither butter nor whipped eggs (only a smidge of added sugar), making for easier preparation.

The cake itself is adapted from Ina Garten (the recipe is cut in half), the frosting from Smitten Kitchen. 

Bit of a side note, but I had a perfect birthday yesterday. Our inital dinner plans in San Francisco were thwarted (there's a dog flu ripping through our area, so we couldn't find a proper sitter, and we don't take chances with our Marlowe), but we ended up having an even better day and evening sticking closer to home. The BF took me to the movies (Winchester, not our cup of tea) and then to a terrific local restaurant called Timber & Salt. The meal: an appetizer of crispy brussels sprouts with apple gastrique and whipped goat cheese, cheeseburger with horseradish mayo and bacon jam (oh yes), and a bavette steak over sauteed greens and maitake mushrooms in a red wine reduction sauce.

Once home we chilled to the far superior movie A Futile And Stupid Gesture (about Doug Kenney and the rise and fall of National Lampoon), cracked open a bottle of prosecco we'd been saving, made a cocktail with Aperol (my favorite), and tucked into this cake.

Folks, this is my absolute favorite cake. Excuse me while I have another slice.​
Picture
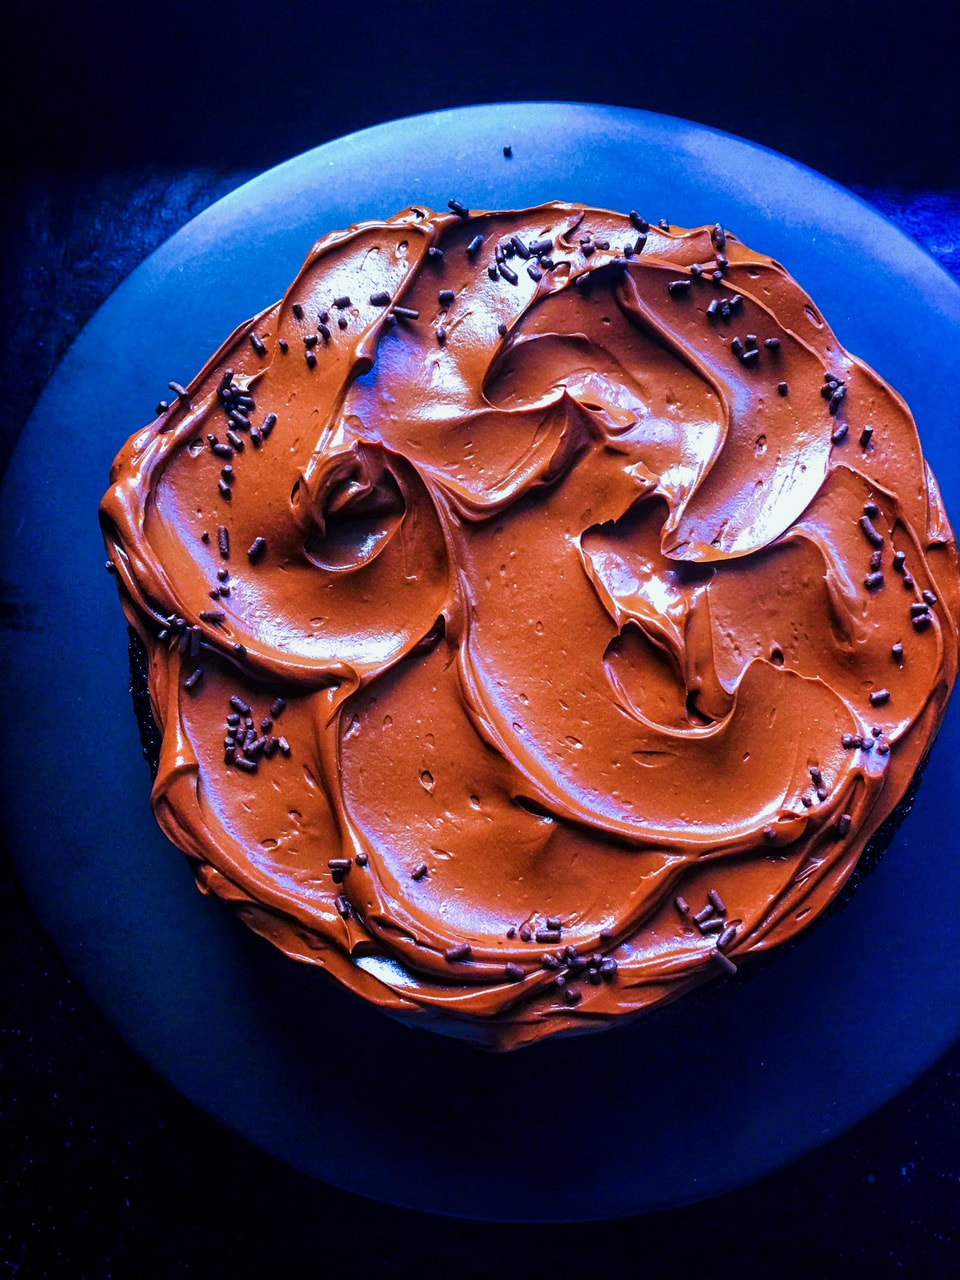
Adapted from: Ina Garten and Smitten Kitchen
Number of Servings: makes a one layer 8-inch cake (round or 8x8 square)

Cake
Ingredients
  • ¾ cup + 2 tablespoons all purpose flour, plus more for dusting
  • 1 cup sugar
  • 6 tablespoons unsweetened cocoa powder 
  • 1 teaspoon baking soda
  • ½ teaspoon baking powder
  • ½ teaspoon kosher salt
  • ½ cup buttermilk
  • ¼ cup vegetable oil
  • 1 large egg
  • ½ teaspoon pure vanilla
  • ½ cup freshly brewed hot coffee

Directions
  1. Preheat oven to 350 °F. Butter one 8 x 2-inch round cake pan or 8 x 8-inch square pan and line with parchment; butter the paper. Dust the pan with flour, tapping out any excess.
  2. In electric mixer bowl fitted with a paddle, mix flour with the sugar, cocoa powder, baking soda, baking powder and salt at low speed. In a seperate bowl, whisk buttermilk with the oil, eggs and vanilla. Slowly beat buttermilk mixture into the dry ingredients until just incorporated, then slowly beat into the hot coffee until fully incorporated.
  3. Pour batter into the prepared pan. Bake for 30-35 minutes, or until a toothpick inserted in the center of each cake comes out clean (do not overbake). Let the cake cool in the pan for 30 minutes, then invert cake onto a rack to cool. Peel off the parchment.

Chocolate Sour Cream Frosting
NOTE: Be sure that your sour cream is at room temperature before you make the frosting. 
Ingredients
  • 7 ½ ounces semisweet or bittersweet chocolate, chopped
  • ½ + ⅛ teaspoons instant espresso (optional) 
  • 1 ⅛ cups sour cream, at room temperature
  • 2-4 tablespoons light corn syrup
  • ½  teaspoon vanilla extract

Directions
  1. Combine chocolate and optional espresso powder (if using), in the top of a double-boiler or in a heatproof bowl over simmering water. Stir until chocolate is melted. (Alternately, you can melt the chocolate in a microwave for 30 seconds, stirring well, and then heating in 15 second increments, until the chocolate is melted.) Remove from heat and let chocolate cool until tepid.
  2. Whisk together the sour cream (I used a hand mixer), 2 tablespoons of corn syrup and vanilla extract until combined. Add the tepid chocolate slowly and stir/beat quickly until mixture is uniform. Taste for sweetness, and if needed, add additional corn syrup in one tablespoon increments until desired level of sweetness is achieved.
  3. Let cool in refrigerator until the frosting is a spreadable consistency. This should not take more than 30 minutes. Should the frosting become too thick or stiff, just leave it out until it softens again.
Picture
12 Comments

Peanut Butter Scotcheroos 2.0

9/29/2017

2 Comments

 
Picture
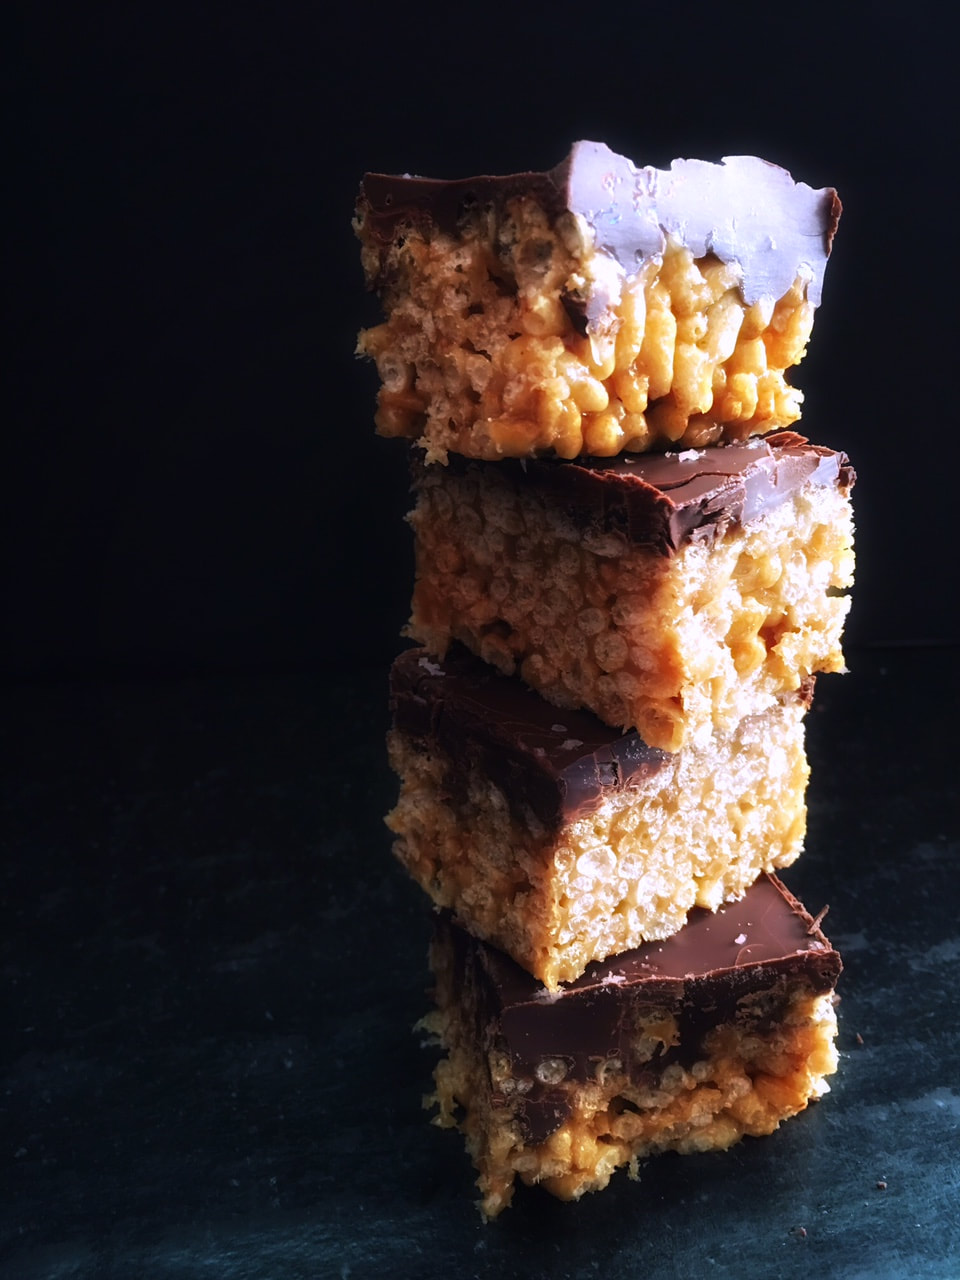
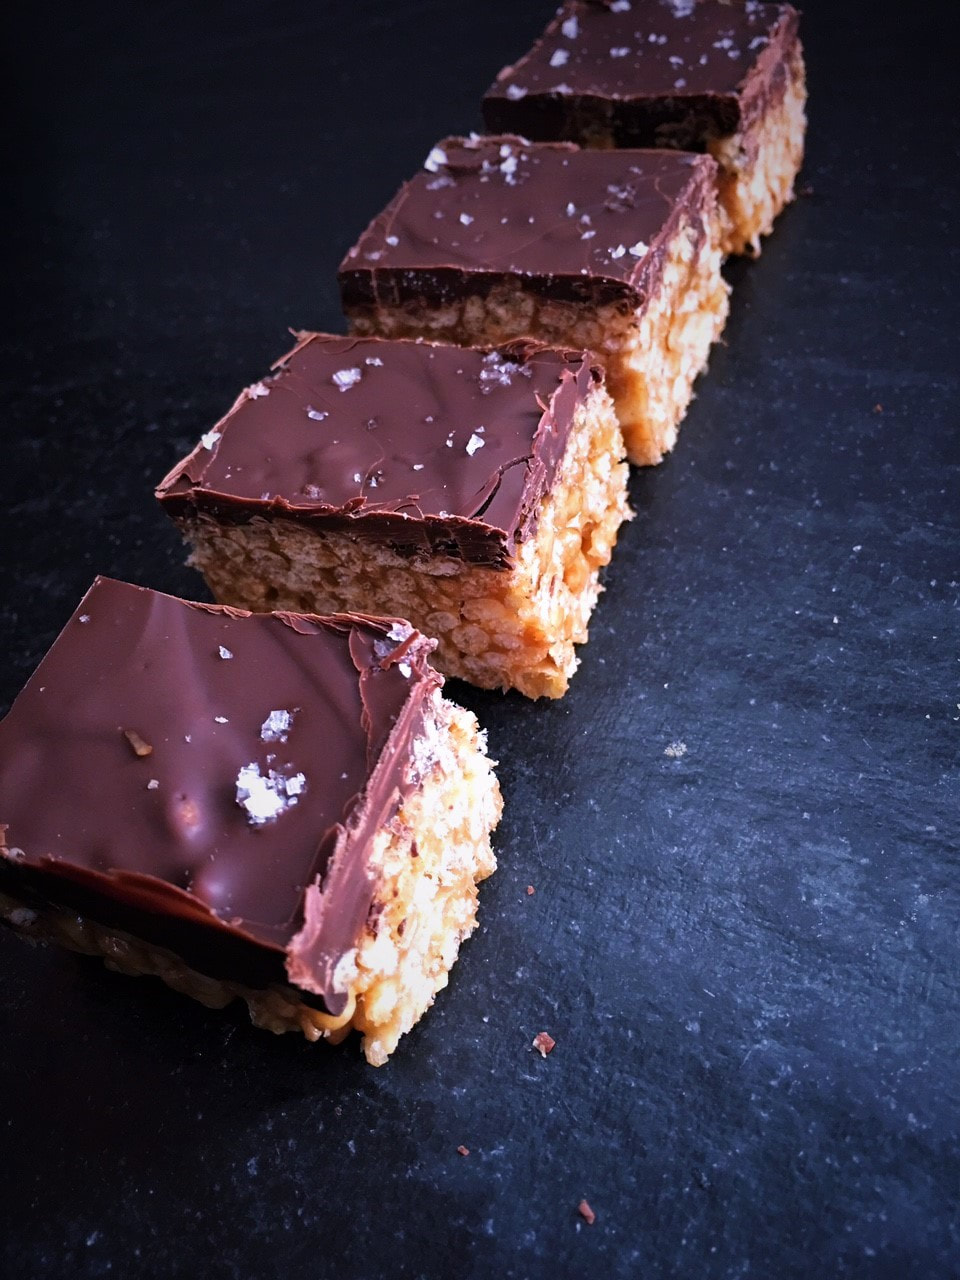
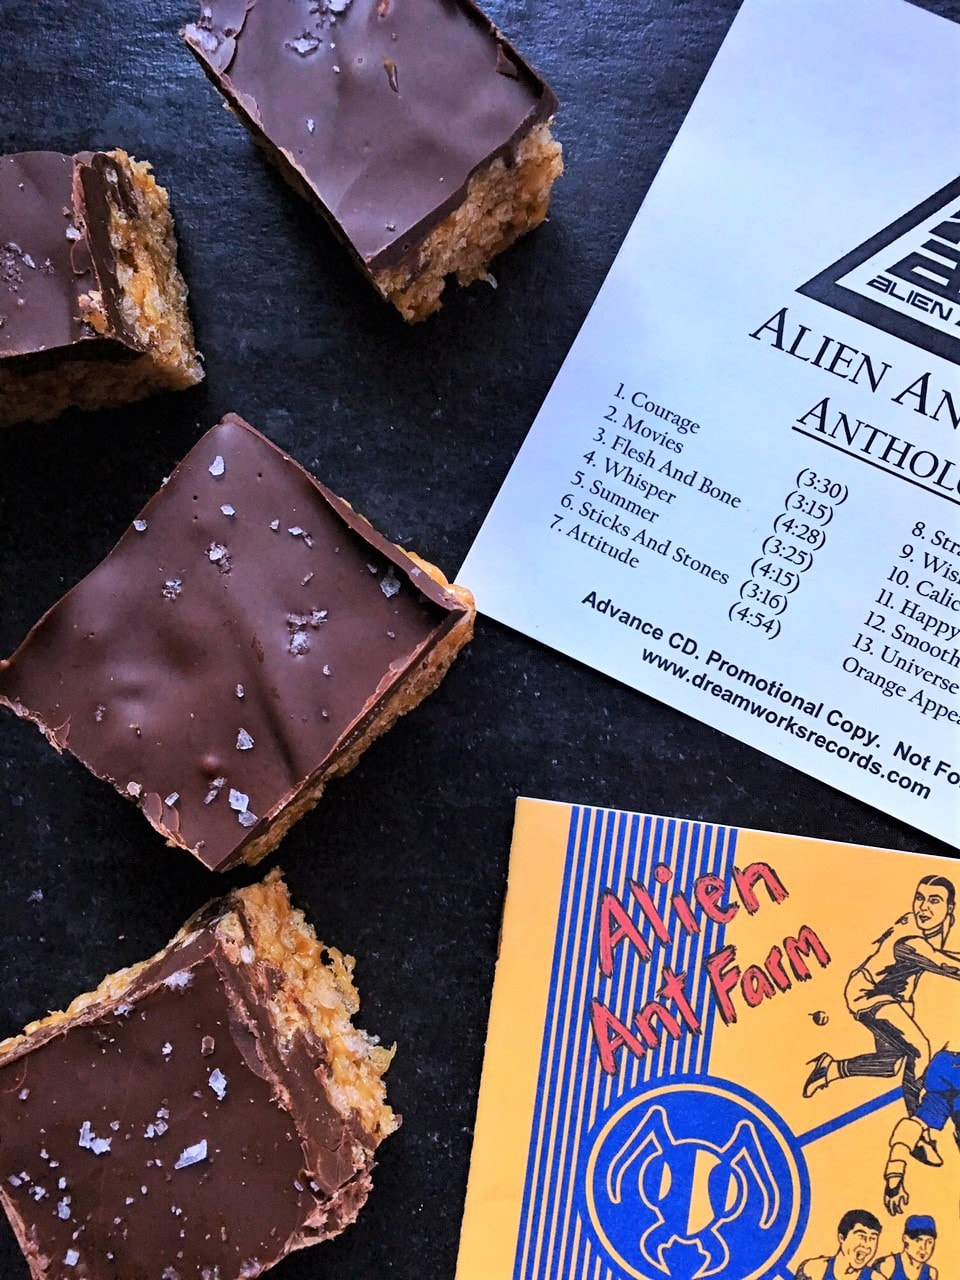
Scotcheroos. Rice Krispies treats. Never appealed to me. Never had one as a kid or adult. We did not have them in our house growing up, and honestly (if you've read the Chocolate Pavlova post www.moveablefeast.me/blog/chocolate-pavlova-with-berries), you'd know that if I'd been offered one, I would have politely declined. I detested crunch, cereal, peanut butter, butterscotch, marshmallows, nuts, and cloyingly sweet treats. Just wasn't into desserts, and no, my mother did not know how this happened.

That said, am not sure of the exact date, but at some point in my mid-forties I developed a slight sweet tooth. And this Rice-Krispies-treat variant is quite addicting.

What makes this variant different from traditional Rice Krispies treats? For starters, I used Whole Foods 365 brand Everyday Value Organic Brown Rice Crisps Cereal (Kellog's makes one too), making this gluten free. Also, there's no marshmallows, butter, corn syrup (brown rice syrup was used instead), or granulated/refined sugar (maple syrup filled that role). This does not make these healthy by any stretch, sugar is sugar–but I happen to think they taste better, a little less sweet and slightly nuttier.

They make a great alternative to cupcakes for back-to-school activities, as well as adult tail-gaters and date-day matinees (they hold up well in the movie purse). Oh, and did I mention they took five minutes to make, no bake, and my BF has asked, "When are you making these again?"

[Ed. note: The BF would like to thank Mike Cosgrove and the rest of Alien Ant Farm for being such gracious hosts to me in my previous life as a writer interviewing musicians. Dig the press-advance copy of ANThology. To this day I wonder if Annie is okay.]

Adapted from: Pinch of Yum
Number of servings: 12-20 squares (depending on how small/large you cut the bars)

Ingredients
  • ½ cup brown rice syrup (Lundberg brand was used here)
  • ½ cup creamy peanut butter
  • 2 tablespoons real maple syrup
  • 3 ¼ cups brown rice krispies (Whole Foods 365 store brand was used)
  • 10-ounce bag bittersweet chocolate chips
  • 2 ounces butterscotch chips 
  • Flaked sea salt

Directions
  1. Cut a piece of parchment paper and line the inside of a square 8 x 8 pan. There will be overhang on sides to easily lift out the scotcheroos.  Let it hang!
  2. Rice Krispies Mixture: melt brown rice syrup, peanut butter and maple syrup in a large pot until a smoth mixture forms. Add a pinch of sea salt and stir in the brown rice krispies. Remove from heat and press into your prepared square 8 x 8 pan.
  3. Chocolate Topping: melt chocolate and butterscotch chips gently and slowly (either in double boiler or microwave, I used the microwave). Heat at 25-second intervals and stir with rubber spatula. Do not overcook.
  4. Pour chocolate over the rice krispie mixture and sprinkle with flaked sea salt.
  5. Place in fridge until chocolate sets. Once set, take out at room temperature for approx 10 minutes. Hold onto sides of the parchment paper and lift out the entire square of scotcheroos.  Cut into smaller squares. 
  6. NOTE: I have made this with all bittersweet chocolate chips and it's delicious. I only add a little butterscotch because my BF adores caramely things.
2 Comments
<<Previous

    Author

    I'm Jacquie, personal chef & recipe developer in the beautiful Pacific Northwest. ​Living life with my wildly funny boyfriend and dog Marlowe. Lover of books, bourbon, chocolate and movies.​

    Archives

    May 2020
    February 2020
    January 2020
    November 2019
    October 2019
    September 2019
    August 2019
    July 2019
    May 2019
    April 2019
    March 2019
    February 2019
    January 2019
    December 2018
    November 2018
    October 2018
    September 2018
    August 2018
    July 2018
    June 2018
    May 2018
    April 2018
    March 2018
    February 2018
    January 2018
    December 2017
    November 2017
    October 2017
    September 2017
    August 2017
    July 2017

    Categories

    All
    Ahi
    Apple
    Apple Pie
    Avocado
    Bars
    BBQ
    Beans
    Beef
    Beets
    Black Bean
    Blackberry
    Blueberries
    Borscht
    Bread
    Brownies
    Brussels Sprouts
    Bundt
    Butter
    Butternut Squash
    Butterscotch
    Cabbage
    Cake
    Caramel
    Carrot
    Challah
    Champagne
    Cheesecake
    Chicken
    Chili
    Chinese
    Chinese New Year
    Chocolate
    Christmas
    Cinco De Mayo
    Citrus
    Cocktail
    Coconut Rice
    Comfort Food
    Cookies
    Corn
    Cranberries
    Crostata
    Crumble
    Cupcakes
    Curry
    Dessert
    Easter
    Egg
    Egg Nog
    Eggplant
    Fish
    Ginger
    Gingerbread
    Gluten Free
    Grain Free
    Green Sauce
    Gumbo
    Halibut
    Halloween
    Hannukah
    Healthy
    Holiday
    Holidays
    Ice Cream
    Indian
    Kale
    Key Lime
    Kohlrabi
    Kosher
    Lamb
    Latkes
    Lemon
    Lentil
    Low Carb
    Mac & Cheese
    Malt
    Mango
    Mango Salsa
    Mardi Gras
    Martini
    Memorial Day
    Mexican
    Miso Chicken
    Moroccan
    Mushrooms
    Naan
    Nectarine
    Noodles
    Olive Oil
    Parsnips
    Passover
    Pasta
    Pavlova
    Peanut Butter
    Penne
    Peppermint
    Pesto
    Pie
    Pizza
    Plums
    Pluot
    Pork
    Potatoes
    Pots De Creme
    Pudding
    Pumpkin
    Pumpkin Cake
    Quinoa
    Rajma
    Raspberries
    Ratatouille
    Risotto
    Root Beer
    Salad
    Salmon
    Salmon Bowl
    Salsa
    Sauce
    Scallops
    Shortbread
    Short Ribs
    Shrimp
    Side Dish
    Soup
    Soy Sauce Eggs
    Spicy
    Spiralized
    Steak
    Strawberries
    Sugar Free
    Summer
    Sweet
    Sweet Potatoes
    Tacos
    Tart
    Thanksgiving
    Tomatoes
    Turkey
    Valentine's Day
    Vegan
    Veganuary
    Vegetable
    Vegetarian
    Veggie Burger
    Whole30
    Whoopie Pies
    Yams
    Yellow Bell Pepper
    Yu Choy

    RSS Feed

Powered by Create your own unique website with customizable templates.
  • home
  • services
  • bio
  • blog
  • contact
  • PHOTOS (summer)
  • photos (winter)
  • PRESS
  • faq