Moveable Feast
  • home
  • services
  • bio
  • blog
  • contact
  • PHOTOS (summer)
  • photos (winter)
  • PRESS
  • faq

Feast Mode

a moveable feast blog

Apple Pie Bars

11/16/2019

6 Comments

 
Picture
I probably drive the BF crazy [Ed. note: like no one else, and for some reason I can't help myself], but I start asking him to choose his birthday cake-dessert about a month before his birthday. Usually give a choice of some great found recipe that includes either apples, caramel, butterscotch or lemon. Love hunting for the perfect recipe, with the goal of getting his eyes to bug out.

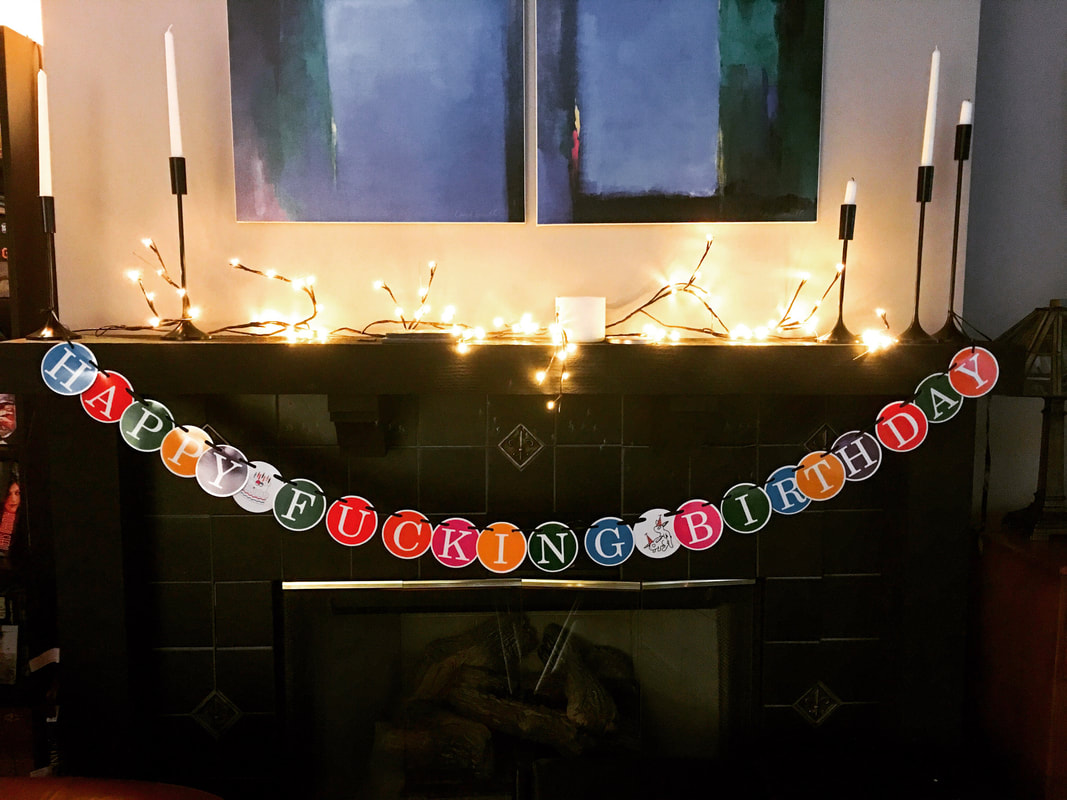
These apple pie bars are a client favorite, and whenever I make them the BF ends up in the kitchen, plaintively staring and asking if there are "extras." [Ed. note: "Oh those were for the clients?"] Needless to say the dessert has become one of his favorites, so I decided to make it for his birthday in lieu of a traditional cake. This was a very special birthday, by the way. [Ed. note: #LOLOLD]

One of the great things about this dessert is the shortbread dough is used for both the bottom crust and crumble on top. (Meaning there's no pie crust to roll out.) As the brilliant Ina Garten likes to say, "How easy is that?"

To really send it over the top, drizzle the bars with gooey caramel (optional, but recommended). Perfectly okay to eat with your hands, or dish/bowl them up with a scoop of vanilla ice cream.
Picture
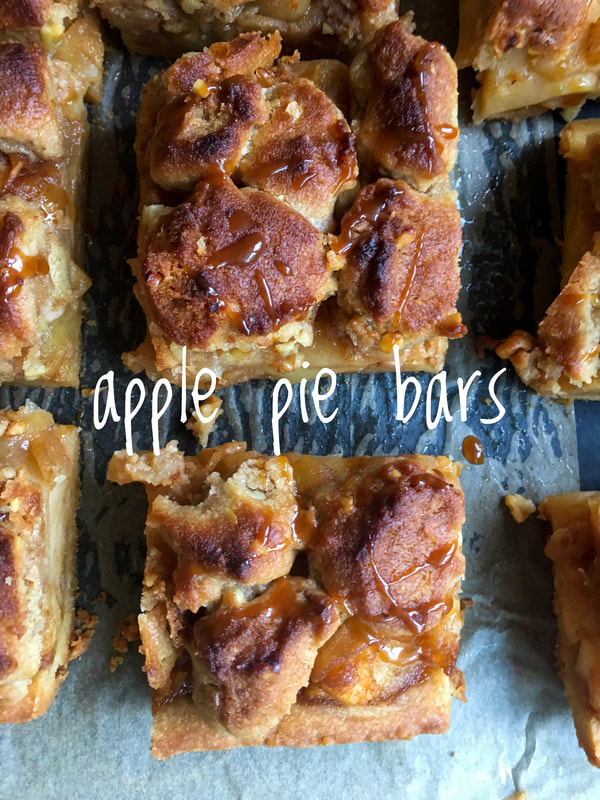
In addition to offering an alternative to your everyday pedestrian cookie, these bars have another perk: they travel well. Simply wrap up the baking pan and cut the bars when you get to your destination. As for optimal portion size, Garten advises, "I cut the bars in fairly large 3 x 3-inch squares if I'm serving them on a plate with a scoop of vanilla ice cream on the side. If I'm serving them on a platter of small petits fours to pick up with your fingers, I'll cut them in smaller bite-size pieces."

NOTES:
  • You can cut this recipe in half  by preparing it in an 8 x 8-inch pan.
  • After baking, cool completely, wrap tightly and store at room temperature for up to two days.  Great for birthdays, every day, and is a perfect make-ahead dessert for Thanksgiving.​

PS: Speaking of Thanksgiving, a year ago we were thinking ahead with this whipped cranberry butter (www.moveablefeast.me/blog/whipped-cranberry-butter). Also, Adam Sandler sings!

PPS: Another client-approved holiday-time dessert, your friends and family won't know this yummy mini pumpkin cheesecake is sugar-free and low-carb. That is, unless you tell them. So don't. (www.moveablefeast.me/blog/mini-pumpkin-cheesecake-sugar-free-and-low-carb)
Picture
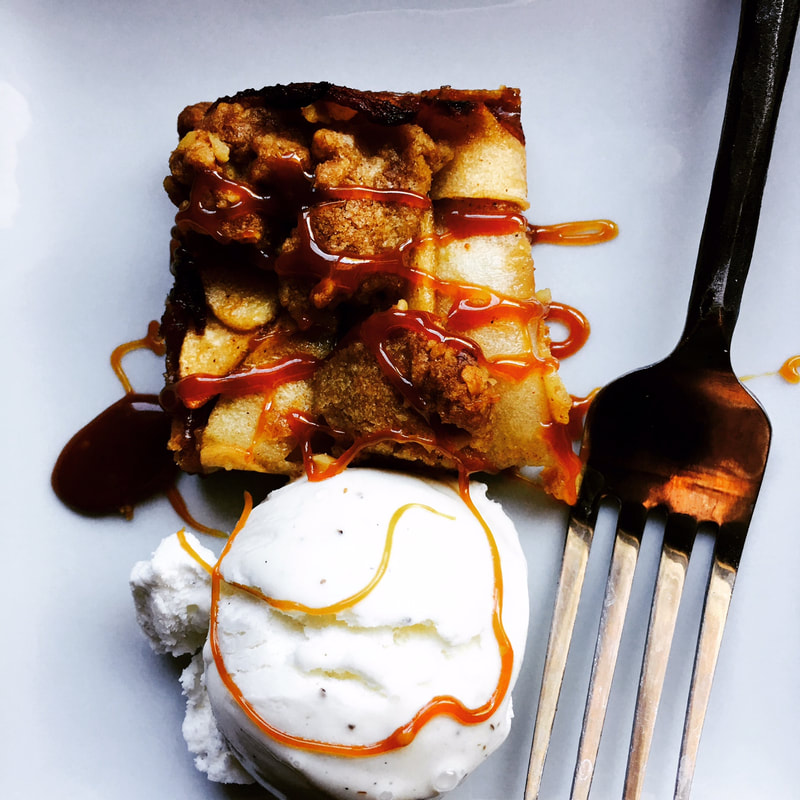
Adapted from: Ina Garten, Cooking For Jeffrey
Number of Servings: Makes one 9 x 13-inch pan

Ingredients
Crust
  • 1 pound (4 sticks) unsalted butter, at room temperature [Ed. note: ROOM TEMPERATURE]
  • ¾ cup granulated sugar
  • ½ cup light brown sugar, lightly packed
  • 2 teaspoons pure vanilla extract
  • 4 cups all-purpose flour
  • 1 ½ teaspoons kosher salt
  • ½ cup chopped walnuts
  • 1 teaspoon ground cinnamon
Apple Filling
  • 3 pounds Granny Smith apples, peeled, quartered, cored, and sliced ⅛-inch thick (6 large)
  • 2 tablespoons freshly squeezed lemon juice
  • ¼ cup granulated sugar
  • 1 teaspoon ground cinnamon
  • ⅛ teaspoon ground nutmeg
  • 4 tablespoons (½ stick) unsalted butter
To Serve
  • Vanilla ice cream
  • Caramel sauce

Directions
Crust
  1. Place a rack in the center of oven and preheat to 375 ºF. Line a 9 x 13-inch baking pan with parchment paper so that paper hangs over two edges of the pan by about two inches. This will make the pie bars easier to remove after it’s baked.
  2. Place the butter, granulated sugar, brown sugar, and vanilla in the bowl of an electric mixer fitted with the paddle attachment. Beat on medium speed for 2 minutes, until light and creamy. Sift the flour and salt together and, with the mixer on low, slowly add to the butter-sugar mixture, beating until combined.
  3. Scatter ⅔ of the dough, in clumps, into your baking pan, and press it lightly with floured hands on the bottom and ½ inch up the sides. Refrigerate for 20 minutes.
  4. Bake for 18-20 minutes, until crust is golden brown. Set aside to cool.
  5. Put mixing bowl with the remaining dough back in the mixer, add walnuts and cinnamon, and mix on low speed to combine. Set aside.
  6. Reduce the oven to 350 ºF.
Apple Filling
  1. Combine the Granny Smith apples and lemon juice into a very large bowl. Add granulated sugar, cinnamon, and nutmeg and mix well.
  2. Melt the butter in a large (10-inch-diameter) pot, add the apples, and simmer over medium to medium-low heat, stirring often, for 12-15 minutes, until apples are tender and the liquid has mostly evaporated.
  3. Spread the apples evenly over the crust, leaving a ½-inch border.
  4. Pinch medium pieces of the remaining dough with your fingers and drop them evenly on top of the apples (they will not be covered). Bake for 25-30 minutes, until the topping is browned. NOTE: I sometimes place the pan under the broiler to get the topping a little more browned.  Watch carefully so it doesn't burn.
To Serve
  1. Cool completely and cut into bars.
  2. Drizzle with caramel and serve with ice cream, or just pick 'em up with your hands.
Picture
6 Comments

Nectarine, Plum & Raspberry Crumble

8/22/2019

2 Comments

 
Picture
So this week marked the official return to school and, sniff, a signal that summer is coughing up its last gasp.

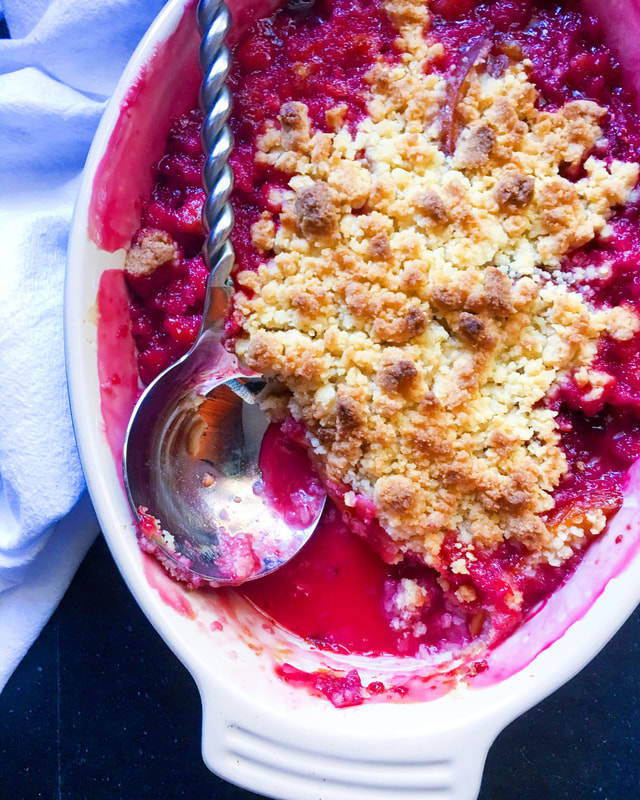
Time for dessert!

This sweet-tart, vibrantly colored crumble was a last-minute request for a recent dinner party. Pressed to come up with something quickly, I tried to steer away from more complicated desserts (i.e., no pie crusts to roll out, chill, crimp, blind bake, etc.), or even complicated fruits to steam, peel, or pit (cherries would have made this arduous). The nectarine, plum and raspberry triumvirate immensely simplified the process. No food processor or pastry cutter required. Prior to baking, it literally took ten minutes to prepare. [Ed. note: Damn, woman.]
Picture
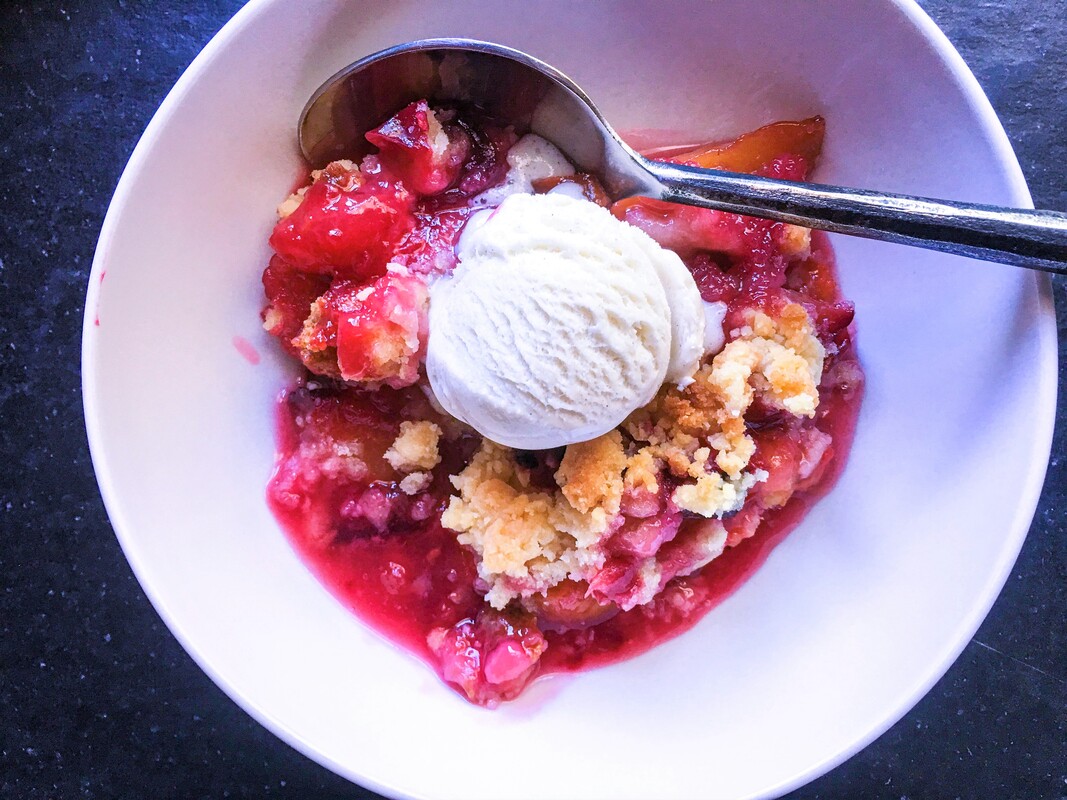
I decided on a crumble as opposed to a streusel topping [Ed. note: Am so triggered by this I do not know what I should be triggered by], because I felt this particular fruit combo would have been overpowered by a spicy oatmeal and nut topping. Love streusel for apples, pears, blackberries and even blueberries, but this fruit combo needed something simpler, more delicate.

What is the difference between a crumble, crisp and cobbler? A crumble has a shortbread cookie-like topping. A crisp's topping is streusel based, typically made with spiced oatmeal and nuts, and a cobbler has biscuit dough dolloped on top.

​Don't get me started on the Betty, pandowdy, or buckles, grunts and slumps!

PS: A year ago we broke out the Spiralizer for some healthy chicken parmesan with veggie noodles (www.moveablefeast.me/blog/healthy-chicken-parmesan-with-veggie-noodles).

PPS: Channeling the late Anthony Bourdain, things got a little NSFW with this sinful mac and cheese (www.moveablefeast.me/blog/anthony-bourdains-macaroni-and-cheese).
Picture
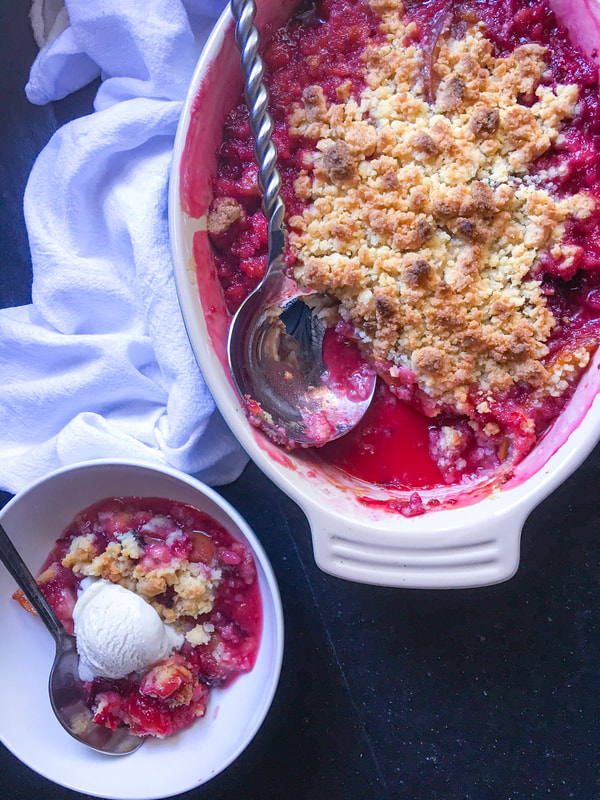
Crumble topping inspired by Smitten Kitchen
Number of servings: 6-8

Ingredients
​Fruit Filling
  • 1 pound nectarines, halved, pitted, cut into ¾-inch-thick slices 
  • 1 pound red or purple plums
  • 6 ounces fresh raspberries
  • ¼ cup sugar
  • 2 tablespoons tapioca flour
  • Pinch of salt
  • Vanilla ice cream 
Crumble Topping
  • ½ cup unsalted butter, melted
  • 6 tablespoons granulated sugar
  • 1 teaspoon baking powder
  • 1 ⅓​ cups all-purpose flour
  • Two pinches of salt

Directions
Crumble Topping
  1. In a medium size bowl, stir sugar, baking powder, flour, salt and melted butter  together with a fork until crumbs form. Set aside.
Fruit Filling
  1. Position rack in center of oven and preheat to 375 ºF.
  2. Combine nectarines, plums, raspberries, sugar, and tapioca in large bowl; toss to blend.
  3. Transfer mixture to a 11 x 7 x 2-inch baking dish. Sprinkle topping evenly over fruit.
  4. Bake until fruit mixture is bubbling and topping is golden brown, about 40-50 minutes.
  5. NOTE: the crumble topping will brown before the fruit is finished baking. Once it reaches the brown color that you want (this might take 25-30 minutes), take a piece of foil and lay it very loosely over the crumble.
  6. Cool 30 minutes.
  7. Serve at room temperature [Ed. note: Oh boy the return of ROOM TEMPERATURE] with vanilla ice cream.
2 Comments

Blackberry Pie with Honeyed Creme Fraiche

8/14/2018

8 Comments

 
Picture
"More people will come if they think we have punch and pie!"
~ Eric Theodore Cartman

Twenty-one years ago, four crudely animated foul-mouthed boys began their seemingly endless journey through grade school in the quaint, cozy mountain town of South Park. Through alien abductions, soul-singing chefs, cannabis-drenched towels, and commentary covering all possible levels of political incorrectness, one thing has been perpetually certain: Eric Cartman loves pie. Loves all desserts, actually.

Growing up, my siblings and I would ask my Mom, "Can we have dessert?" Her reply would often be, "Yes, you can have a piece of fruit." As if channeling Cartman, we would all bellow in unison, "But Mom, fruit is not a dessert."

Honestly, in this form, it really is.
Picture
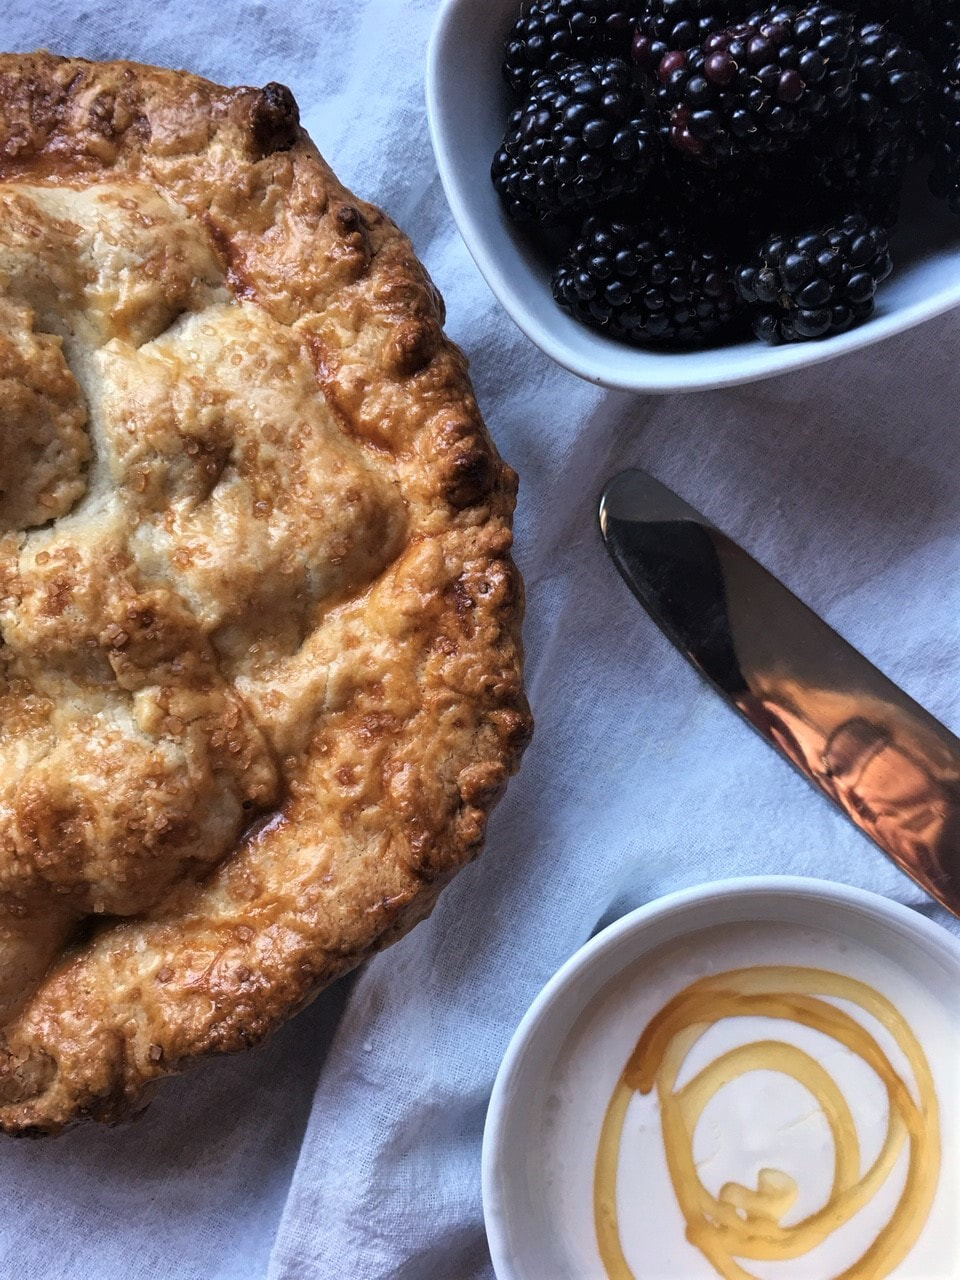
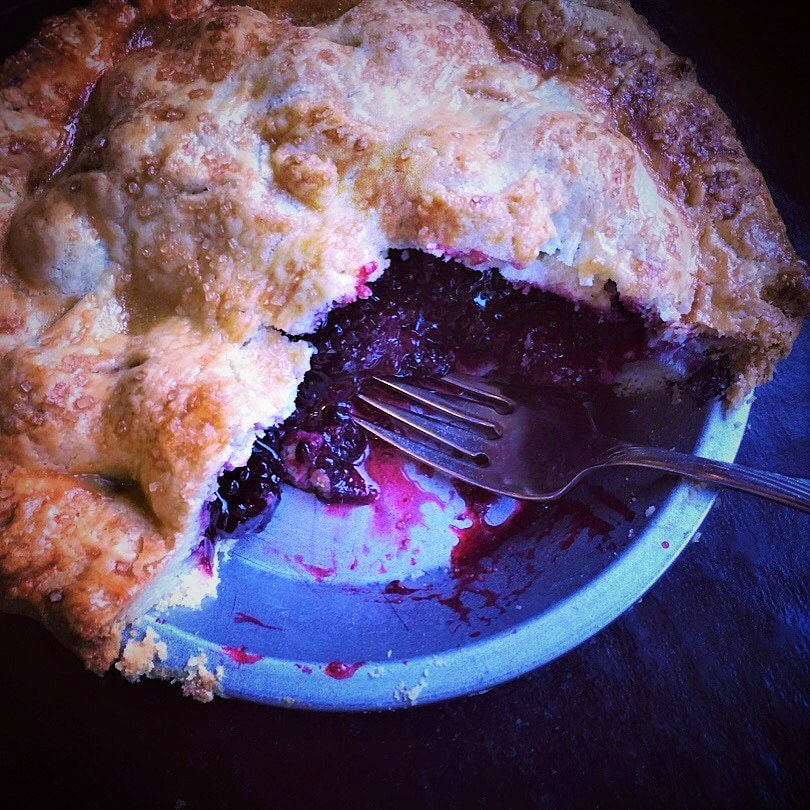
Whenever I bake a pie, especially a blackberry pie, I recall the mother of my best childhood friend (Mrs. C). A master pie maker. She taught me how to make a pie from scratch.

We picked wild blackberries from her daughter's back yard. The berries were so plump, we filled the huge plastic bucket within 15 minutes. Of all the priceless baking tips Mrs. C gave, I'm most thankful for her method of thickening a pie filling with tapioca flour (a.k.a. tapioca starch) instead of cornstarch or all-purpose flour. Tapioca flour makes the filling bright and clear, whereas cornstarch or A.P. flour can give the filling a cloudy look and chalky taste.

This recipe is adapted from Julia Frey's blog Vikalinka. Besides some general streamlining, my changes include adding a bit of cinnamon to the filling, upping the amount of blackberries, and subbing tapioca flour in place of A.P. flour. I love her idea of topping the pie with honeyed creme fraiche (a favorite that really complements the blackberries well).

One note, if you're lucky enough to have wild blackberries in your backyard, use them (and I'm envious). If not, store bought will do just fine. If you're short on time, you can also use your favorite store-bought pie crust. Just don't forget the honeyed creme fraiche. More people will come if they think you have honeyed creme fraiche.
Picture
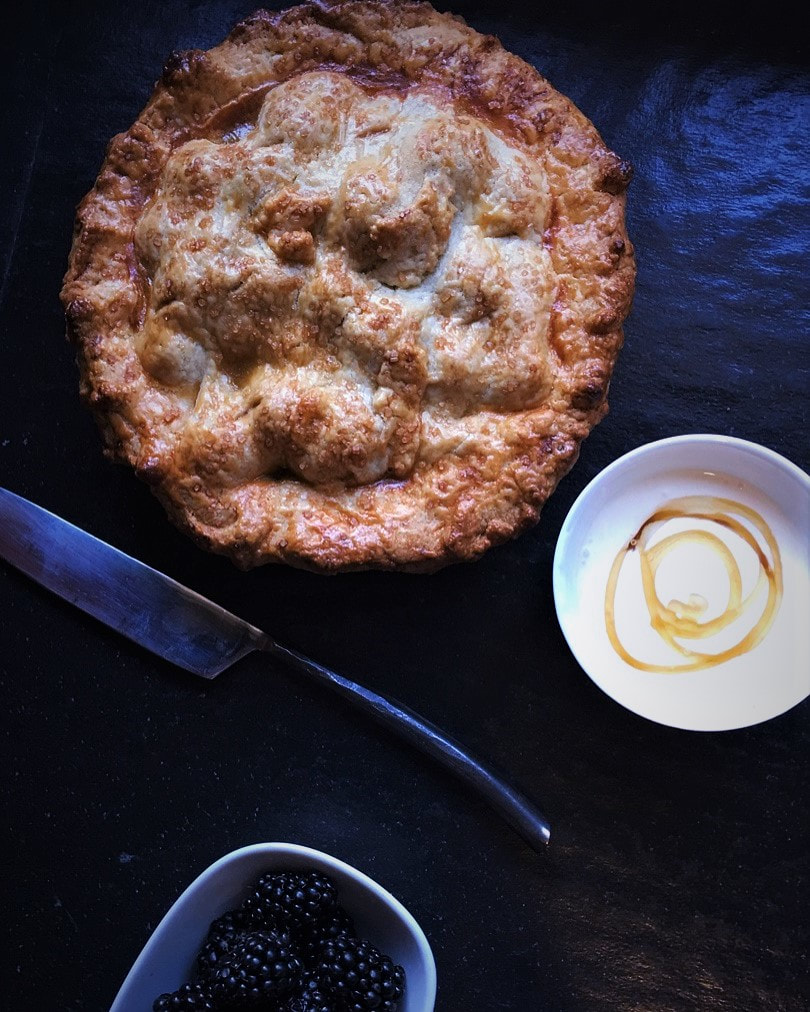
Adapted from: Vikalinka
Number of servings; 8

Ingredients
Blackberry Filling
  • 5-6 cups fresh blackberries
  • ½-¾​ cup sugar (depending on how sweet your berries are; I use less since I prefer a less-sweet pie)
  • 3-4 tablespoons tapioca flour or cornstarch (use 3 tablespoons if making the pie with wild-picked berries, 4 tablespoons if making with store-bought very ripe berries)
  • Zest of 1 lemon
  • ¼ teaspoon cinnamon
  • 1 egg for the eggwash
Pie Crust
  • 3 cups flour
  • ¾  tespoon salt
  • ¾ cup unsalted butter
  • ¾ cup sour cream
Honeyed Creme Fraiche
  • 2 tablespoons honey
  • 1 cup creme fraiche

Directions
Blackberry Filling
  1. Preheat the oven to 400 °F.
  2. In a large bowl combine fresh blackberries with sugar, tapioca flour and lemon zest by lightly tossing them taking care not to mash blackberries. Let sit while preparing the pie crusts.
Pie Crust
  1. In a large bowl, combine flour and salt.
  2. Add the butter using a pastry blender, cut it into the flour until it resembles coarse crumbs. Add sour cream and work it into the mixture with your hands until it comes together.
  3. Knead briefly, wrap in plastic wrap, and chill in the fridge for 30 minutes.
  4. On a lightly floured surface, roll out ⅔ of the pie crust to fit a 9-inch pie plate. It should be large enough so the sides hang over the edges of the plate. 
  5. Drape the rolled out pastry on the rolling pin and carefully transfer it into the pie plate. Chill in fridge while rolling out the top crust.
  6. Fill pie crust with blackberry filling.
  7. Roll out the remaining pastry and cover the pie with it.
  8. Pinch sides of the pie and brush the top with lightly beaten egg. Cut slits in the pie and sprinkle with additional sugar, if desired.
  9. Place pie on baking sheet to catch any juices that might bubble out while it's cooking. Bake in  preheated oven for 30 minutes until golden. At this point, check it. If it's getting too dark, place a piece of aluminum foil over outer edge of pie and continue baking for 15-20 more minutes, until crust has browned and filling is bubbly. (It must be visibly bubbling or it won't set properly.)
  10. Remove from oven and place on wire rack. Cool completely before serving.
  11. Swirl honey into creme fraiche and serve with pie.

8 Comments

Key Lime Pie

8/1/2018

4 Comments

 
Picture
“Cut my pie into four pieces, I don’t think I could eat eight.”
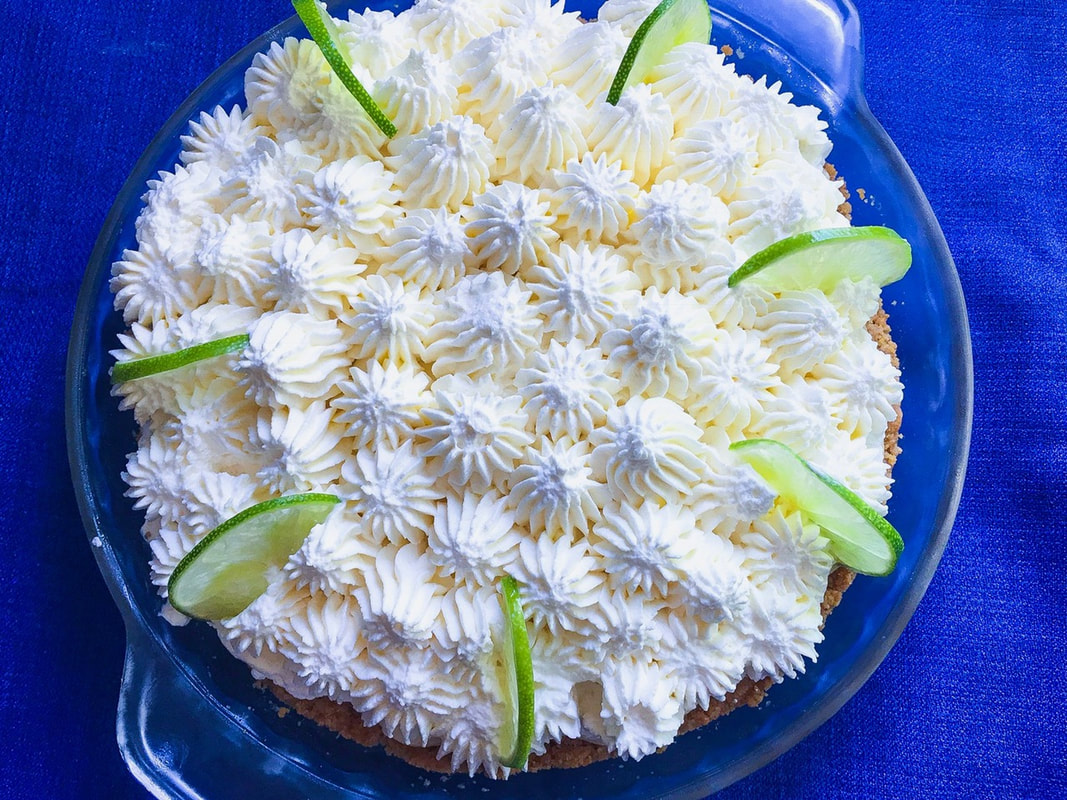
- Yogi Berra


August 3 is the MIL/BF-mother's birthday (passed in 2016), and last year we got into some trouble with butterscotch (www.moveablefeast.me/blog/butterscotch-cookie-ice-cream-sandwiches), a favorite of hers.

She also loved anything with lemon or lime [Ed. note: Marie Callender's should have gone out of business, such was our love of their sour-cream varietals.], so this year I'm honoring her with a killer key lime pie adapted from Joe's Stone Crab restaurant in Miami. The BF definitely inherited the "tart" gene, and vociferously approves.
Picture
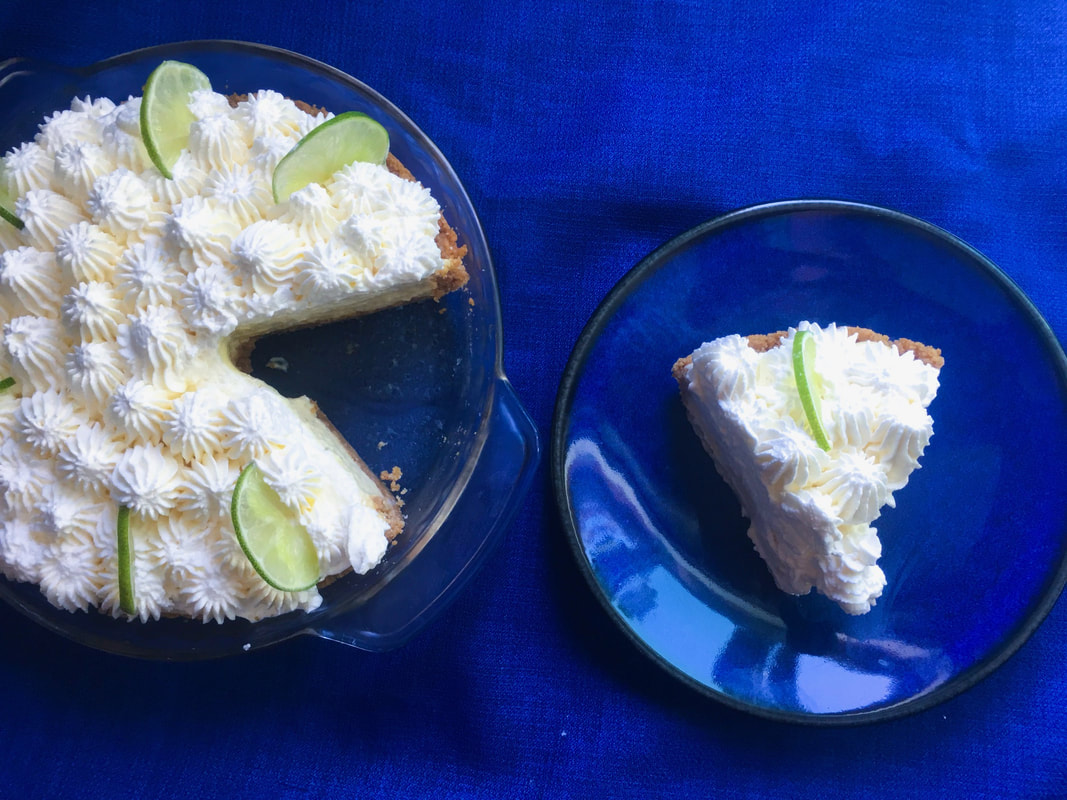
​Creamy, tart filling with a raft of whipped cream on top, utterly addicting. It's also very easy to make, as in under an hour to assemble. Why don't I make this more often? [Ed. note: Because my primary care physician will send you a personal note, "Please stop."] 

A perfect summer dessert, especially for those who possess the "tart" gene.
Picture
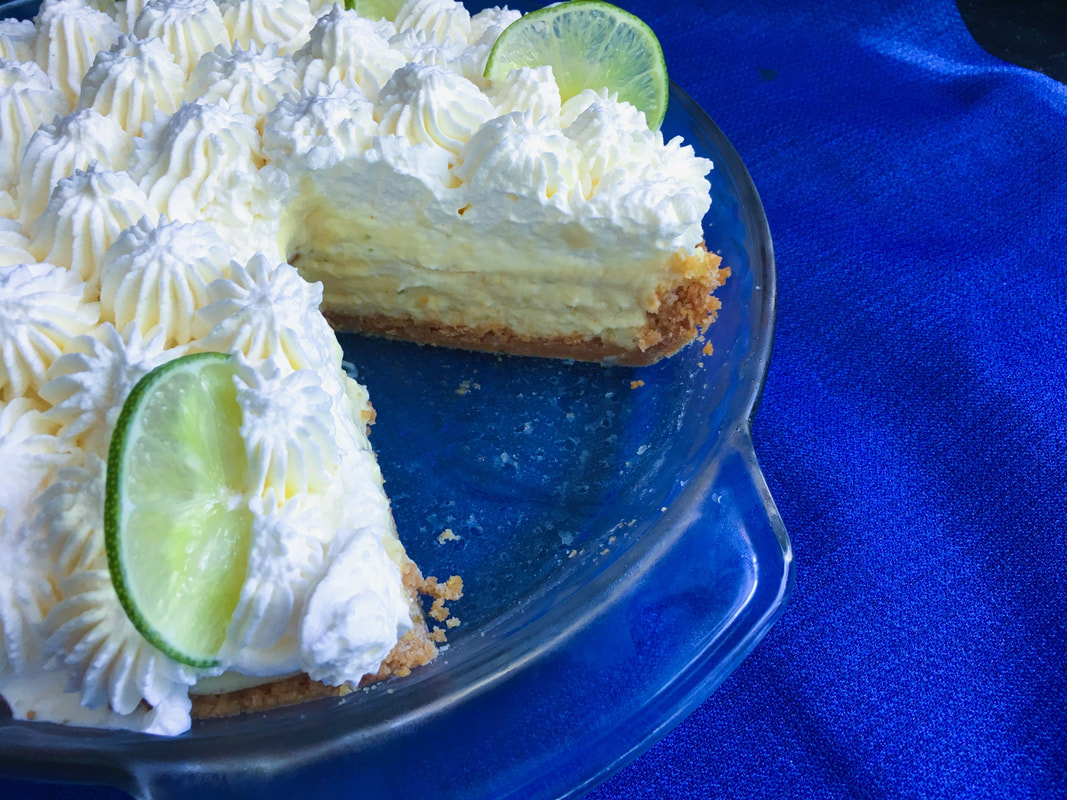
Adapted from: Joe's Stone Crab
Number of servings: 8

Ingredients​
Graham Cracker Crust
  • 1 paper-wrapped package graham crackers (⅓ of a 1 pound box), or 1 cup plus 2 ½ tablespoons graham cracker crumbs (to save time and keep the food processor clean, I used ready-made graham cracker crumbs)
  • 5 tablespoons melted unsalted butter
  • ⅓ cup sugar
Filling
  • 3 egg yolks
  • Grated zest of 2 limes (about 1 ½ teaspoons)
  • 1 can (14 ounces) sweetened condensed milk
  • ⅔ cup freshly squeezed lime juice (key lime, if you can get it, otherwise regular lime juice is fine; Nellie & Joe's Key West lime juice was used here)
Topping
  • 2 cups heavy whipping cream, chilled
  • 5-6 tablespoons powdered sugar

Directions
Graham Cracker Crust
  1. Preheat oven to 350 °F. Butter 9-inch pie pan.
  2. Break up graham crackers, place in food processor and process to crumbs (if you don't have a food processor, place crackers in large ziploc bag and crush with a rolling pin). Add melted butter and sugar, and pulse/stir until combined.
  3. Press mixture into bottom and sides of pie pan, forming a neat border around the edge. I like to use the outer edge of a heavy measuring cup to press in neat/firm sides, but use your fingertips if you prefer.
  4. Bake crust until set and golden, about 8-10 minutes. Set aside on wire rack. Leave oven on.
Filling
  1. With an electric mixer with wire whisk attachment, or a hand-held mixer, beat egg yolks and lime zest at high speed until very fluffy, about 5 minutes.
  2. Gradually add condensed milk and continue to beat until thick, 3-4 minutes longer. Lower the mixer speed and slowly add lime juice, mixing just until combined, no longer.
  3. Pour mixture into the pie crust. Bake for 10 minutes or until filling has set.
  4. Cool completely on wire rack, then refrigerate for at least 3 hours. 
Topping
  1. Whip the cream and powdered sugar until nearly stiff. Pile on pie or place in piping bag and pipe as done in photos. Ideally, you should chill for another 2-3 hours.
  2. Freeze for 15-20 minutes before serving.

NOTES:
  • I doubled the whipped cream from the original recipe. If you are normal, go ahead and half it. [Ed. note: Being normal is breathtakingly overrated.]
  • I used Nellie & Joe's Key West Lime Juice., which has a wonderful key-lime flavor. Don't confuse this with the weird juice in the little lime-shaped bottle. This is not that.
  • Ready-made graham cracker crumbs were used here. Total time saver.
  • If you decorate with fresh limes on top of whipped cream, take off the limes after a few hours as they cause the whipped cream to taste bitter.
  • Key lime pie keeps in refridgerator for one week, though certainly not around here. [Ed. note: HEY...]

PS: One year ago...
www.moveablefeast.me/blog/chocolate-pavlova-with-berries
Picture
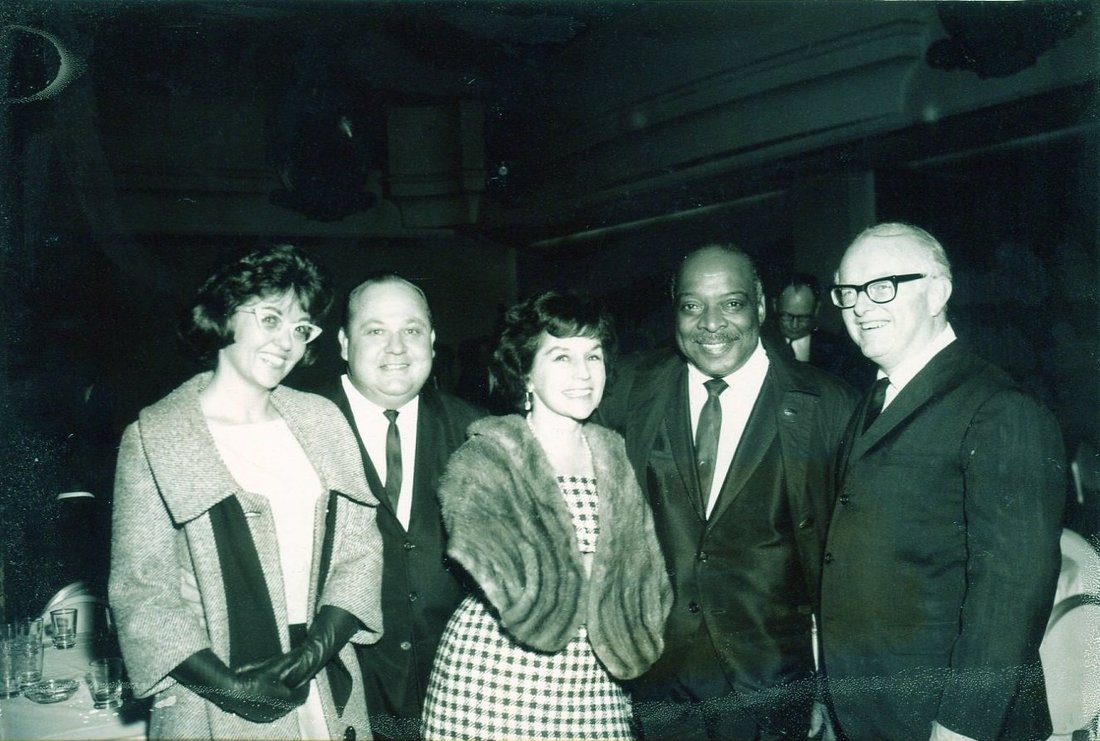
BF's mom Kathy (far left) with friends, and Count Basie, at the Fairmont Hotel in San Francisco, 1961.
4 Comments

    Author

    I'm Jacquie, personal chef & recipe developer in the beautiful Pacific Northwest. ​Living life with my wildly funny boyfriend and dog Marlowe. Lover of books, bourbon, chocolate and movies.​

    Archives

    May 2020
    February 2020
    January 2020
    November 2019
    October 2019
    September 2019
    August 2019
    July 2019
    May 2019
    April 2019
    March 2019
    February 2019
    January 2019
    December 2018
    November 2018
    October 2018
    September 2018
    August 2018
    July 2018
    June 2018
    May 2018
    April 2018
    March 2018
    February 2018
    January 2018
    December 2017
    November 2017
    October 2017
    September 2017
    August 2017
    July 2017

    Categories

    All
    Ahi
    Apple
    Apple Pie
    Avocado
    Bars
    BBQ
    Beans
    Beef
    Beets
    Black Bean
    Blackberry
    Blueberries
    Borscht
    Bread
    Brownies
    Brussels Sprouts
    Bundt
    Butter
    Butternut Squash
    Butterscotch
    Cabbage
    Cake
    Caramel
    Carrot
    Challah
    Champagne
    Cheesecake
    Chicken
    Chili
    Chinese
    Chinese New Year
    Chocolate
    Christmas
    Cinco De Mayo
    Citrus
    Cocktail
    Coconut Rice
    Comfort Food
    Cookies
    Corn
    Cranberries
    Crostata
    Crumble
    Cupcakes
    Curry
    Dessert
    Easter
    Egg
    Egg Nog
    Eggplant
    Fish
    Ginger
    Gingerbread
    Gluten Free
    Grain Free
    Green Sauce
    Gumbo
    Halibut
    Halloween
    Hannukah
    Healthy
    Holiday
    Holidays
    Ice Cream
    Indian
    Kale
    Key Lime
    Kohlrabi
    Kosher
    Lamb
    Latkes
    Lemon
    Lentil
    Low Carb
    Mac & Cheese
    Malt
    Mango
    Mango Salsa
    Mardi Gras
    Martini
    Memorial Day
    Mexican
    Miso Chicken
    Moroccan
    Mushrooms
    Naan
    Nectarine
    Noodles
    Olive Oil
    Parsnips
    Passover
    Pasta
    Pavlova
    Peanut Butter
    Penne
    Peppermint
    Pesto
    Pie
    Pizza
    Plums
    Pluot
    Pork
    Potatoes
    Pots De Creme
    Pudding
    Pumpkin
    Pumpkin Cake
    Quinoa
    Rajma
    Raspberries
    Ratatouille
    Risotto
    Root Beer
    Salad
    Salmon
    Salmon Bowl
    Salsa
    Sauce
    Scallops
    Shortbread
    Short Ribs
    Shrimp
    Side Dish
    Soup
    Soy Sauce Eggs
    Spicy
    Spiralized
    Steak
    Strawberries
    Sugar Free
    Summer
    Sweet
    Sweet Potatoes
    Tacos
    Tart
    Thanksgiving
    Tomatoes
    Turkey
    Valentine's Day
    Vegan
    Veganuary
    Vegetable
    Vegetarian
    Veggie Burger
    Whole30
    Whoopie Pies
    Yams
    Yellow Bell Pepper
    Yu Choy

    RSS Feed

Powered by Create your own unique website with customizable templates.
  • home
  • services
  • bio
  • blog
  • contact
  • PHOTOS (summer)
  • photos (winter)
  • PRESS
  • faq