Moveable Feast
  • home
  • services
  • bio
  • blog
  • contact
  • PHOTOS (summer)
  • photos (winter)
  • PRESS
  • faq

Feast Mode

a moveable feast blog

Mini Pumpkin Whoopie Pies with Apple Cider Cream Cheese Filling

10/25/2017

0 Comments

 
Picture
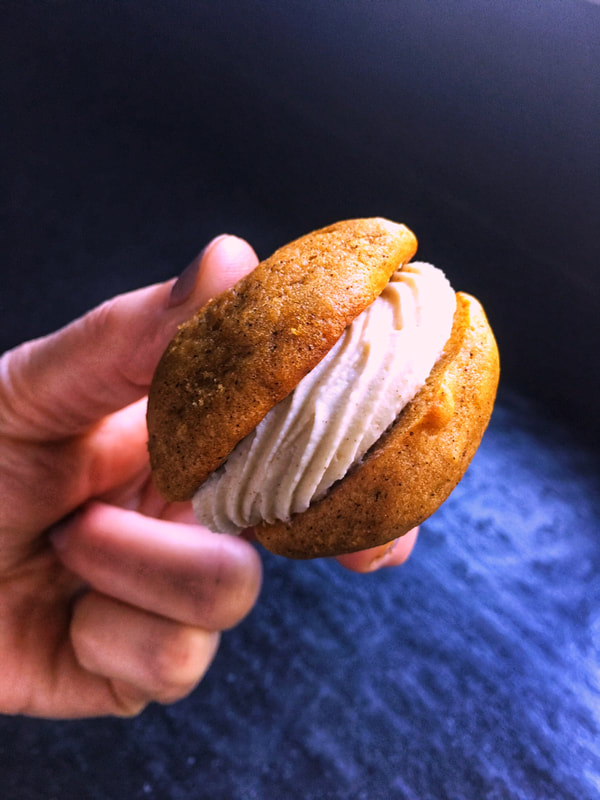
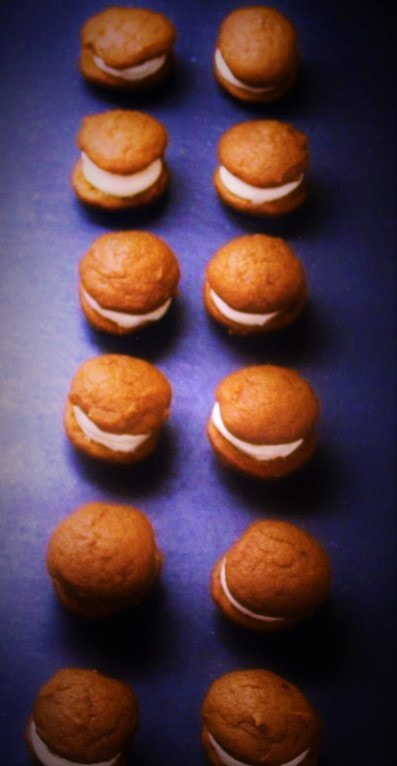
​How fun are these? I make mini whoopie pies every Halloween.

Every year I try a different flavor for the filling: cinnamon, maple, eggnog, butterscotch, bourbon [Ed. Note: HELLO.] and this year, apple cider. This may be my favorite yet.
​
The secret ingredient to this filling is boiled apple cider. If you haven't heard of bottled boiled apple cider, don't worry, I didn't either until last year. It's a good product to have in your arsenal.

Ordered it online from King Arthur Flour www.kingarthurflour.com/shop/items/boiled-cider-1-pint and I've used it for muffins, cookies, cakes, pie, and it makes a great glaze for meats when mixed with whole grain mustard.

King Arthur Flour describes their boiled cider as "magically capturing the intense, robust flavor of just-picked apples, preserving it in liquid form." Couldn't agree more.
Picture
​

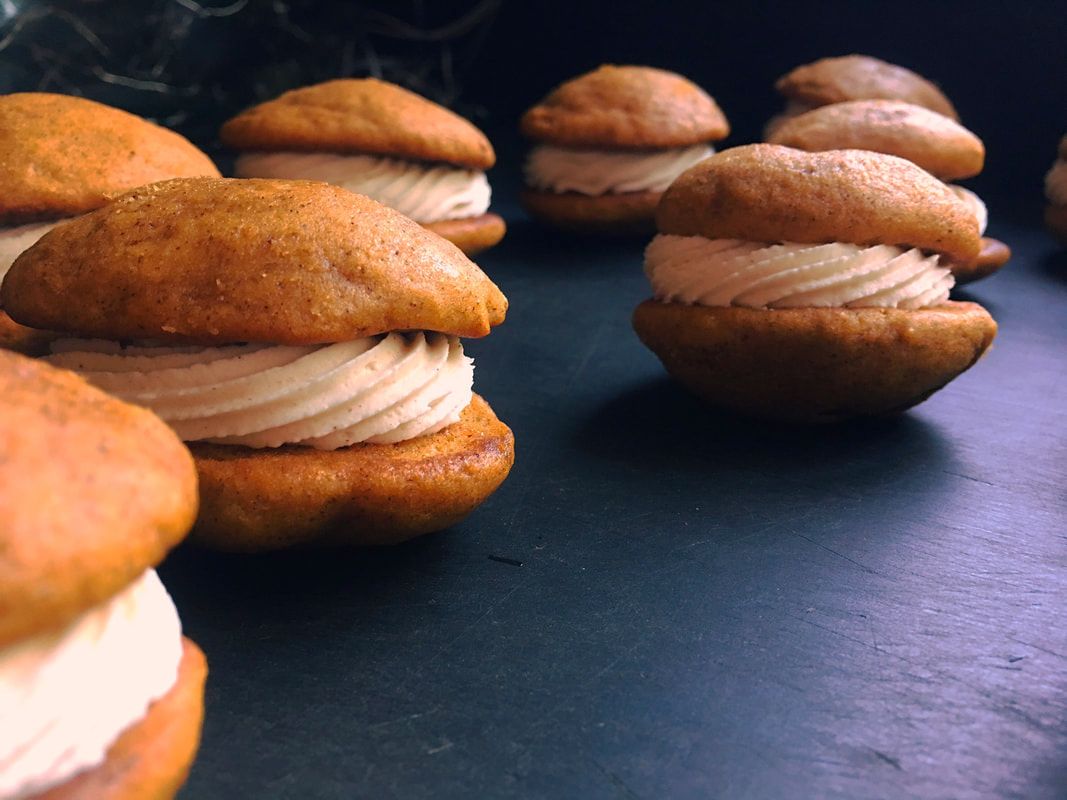
Kids love them, and adults do too (have passed them around on trays of finger foods and they were the hit of the night).​

​These little mounds of goodness hold well in the fridge for up to three days. Great for make-ahead parties.

Know there are many who despise the word "moist," but I will use it here, because the cookie part is, well, moist...and flavorful. All the autumn flavors packed into one tiny little mouthful of goodness: pumpkin, cinnamon, nutmeg, clove, and apple cider.
Picture
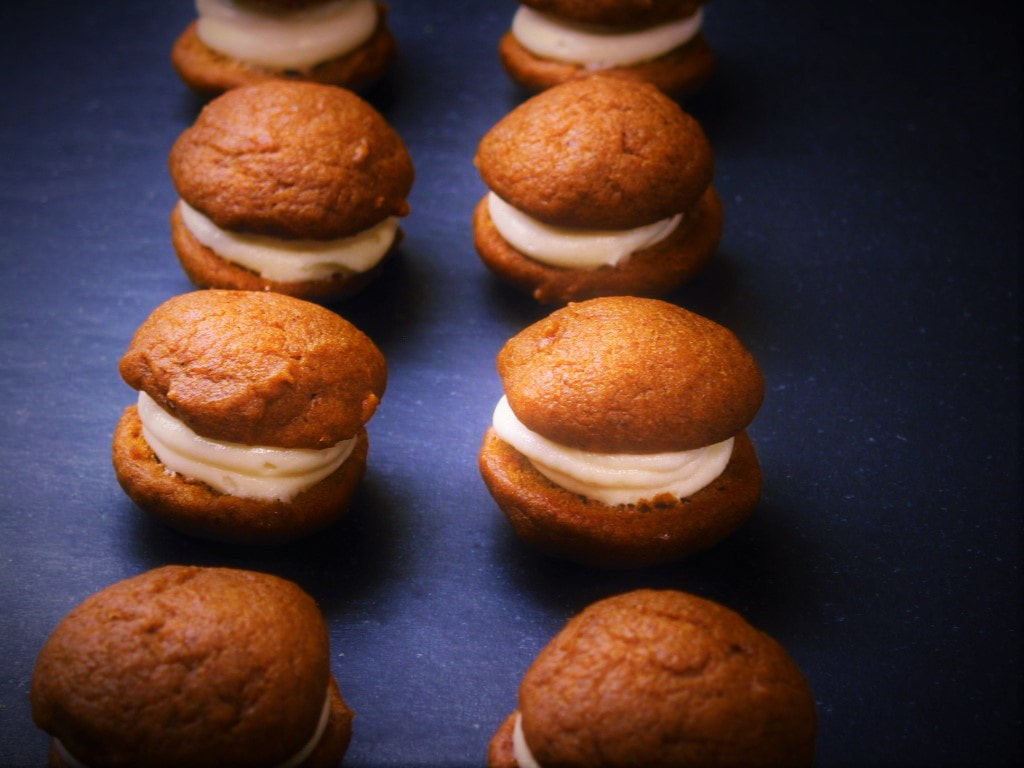
Adapted from: Every Day with Rachel Ray (Whoopie Pies); Marbled, Swirled, and Layered by Irvin Lin (Apple Cider Cream Cheese Filling).

Number of servings: makes approximately 12-14 whoopie pies (with tablespoon scoop) and 20 whoopie pies (with teaspoon scoop).

Ingredients
Whoopie Pies
  • 1 stick (4 ounces) unsalted butter, melted
  • 1 cup packed light brown sugar
  • 2 large eggs, at room temperature, lightly beaten
  • 1 cup canned pure pumpkin puree
  • 1 ½ tablespoons pumpkin pie spice
  • 1  teaspoon pure vanilla extract
  • 1 teaspoon baking powder
  • 1 teaspoon baking soda
  • ¾ teaspoon salt
  • 1  ⅔ cups flour

Filling
  • 8 ounces cream cheese, room temperature
  • 1 stick (4 ounces) butter, room temperature
  • 2 ½-3 cups powdered sugar, sifted
  • 2 tablespoons boiled cider (see link above)
  • ½ teaspoon ground cinnamon
  • A pinch of salt

Directions
Whoopie Pies
  1. Preheat oven to 350 °F. Line two baking sheets with parchment paper.
  2. In large bowl, whisk together the melted butter and brown sugar until smooth. Whisk in eggs, pumpkin puree, pumpkin pie spice, vanilla, baking powder, baking soda and salt. Fold in flour, using a rubber spatula.
  3. Using  1 tablespoon or 1 teaspoon ice-cream scoop with a release mechanism, drop 12 mounds of batter, evenly spaced, onto each baking sheet. Bake until springy to the touch, about 10 minutes. Transfer to a rack to cool completely.
Filling
  1. Using an electric mixer, cream the cream cheese and butter. Add sifted powdered sugar 1 cup at a time (I don't like it too sweet, so start tasting at the 2 ½ cup mark and keep adding sugar until it's to your liking). Beat on low until smooth and fully combined.
  2. Add boiled cider, ground cinnamon and a pinch of salt. Beat together until frosting is smooth. If the filling is too runny, refrigerate for 15 to 20 minutes to firm up.
Assembly
  1. Line a baking sheet with parchment paper and set aside. Transfer filling into a pastry bag or a ziplock bag and snip the end.
  2. When cookies have cooled completely, pipe a large dollop of filling on the flat side of half the cookies. Sandwich with the remaining cookies, pressing down slightly so that the filling spreads to the edge of the cookies.
  3. Transfer to prepared baking sheet and cover with plastic wrap. Refrigerate cookies at least 30 minutes before serving and up to 3 days.
Picture
Happy Halloween!
0 Comments

Jalapeño, Serrano & Fresno Pepper Roast Chicken

10/18/2017

0 Comments

 
Picture
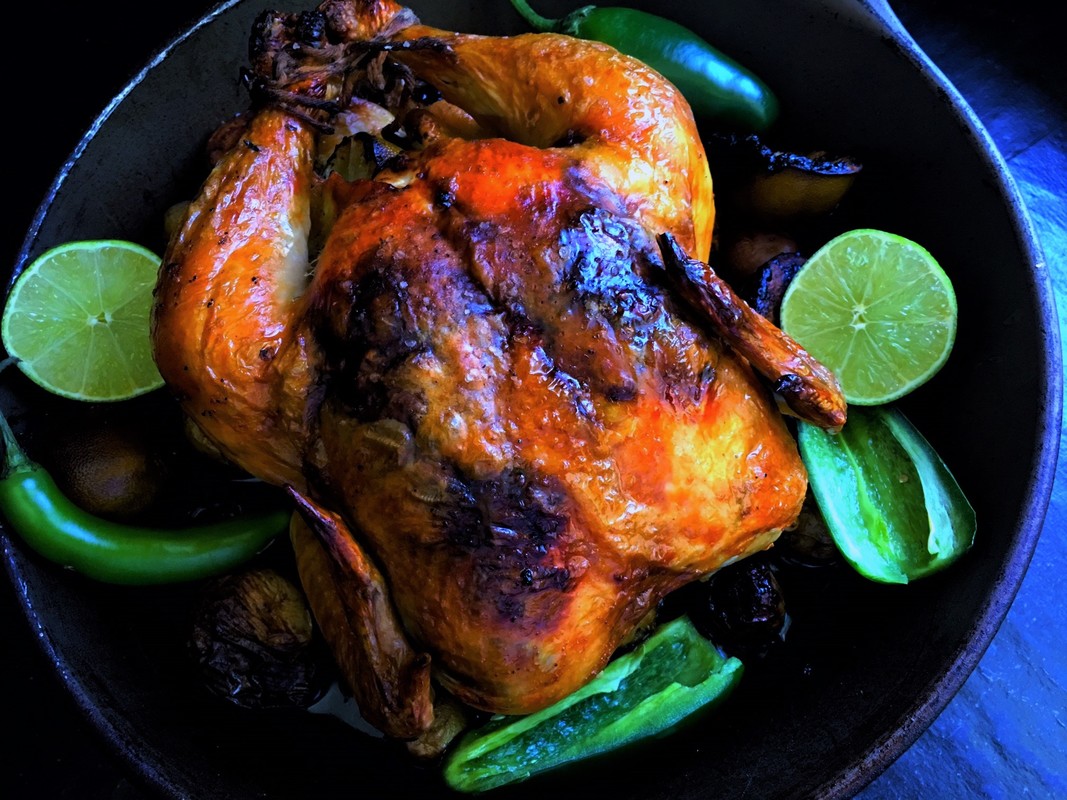
Sometimes my BF and I like a little heat. Not scorch-your-tongue-off heat, but enough to have a little pop. Not sure why Halloween brings cravings for spicy food, perhaps I'm equating spicy-heat with devils and vampires.

This chicken is a one-pan meal with a side dish to boot, very simple to make, and packed with flavor. (Did you know you can stuff practically anything under the chicken skin for extra flavor? I've stuffed a mixture of spinach, mushroom, and Manchego cheese under the skin as well as several kinds of compound butters–truffle, garlic, lemon, herb–and it's out of this world.)
  
I found this jalapeño chicken recipe in the delightful cookbook Casa Marcela, by Marcela Valladolid. As she says, "For this one, you'd think there's so much heat from the raw jalapeño, but during the roasting it mellows out ... It also serves as a barrier between the flesh of the chicken and the direct heat in the oven, so the breast stays nice and moist."

I varied the peppers a bit because many jalapeños I find in local groceries are so mild they taste like green bell peppers. You can stick with just jalapeño (like Valladolid's recipe), or spice it up and use a mixture of serrano, fresno, jalapeño and/or even poblano. It's spicy, but not too spicy. 

The chicken is roasted with baby potatoes so you have a side dish ready when the chicken is. In my house, we also serve this with black beans and/or rice for a South-of-the-Border-style meal. You can even shred the chicken for tostadas, enchiladas, or tortilla soup.

NOTE:  Use latex gloves when handling chilies!

Adapted from: Casa Marcela, by Marcela Valladolid
Number of servings: makes 1 roast chicken

Ingredients
  • 1 pound assorted baby potatoes, sliced into 1-inch pieces
  • 6 tablespoons unsalted butter
  • Salt and freshly ground black pepper
  • ½ cup thinly sliced fresh chiles (jalapeño, serrano, fresno and/or poblano–use one kind of chili or a mix)
  • 1 (5 pound) whole chicken, giblets removed
  • 3 garlic cloves
  • 4 sprigs fresh oregano
  • ¼ cup fresh parsley leaves
  • 3 limes, 1 sliced into ¼-inch-thick rounds, 2 cut in half

Directions
  1. Place racks in the upper and lower thirds of the oven and preheat to 475 °F.
  2. Arrange potatoes in a heavy cast iron skillet (just large enough to fit them all in a single crowded layer), and dot with 2 tablespoons of butter. Season with salt and pepper and toss to coat. Set aside.
  3. Carefully place chiles under the skin of the chicken (wear your gloves). Stuff chicken cavity with garlic, oregano, parsley, lime slices and remaining 4 tablespoons butter. Season outside of chicken heavily with salt and pepper. Place chicken, breast side up, directly on top of potatoes. Place remaining lime halves around the chicken.
  4. Roast chicken and potatoes, rotating pan halfway through the cooking process, until a thermometer inserted into the thickest part of the thigh registers 165 °F, about 1 hour and 20 minutes. Let rest for 15 minutes before carving.
Picture
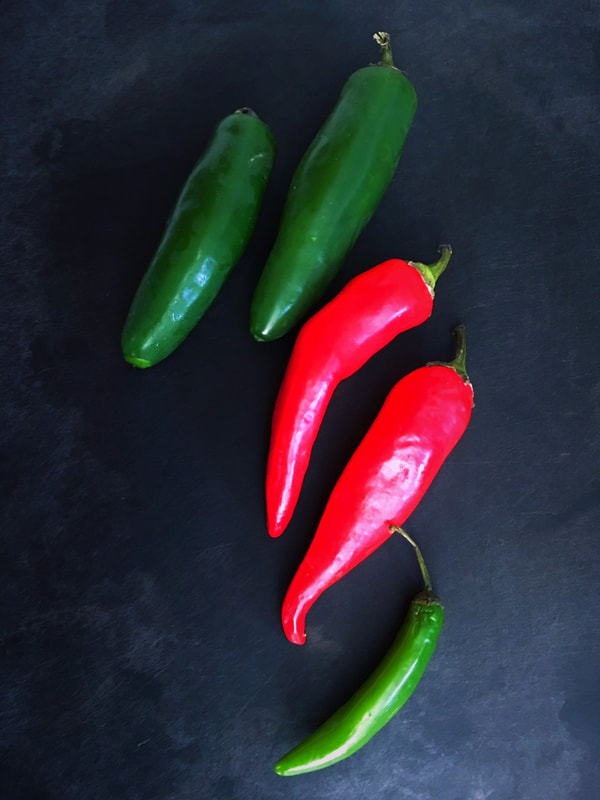
Top to bottom: jalapeño, fresno (red) and serrano peppers
0 Comments

Caramel Apple Cheesecake

10/14/2017

2 Comments

 
Picture
November, 1995. It was my BF's birthday (he was not the BF at that time), and I remember making this first-ever attempt at baking a cheesecake. [Ed. note: To quote Private Hudson from Aliens, "Game over, man. Game over."]

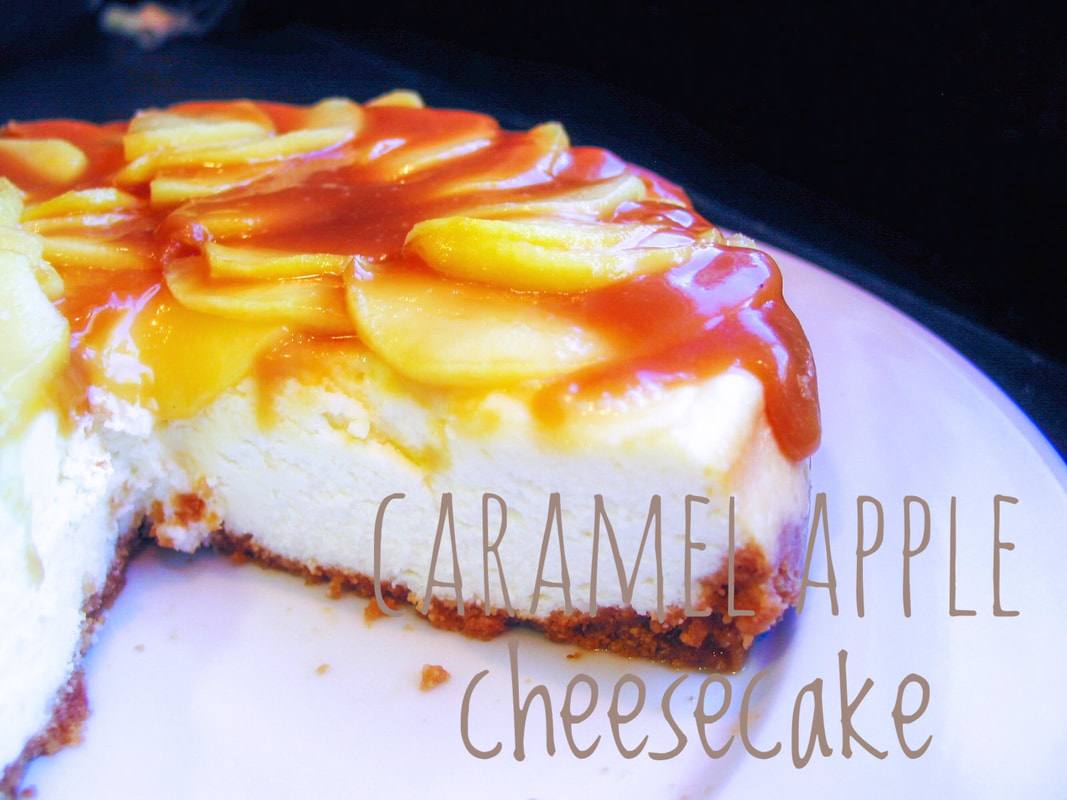
Yes. This is the one. Try not to stick your fork through the screen–I dare you.

This delicious caramel bomb made repeat appearances that Thanksgiving, Chanukah and Christmas, and at different times every year after that. My mamala begged me to make it every year for the holidays, and this year I'm making it for a client's Halloween party.

The body of the cheesecake is incredibly creamy (not dense), with a touch of orange juice and a good amount of sour cream. There is a perfect crust-to-filling ratio, and the caramel apple topping is to die for (the caramel stays soft and does not stick to your teeth and harden).

Keep in mind, this makes a large cheesecake (10 inches diameter). Perfect for any get together, my favorite is to offer this at Thanksgiving.

Funny story/cautionary tale: two years ago I made this for my BF again and cut the ingredients in half to make a smaller 8-inch cake (was also going to give half to a neighbor). Just as I was presenting the entire cake to him on a platter, I dropped it. The platter broke, little shards of glass flaked all over and into the cheesecake–unsalvageable.

We stared at the floor for the longest time. Curse words seethed through clenched teeth. Tears were shed. I will not lie, this is not a 30-minute dessert. There is  preparation and time involved. (Really, you have to start making this the day before you plan on serving it.) However, the process is very straightforward and the end result is so worth the effort.

Just be careful with those glass platters!
Picture
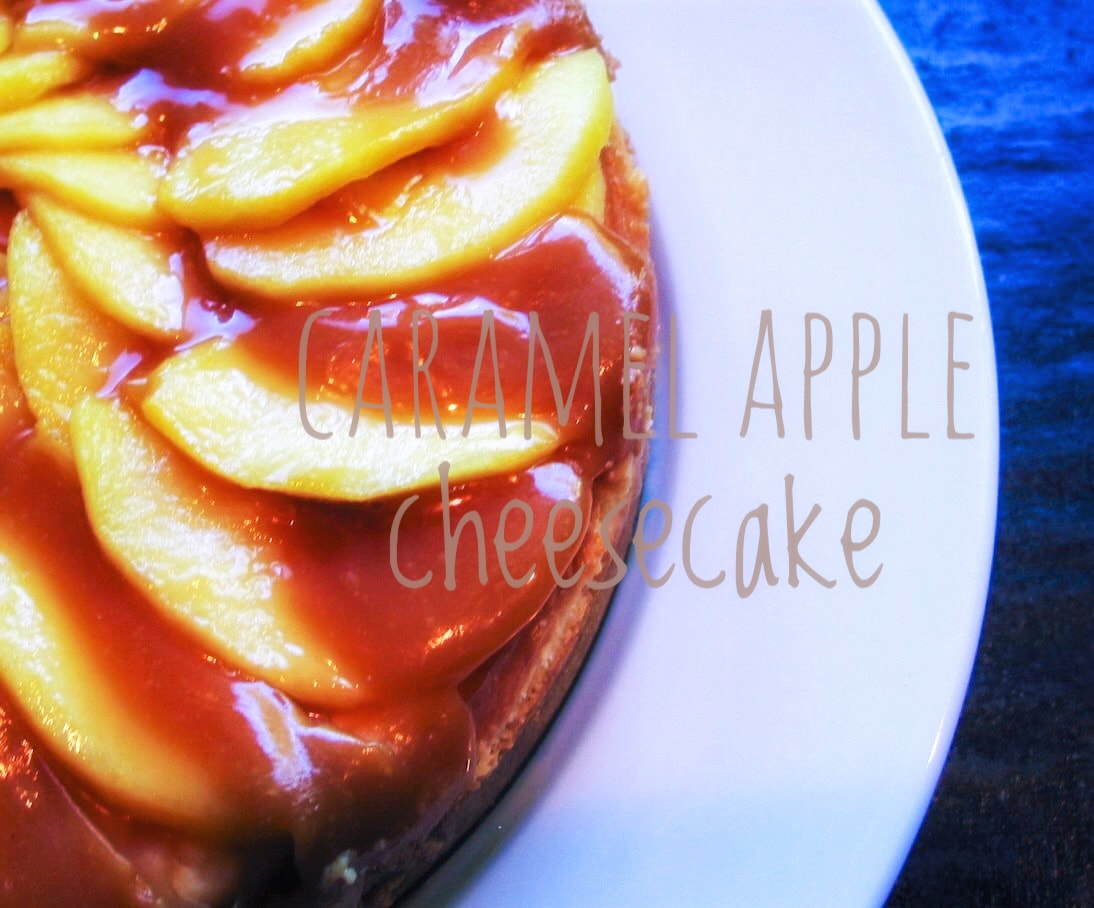
Adapted from: Bon Appetit (September 1995)
Number of servings: 16
​
Ingredients
Crust
  • 3 cups graham cracker crumbs (about 18 whole graham crackers)
  • ¼ cup sugar
  • 10 tablespoons unsalted butter, melted
Filling
  • 2 pounds cream cheese at room temperature
  • 1 ½ cups sugar
  • 2 tablespoons cornstarch
  • 1 16-ounce container sour cream
  • ½ cup orange or tangerine juice
  • ½ teaspoon vanilla extract
  • 4 large eggs
Topping
  • ½ cup (1 stick) unsalted butter
  • 1 ½ pounds Fuji apples (about 4 medium), peeled, cored, cut into ¼-inch-thick wedges
  • 1 cup sugar
  • ⅓ cup whipping cream

Directions
Crust
  1. Preheat oven to 350 °F. Wrap outside of 10-inch diameter spring-form pan with 2 ¾-inch high sides with foil. Combine graham cracker crumbs and sugar in medium bowl. Add melted butter and stir to blend. Press mixture onto bottom and up sides of prepared pan. Bake crust 10 minutes. Transfer pan to rack and cool completely. Maintain oven temperature.

Filling
  1. Using electric mixer, beat cream cheese, sugar and cornstarch in large bowl until smooth. Add sour cream, orange/tangerine juice and vanilla and beat until blended. Add eggs one at a time, beating just until blended after each.
  2. Pour filling into crust. Bake cheesecake until center moves only slightly when pan is shaken, about 1 hour 30 minutes. Transfer to rack and cool. Cover and refrigerate overnight. NOTE: do not overbake or bake at too high heat. If your oven runs hot and you don't adjust for that the cheesecake will not be as creamy, and it might crack. 

Topping
  1. Melt butter in large skillet over high heat. Add apples, stir until apples are coated with butter, about 2 minutes. Add sugar, stir until sugar dissolves and liquid comes to boil, about 3 minutes. Strain apples, reserving liquid. Return reserved liquid to same skillet. Boil until liquid turns deep amber, stirring occasionally, about 6 minutes. Remove from heat. Carefully add cream (mixture will bubble vigorously); whisk to blend. Return to heat and bring to boil, whisking constantly. Remove from heat. Cool until caramel sauce is lukewarm but can still be poured.
  2. Arrange apple wedges in overlapping concentric circles atop cheesecake. Pour caramel sauce over apples, covering top of cheesecake completely. (Can be prepared one day ahead. Cover loosely with foil and refrigerate. Let stand at room temperature 45 minutes before serving.)
  3. Remove foil from pan. Remove pan sides. Cut cheesecake into wedges.
2 Comments

Pumpkin Challah

10/11/2017

2 Comments

 
Picture
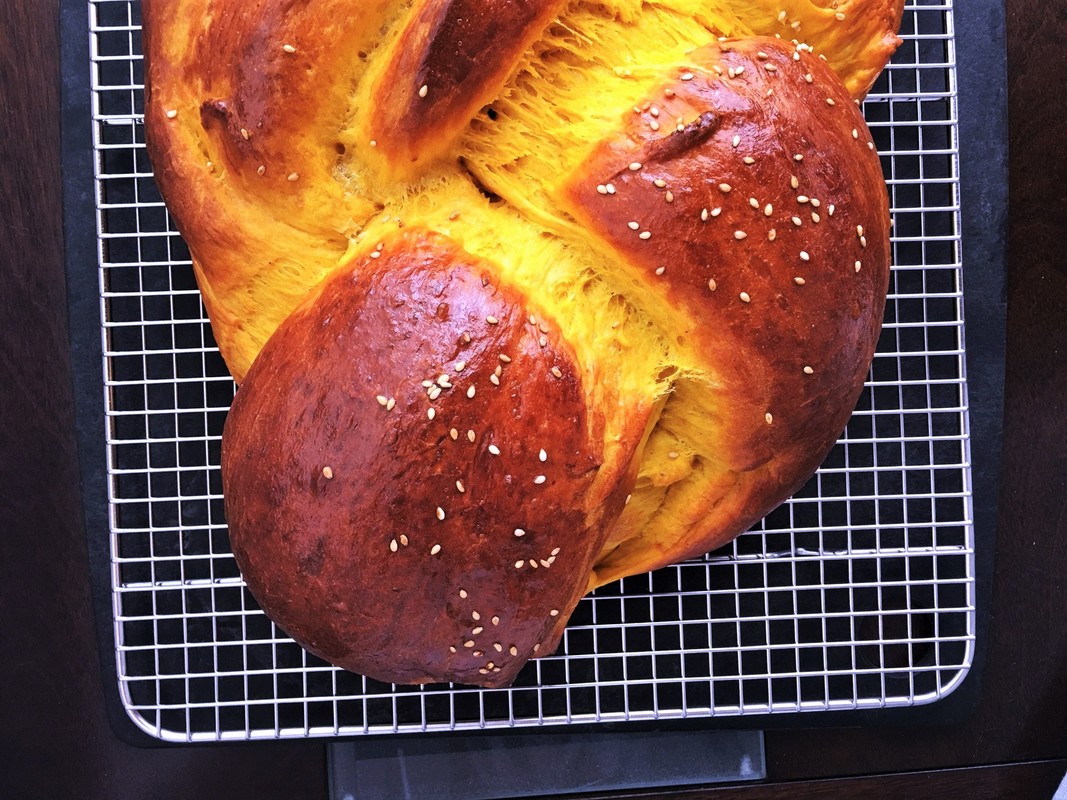
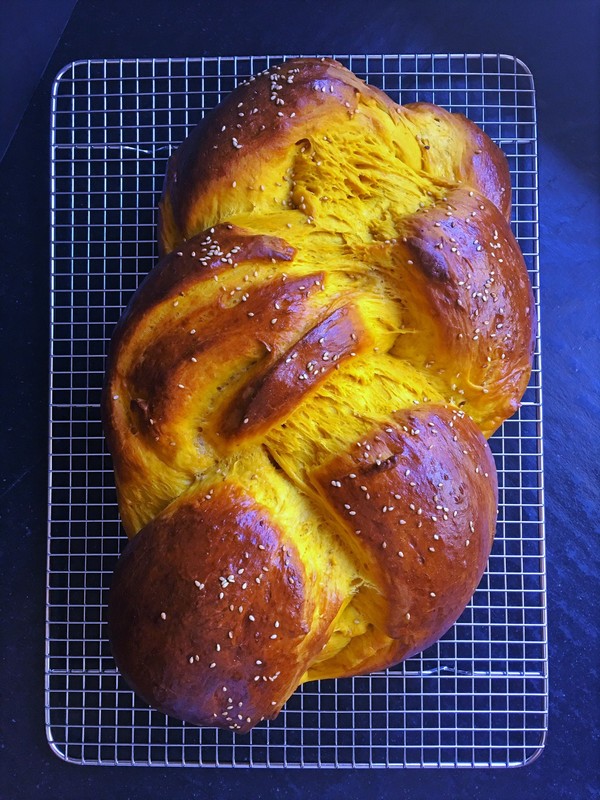
​Because I ain't no Challahback Girl, I ain't no Challahback Girl!
 
Sorry, couldn't get Gwen Stefani's "Hollaback Girl" out of my head while making this pumpkin challah. No Doubt fans will understand.

I don't make homemade bread too often, as there are many extraordinary bakeries around me that offer all manner of amazing confections. But it was so worth making this particular bread at home. The aroma alone was intoxicating, and I've never seen pumpkin challah at any bakery.
​
Disclaimer: my BF is a writer-music-journalist and is meticulous with grammar, so he hates when I use too many !!!!!! [Ed. note: I'm letting this slide, but will need to see you after class.] But people, I mean, look at this challah! Oh my beloved October!

Pumpkin and challah is a divine combination. The inside is a gorgeous saffron yellow, the crust is laquered, and the bread itself is soft and has an ever so slight taste of pumpkin. You can taste it, but it doesn't overwhelm. 

There is, however, much down time, and you can do other things while the bread is rising and baking. ​When fully baked this loaf of bread is hefty, the BF and I feasted on this loaf of love for a week (we've made deli sandwiches, grilled cheese, french toast, bread pudding, croutons and eaten it plain, slicked with honey butter or cranberry butter—my favorite).
​
If you're invited to a dinner party or perhaps a holiday dinner, and the host asks you to bring the carbs, consider bringing this gem of a challah. Bet you're asked to bring it the following year.
​
Adapted from: The Bojon Gourmet, Smitten Kitchen and Joan Nathan
Number of servings: Makes 1 large loaf

According to Joan Nathan, the secrets to good challah are simple: use two coats of egg wash to get that laquer-like crust, and don't overbake it. Also, three risings always makes for the tastiest loaves.
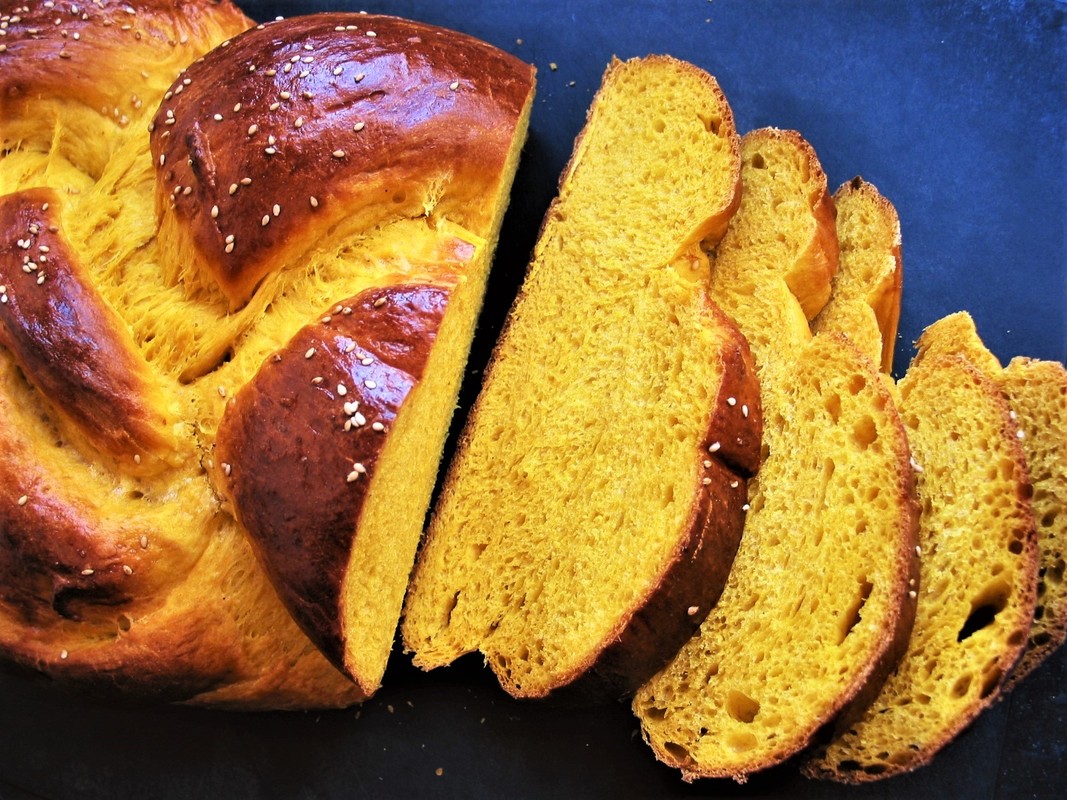
Picture
Ingredients
  • 1 tablespoon rapid-rise yeast, or 5 teaspoons active dry, or 3 tablespoons fresh (I used active dry)
  • ½ cup luke-warm water
  • 1 cup (8 ounces) pumpkin puree
  • 3 eggs, plus 1 for brushing the bread
  • 4 ounces (8 tablespoons) butter, melted and cooled
  • ½ cup sugar
  • 1 tablespoon salt
  • about 5 cups all-purpose or bread flour (I used bread flour)
  • optional: 1 tablespoon poppy or sesame seeds, for sprinkling

Directions
  1. In a large bowl, whisk together the yeast, water, pumpkin, eggs, butter, sugar and salt. (If using active dry yeast, sprinkle yeast over water and let stand 5-10 minutes, until foamy, before adding the other ingredients.) Stir in the flour, a cup at a time, until a shaggy dough forms. Turn out onto a lightly floured surface and knead until smooth. Add just enough flour to keep the dough from sticking to your hands and the surface, until the dough feels smooth and springy. Place in a lightly oiled bowl or container, cover with a lid or plastic wrap, and let rise in a warm place until doubled in bulk, about 2 hours. I placed my dough in an oven that had been warmed to 150 °F and then turned off.  After 2 hours, punch down dough, cover and let rise again in a warm place for 30 minutes.
  2. Turn the dough out onto a lightly floured surface and gently press out the air bubbles. Divide the dough into 3 equal portions. Tuck the edges under to form loose rounds. Cover loosely with plastic wrap or a large plastic bag and let them rest for 10 minutes to relax the glutens and make them easier to shape.
  3. Roll them into approximately 14-inch ropes. Connect the ropes at the far end, with the loose ends closest to you and then tightly braid (on my first attempt I braided mine a little too loose). Pinch the ends together and tuck them under the loaf.
  4. Now lift the loaf onto a parchmented baking sheet, put the whole thing in a large plastic bag, and let rise for about 30 minutes.
  5. Preheat the oven to 400 ºF with a shelf on the lowest rack. Brush the loaf with the beaten egg, and let rise another 15 minutes in the bag. Brush the loaf a second time, return to the bag, and let rise another 15 minutes or so. The bread should roughly double in size, and should hold the indentation of your finger when pressed lightly. (Optionally sprinkle the top with poppy or sesame seeds.)
  6. Place the loaf in the oven and bake for 10 minutes. Reduce the temperature to 325 ºF and bake for another 20 minutes. Rotate the loaf, and bake another 10-15 minutes, for a total baking time of 40-55 minutes. The bread should be a rich brown, sound hollow when thumped on the underside, and an instant read thermometer should register at least 190 ºF when inserted in the center.
  7. Remove the pan from the oven. Cool loaf on a rack for 1-2 hours.
Picture
2 Comments

Vegan Garam Masala Carrot Soup

10/4/2017

0 Comments

 
Picture
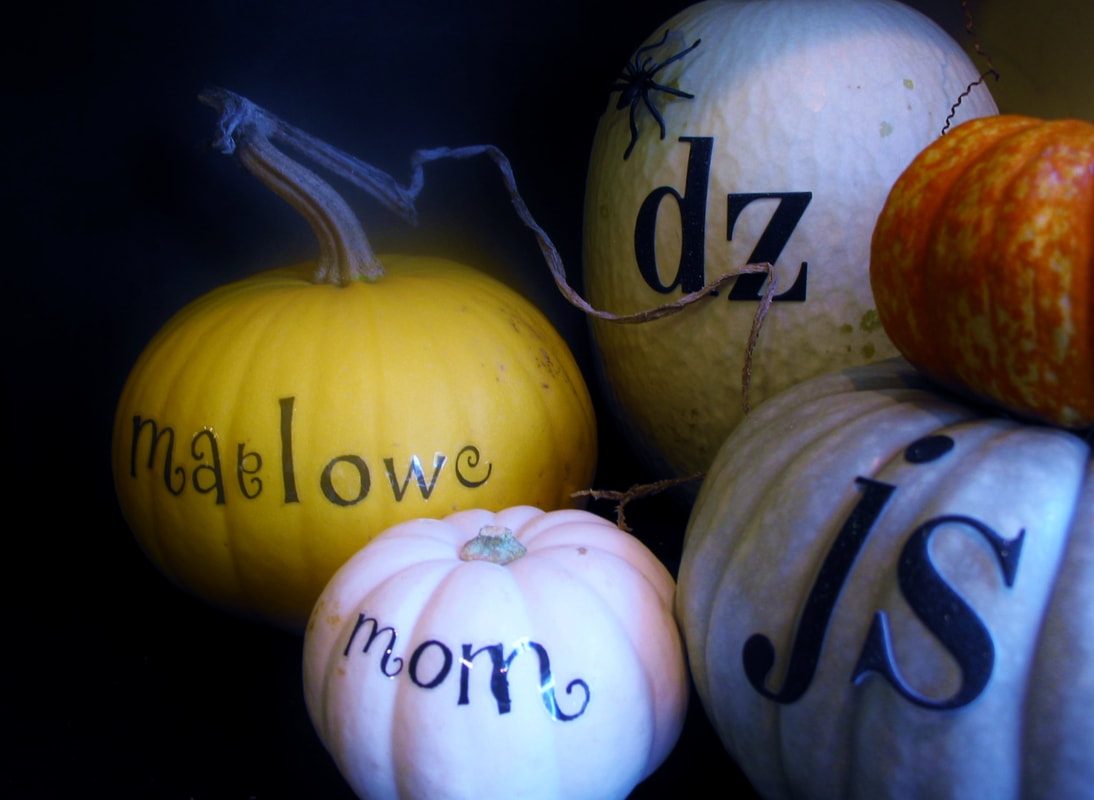
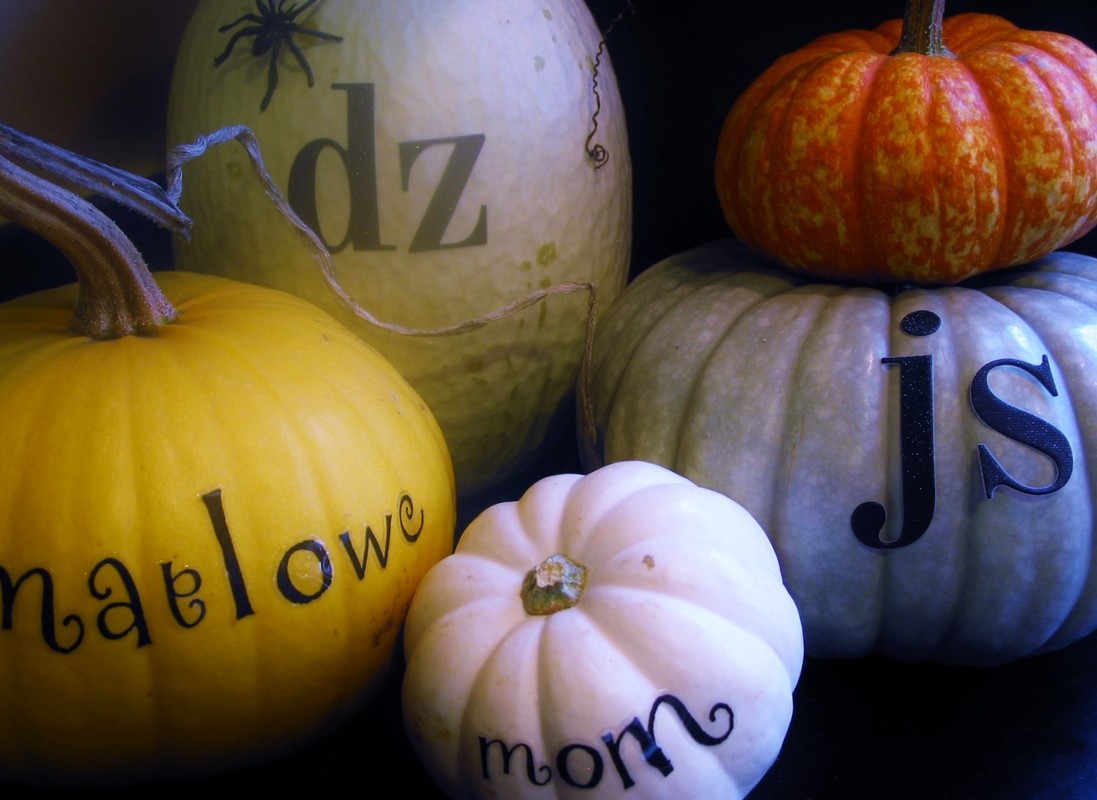
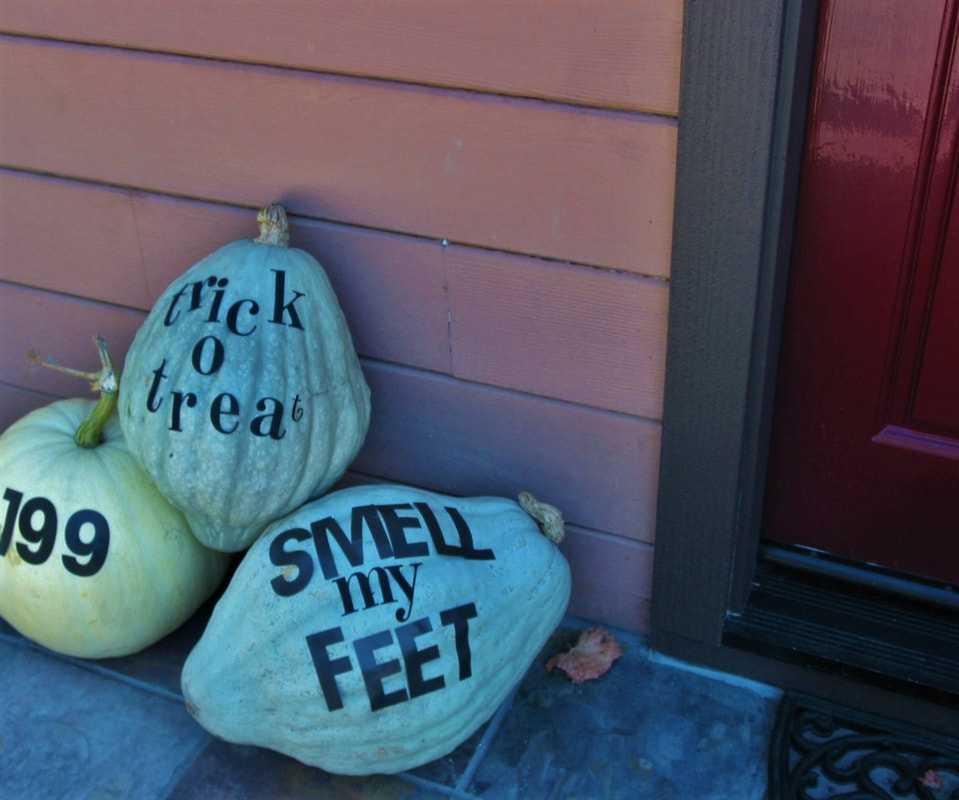
​The countdown begins: twenty-seven days until Halloween. The pumpkins have found a rightful place in the house. Pumpkin lights are up and dare I say cinnamon-apple-cider candles are lit and wafting their collective fragrance throughout the house. The boyfriend is asking for caramel apple cheesecake—which is a sure sign that autumn is here (at least inside our house). He does not get as excited as I do for fall to arrive [Ed. Note: Perhaps it's the annual fall reminder of how aged I have become, but I digress], but does enjoy the autumnal foods and cute costumed kids ringing our doorbell on the 31st.
​
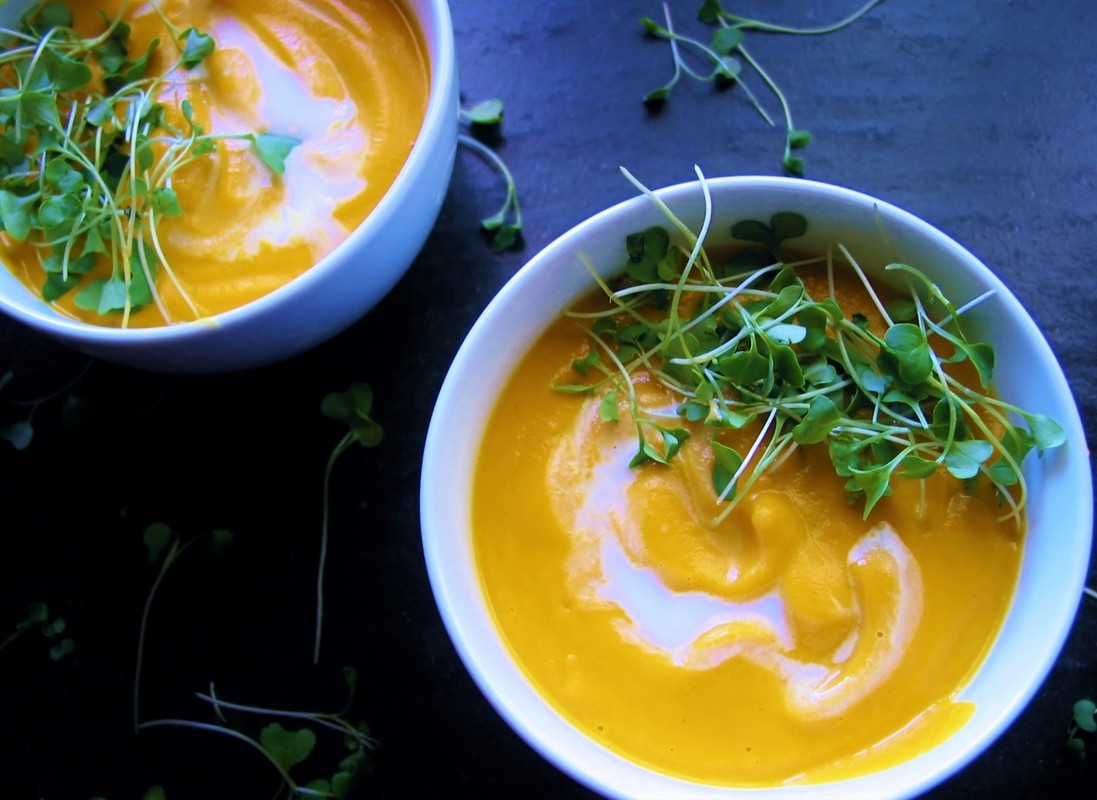
Although this post is not a pumpkin recipe [Ed. Note: Spoiler alert--next week], it's the perfect transitional dish through the end of our regular bay-area Indian summers, when  the Oregonian in me is chomping at the bit for crisper "soup, sweater, boot" weather.
​
In the meantime, enjoy this healthy, flavorful soup.
Picture
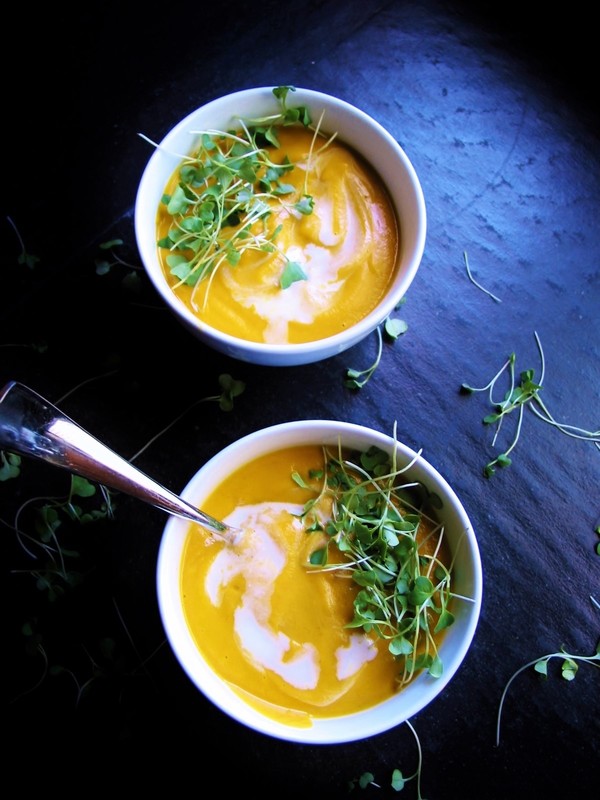
Adapted from: A Beautiful Plate
Number of servings: 3-4 (makes 4 cups)

Ingredients
  • 1 ½ pounds medium carrots, trimmed, peeled, sliced lengthwise and cut into 1-inch pieces
  • 2 medium yellow onions, chopped into 1-inch pieces
  • 2 tablespoons (liquid state) coconut oil or extra virgin olive oil
  • 2 teaspoons ground garam masala 
  • small pinch of ground cayenne pepper
  • ¾ teaspoon kosher salt
  • 1 can (13 or 14 ounces) full-fat coconut milk (or light)
  • juice of half a lime
  • freshly ground pepper
  • microgreens, for garnishing (optional)

Directions
  1. Preheat oven to 425 °F with rack in the center position. Line a sheet pan with aluminum foil. Place carrots and onions on sheet pan, drizzle with coconut oil (or extra virgin olive oil), ground garam masala, cayenne pepper, and salt. Toss vegetables with your hands to evenly coat. Spread into an even, thin layer.
  2. Roast carrots and onions until lightly caramelized and very fork tender, tossing them halfway through, about 25 to 35 minutes.
  3. Place the coconut milk (reserve about 1 to 2 tablespoons for drizzling and garnishing the soup) and 1 ¼ cups boiling hot water in a high capacity blender. If using a smaller blender, you may need to do this step in batches. Using the foil, transfer the roasted carrots and onions to the blender. Add lime juice. Puree until very smooth and creamy. If soup is too thick, add a few tablespoons of hot water at a time, until desired consistency is reached. Season the soup to taste with salt, pepper, and additional lime juice (if desired).
  4. Serve soup hot from the blender, garnishing with a drizzle of coconut milk, olive oil, and fresh microgreens as desired.
  5. NOTE: in the past, I used a hand-immersion blender for convenience, but I urge you to use a blender as the soup has a more velvety texture to it.
0 Comments

    Author

    I'm Jacquie, personal chef & recipe developer in the beautiful Pacific Northwest. ​Living life with my wildly funny boyfriend and dog Marlowe. Lover of books, bourbon, chocolate and movies.​

    Archives

    May 2020
    February 2020
    January 2020
    November 2019
    October 2019
    September 2019
    August 2019
    July 2019
    May 2019
    April 2019
    March 2019
    February 2019
    January 2019
    December 2018
    November 2018
    October 2018
    September 2018
    August 2018
    July 2018
    June 2018
    May 2018
    April 2018
    March 2018
    February 2018
    January 2018
    December 2017
    November 2017
    October 2017
    September 2017
    August 2017
    July 2017

    Categories

    All
    Ahi
    Apple
    Apple Pie
    Avocado
    Bars
    BBQ
    Beans
    Beef
    Beets
    Black Bean
    Blackberry
    Blueberries
    Borscht
    Bread
    Brownies
    Brussels Sprouts
    Bundt
    Butter
    Butternut Squash
    Butterscotch
    Cabbage
    Cake
    Caramel
    Carrot
    Challah
    Champagne
    Cheesecake
    Chicken
    Chili
    Chinese
    Chinese New Year
    Chocolate
    Christmas
    Cinco De Mayo
    Citrus
    Cocktail
    Coconut Rice
    Comfort Food
    Cookies
    Corn
    Cranberries
    Crostata
    Crumble
    Cupcakes
    Curry
    Dessert
    Easter
    Egg
    Egg Nog
    Eggplant
    Fish
    Ginger
    Gingerbread
    Gluten Free
    Grain Free
    Green Sauce
    Gumbo
    Halibut
    Halloween
    Hannukah
    Healthy
    Holiday
    Holidays
    Ice Cream
    Indian
    Kale
    Key Lime
    Kohlrabi
    Kosher
    Lamb
    Latkes
    Lemon
    Lentil
    Low Carb
    Mac & Cheese
    Malt
    Mango
    Mango Salsa
    Mardi Gras
    Martini
    Memorial Day
    Mexican
    Miso Chicken
    Moroccan
    Mushrooms
    Naan
    Nectarine
    Noodles
    Olive Oil
    Parsnips
    Passover
    Pasta
    Pavlova
    Peanut Butter
    Penne
    Peppermint
    Pesto
    Pie
    Pizza
    Plums
    Pluot
    Pork
    Potatoes
    Pots De Creme
    Pudding
    Pumpkin
    Pumpkin Cake
    Quinoa
    Rajma
    Raspberries
    Ratatouille
    Risotto
    Root Beer
    Salad
    Salmon
    Salmon Bowl
    Salsa
    Sauce
    Scallops
    Shortbread
    Short Ribs
    Shrimp
    Side Dish
    Soup
    Soy Sauce Eggs
    Spicy
    Spiralized
    Steak
    Strawberries
    Sugar Free
    Summer
    Sweet
    Sweet Potatoes
    Tacos
    Tart
    Thanksgiving
    Tomatoes
    Turkey
    Valentine's Day
    Vegan
    Veganuary
    Vegetable
    Vegetarian
    Veggie Burger
    Whole30
    Whoopie Pies
    Yams
    Yellow Bell Pepper
    Yu Choy

    RSS Feed

Powered by Create your own unique website with customizable templates.
  • home
  • services
  • bio
  • blog
  • contact
  • PHOTOS (summer)
  • photos (winter)
  • PRESS
  • faq