Moveable Feast
  • home
  • services
  • bio
  • blog
  • contact
  • PHOTOS (summer)
  • photos (winter)
  • PRESS
  • faq

Feast Mode

a moveable feast blog

Crushed Raspberry Tart

6/12/2018

0 Comments

 
Picture
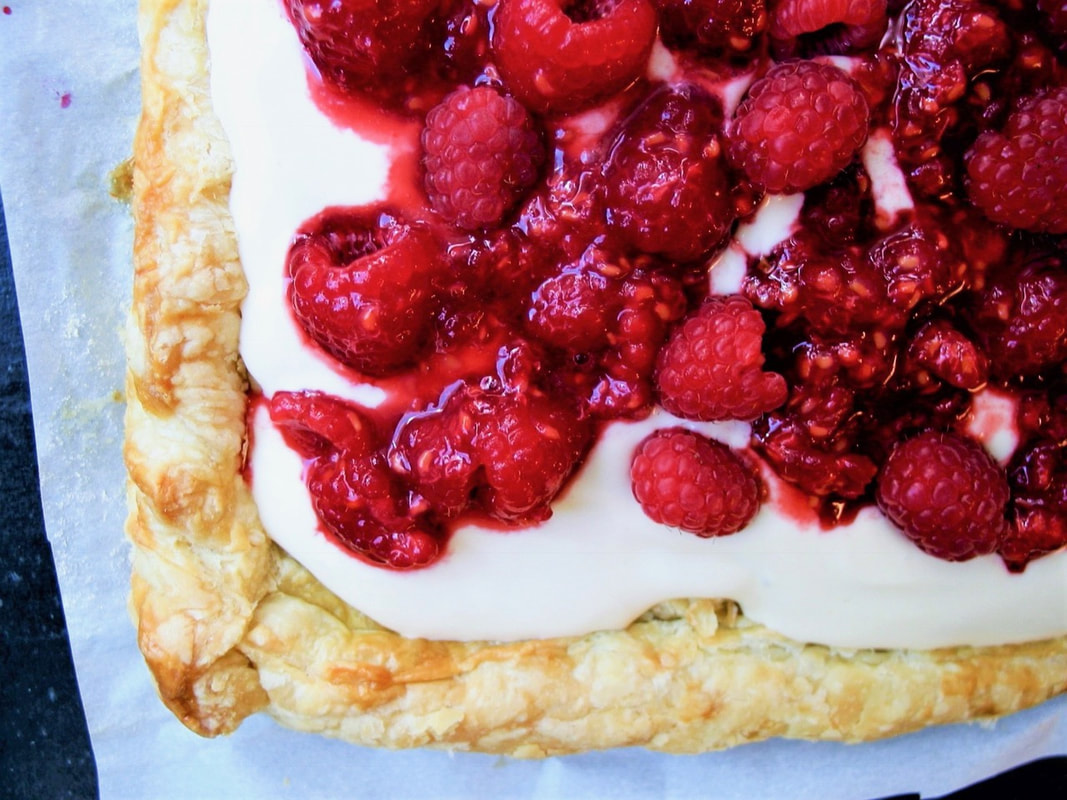
Okay. So, I can be a tad stubborn in my dessert likes and dislikes. The BF can attest.

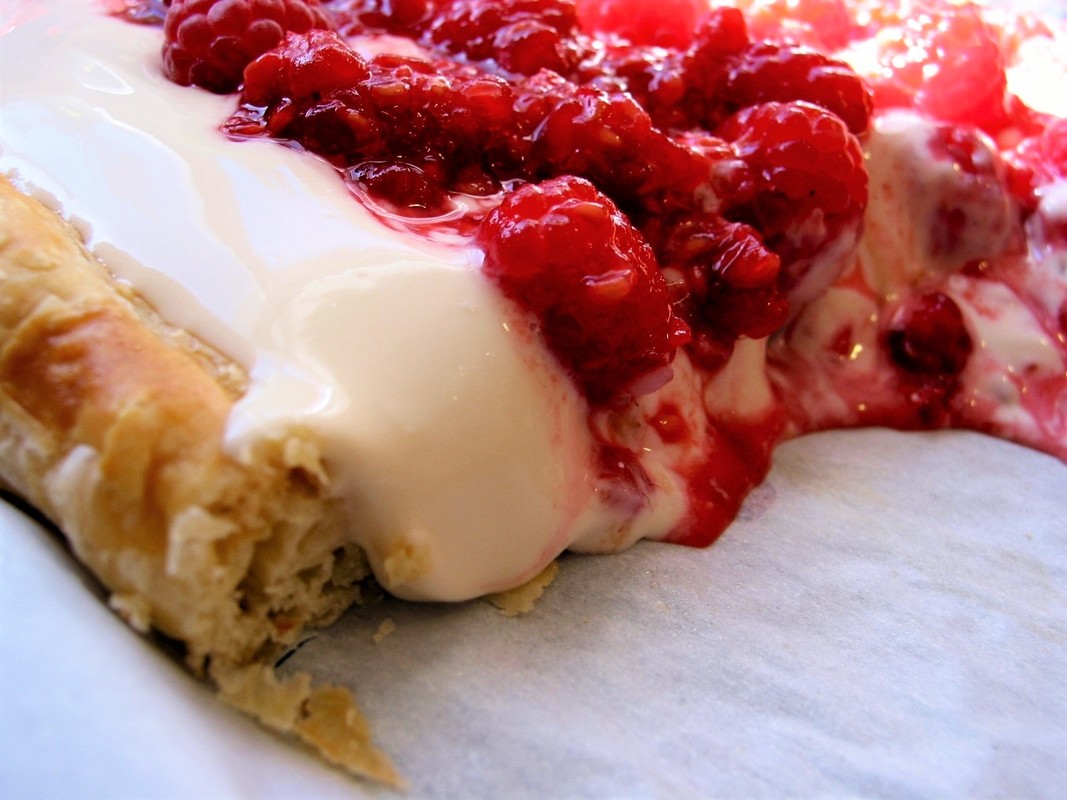
[Ed. note: Want to answer this honestly, but I've been falling asleep before her and value my own life.] 

My existence has revolved around the dictum: if it is not chocolate, it is not dessert. Would think to myself, "What's the point?" It was never a problem to pass up fruit pies, tarts, parfaits, jams, jellies, or other such confections. 

Then several years ago this tart changed my mind. Discovered it from Donna Hay's Seasons and it became a real show stopper for clients. Tart, tangy, colorful, not too sweet, and light. It's also one of the easiest desserts I have ever made.

It's not chocolate, but it works as a terrific distinctive summer dessert to end the meal with.
Picture
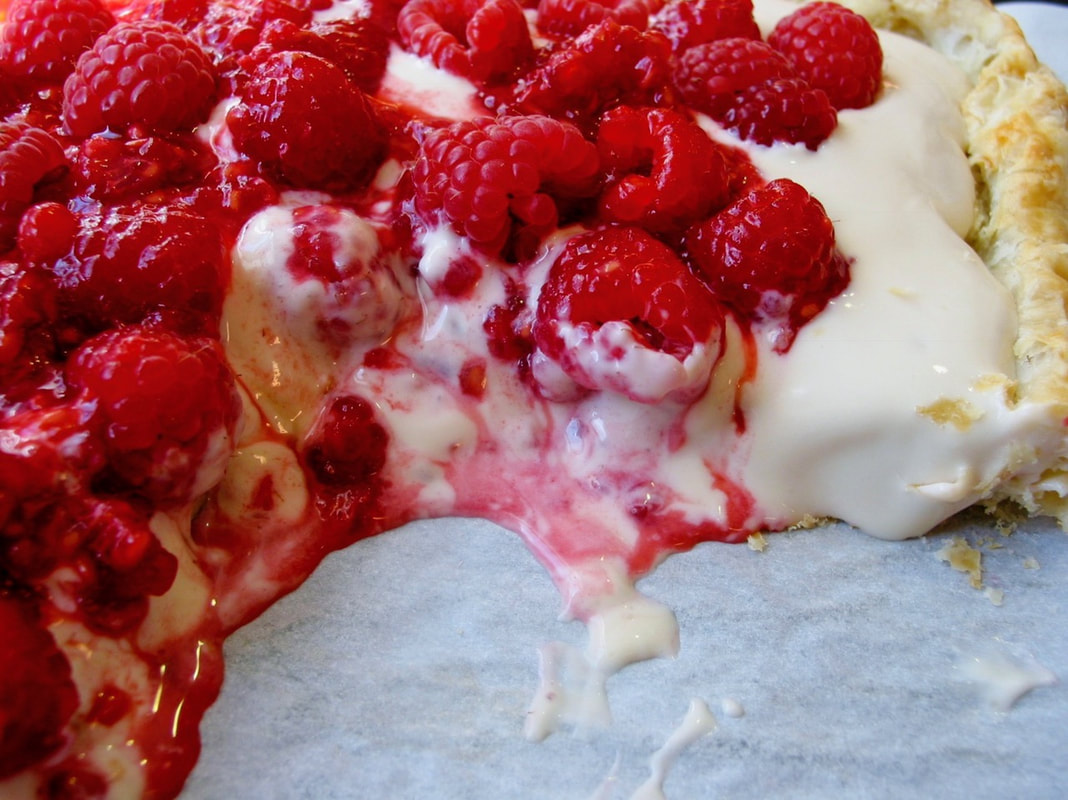
Adapted from: Donna Hay, Seasons
Number of servings: 4-6

Ingredients
Tart and Topping
  • (1)  13 ¼ ounce packet of puff pastry, thawed
  • egg white for brushing
  • 1 tablespoon superfine sugar
  • 2 cups fresh raspberries
  • 1 tablespoon confectioner’s sugar, sifted
​Sour Cream Filling
  • 1 cup sour cream (very thick sour cream works best)
  • ¼ cup heavy whipping cream
  • ⅓ cup brown sugar

Directions
Tart and Topping
  1. Preheat the oven to 400 ºF.
  2. Roll out the puff pastry on a lightly floured surface to ⅛-inch thickness and trim to an 8-inch square. From the remaining dough cut eight strips measuring ½ inch x 8 inch.
  3. Place the dough square on a baking tray lined with non-stick baking paper, brush square with egg white and place half the strips around the edge to form a border, pressing gently to seal. Brush the borders with egg white and place the remaining strips on top. 
  4. Prick the base with a fork. Cover dough with plastic wrap and chill for 30 minutes. Remove the plastic wrap, then sprinkle sugar over the dough and bake for 20 minutes or until crisp and golden. Allow to cool. 
  5. While pastry is cooking, make the sour cream filling.
Sour Cream Filling and Topping
  1. Place sour cream, heavy whipping cream and brown sugar in a bowl and whisk until combined and smooth. Place in fridge. 
  2. Place half the raspberries in a bowl with the confectioner's sugar and crush lightly. Fold in the remaining raspberries and set aside. 
  3. Once the pastry has cooled, spread the sour cream filling over the base of the pastry, spoon over the raspberries and serve. 
Picture
0 Comments

Chocolate Oblivion Truffle Torte

2/11/2018

0 Comments

 
Picture
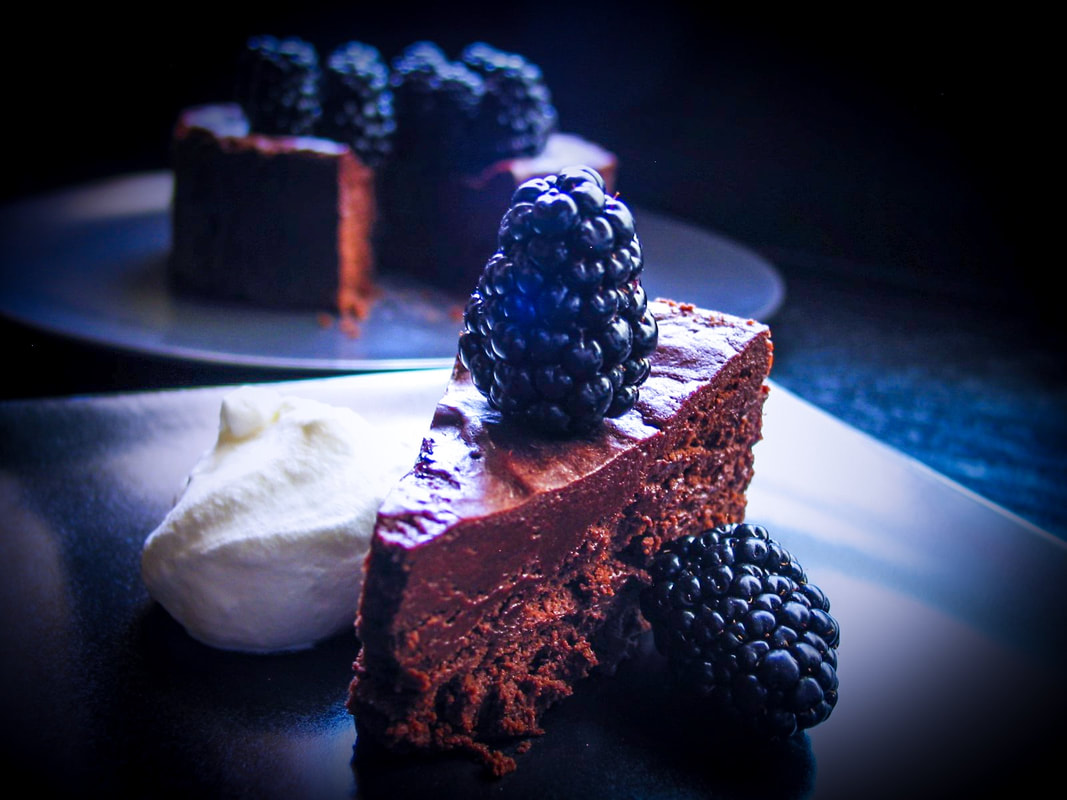
On this Valentine's Day, are you aiming for someone's heart through their stomach? Don't let the ingredients and directions of this recipe scare you, this is actually way less daunting than it appears. [Ed. Note: But you don't have to disclose that information if you're truly looking to impress.]

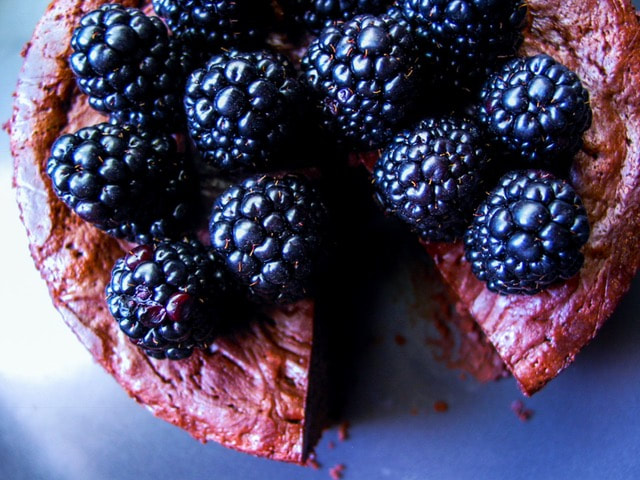
The key to the torte's simplicity is that it's made from just three ingredients: chocolate, butter, and eggs—and it only bakes for 15 minutes. I made this for the BF, myself and a few friends in a 6-inch springform pan, but am giving the recipe as originally presented (in an 8-inch springform pan) from the brilliant Rose Levy Beranbaum's The Cake Bible. I happen to love flourless tortes and have made so many different kinds, and this is certainly one of my favorites. Not to mention gluten free!

Beranbaum says this is her favorite way to eat chocolate, "It's the purest form of chocolate—when you just have a chocolate bar, you can't taste the chocolate until it starts melting in your mouth. But this is just the right texture so that the minute you put it in your mouth, the flavors start exploding. It's like the creamiest truffle wedded to the purest chocolate mousse. It's the right consistency and there's nothing to interfere. There's no flour. Egg gives it texture, but it also enriches it further—it gives it a fuller flavor. And then of course butter doesn't do any harm either!"
(Source: food52.com/blog/15895-the-magic-of-the-3-ingredient-chocolate-oblivion-truffle-torte-as-told-by-rose-levy-beranbaum)

It's creamy. moussey, and sinfully decadent. And seriously, who cares about clichés, nothing's beating chocolate on Valentine's Day. 
Picture
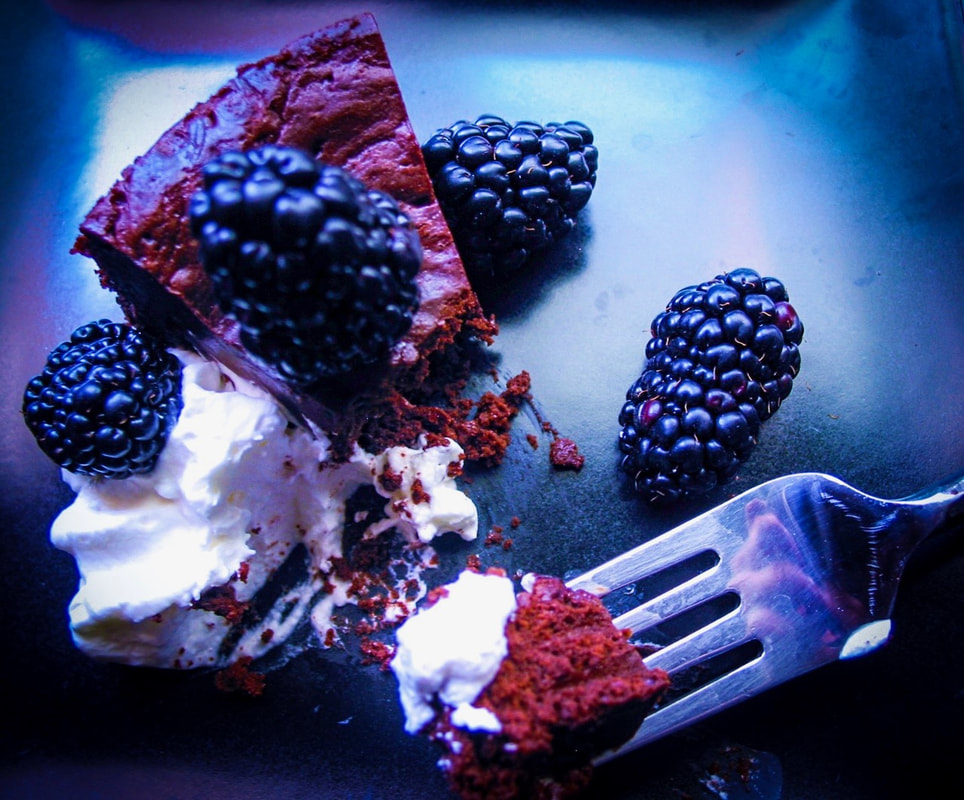
NOTES: It's very important to have the eggs and butter at room temperature. Since there are only three ingredients, use the best chocolate and butter that you can (Scharffen Berger chocolate and Plugra European butter were used here). Finally, be sure to serve the torte at room temperature, not chilled. Read through the entire recipe before starting; while it is deceptively easy to make, there are lots of side notes that are important to its success.

Adapted from: Rose Levy Beranbaum's The Cake Bible and Food 52
Number of servings: makes one 8-inch torte, serves approx 16 (depending on slice size)

Ingredients
  • 1 pound (454 grams) bittersweet chocolate, no higher than 62% cacao
  • ½ pound (2 sticks, or 227 grams) unsalted butter, room temperature
  • 6 large eggs (300 grams, out of shell), room temperature 
  • Whipped cream for topping (optional)
  • Blackberries or raspberries for topping (optional)
  • Equipment: One 8-inch spring-form pan at least 2 ½ inches high, buttered, and bottom lined with buttered parchment; outside of pan wrapped with a double layer of heavy-duty foil. One 10-inch cake pan or roasting pan to serve as a water bath.
Directions
  1. Heat oven to 425 °F.
  2. In a large heat-proof bowl set over a pan of hot (not simmering) water (do not allow bottom of the bowl to touch the water), place the chocolate and butter and allow it to stand, stirring occasionally, until smooth and melted. (You can also use a microwave on higher power, stirring every 20 seconds.)
  3. In a large mixer bowl, set over a pan of simmering water, heat the eggs, stirring constantly with a wire whisk, until just warm to the touch. Immediately remove the bowl to the stand mixer and with the whisk attachment on high speed, beat about 5 minutes, until triple in volume and the eggs are billowy and lighter in color. (If using a handheld electric mixer, beat the eggs over simmering water until they are hot. Then remove them from the heat and beat for about 5 minutes or until cold.)
  4. Use a large wire whisk or rubber spatula to fold half the eggs into the chocolate mixture until almost evenly incorporated. Fold in remaining eggs until almost no streaks remain. Use rubber spatula to finish folding, scraping up the mixture from the bottom to ensure that all the heavier chocolate mixture gets incorporated.
  5. Scrape the mixture into the prepared pan and set it in the larger pan. Place it in the oven and surround it with 1 inch of hot water. Bake for 5 minutes. Loosely cover with a sheet of buttered foil and bake another 10 minutes. (It will wobble when moved.) Remove the cake pan from the water bath and allow it to cool for about 45 minutes. Cover tightly with plastic wrap and refrigerate it until very firm, at least 3 hours.
  6. Unmold the cake: Have ready a serving plate that has at least an 8-inch flat center portion and an 8-inch or large flat loose bottom of a tart pan or plate, covered with greased plastic wrap.
  7. Use a torch, hair drier, or a hot damp towel to wipe the sides of the pan.
  8. Run a thin metal spatula around the sides of the torte and release the sides of the springform pan. Place the plastic-wrapped plate on top and invert the torte onto it. Heat the bottom of the pan and remove it. Peel off the parchment and reinvert torte onto the serving plate.
  9. Serve: It is most moussey and delicious at room temperature. Cut the torte, using a thin-bladed knife dipped in hot water, between each slice. Accompany with raspberry sauce, fresh raspberries and/or whipped cream if desired.
Picture
0 Comments

Cinnamon Swirl Honey Bun Cookies

11/29/2017

4 Comments

 
Picture
Patience is not my virtue. [Ed. note: I want to comment, but appreciate my life.] Rolling out cookie dough and cutting out cookies with cookie cutters? No patience for it. Hell-o slice-and-bake simplicity!

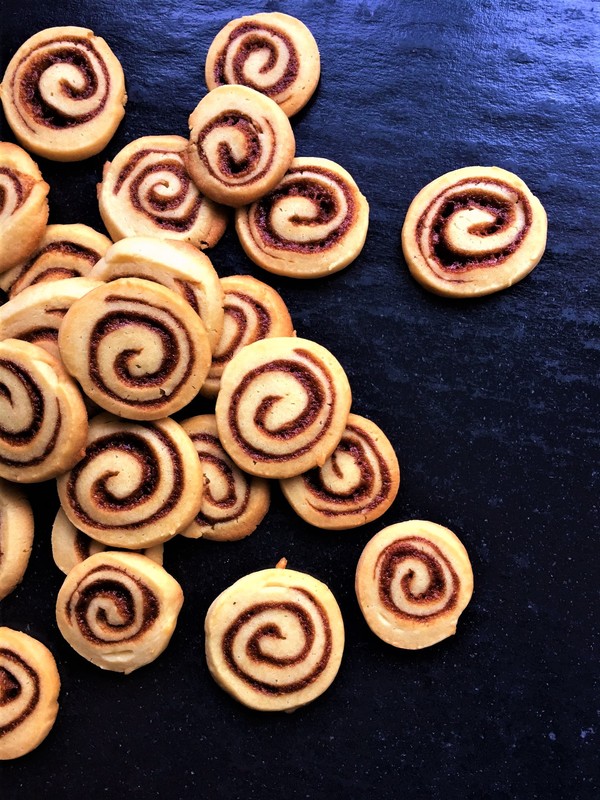
These cookies are tender, lightly sweetened with honey, and swirled with cinnamon and spice–a perfect holiday cookie that travels and keeps well, perfect for gracing your Hanukkah dessert table, a cookie exchange, or to leave as a nice treat for Santa and his helpers. I have been known to have them for breakfast with coffee, or late afternoon pick-me-up with tea.

Winter is coming: let the holiday cookie season begin!

NOTE:  Although the glaze is delicious, I opted not to use it as I prefer it much better plain (plenty sweet for this household), and if you are going to ship it as a gift it's probably more practical to go glazeless. That said, if you're serving at a party or leaving for Santa, by all means glaze it up.

Adapted from: Marbled, Swirled, and Layered, by Irvin Lin
Number of servings: 48 cookies

Ingredients
Cookie Dough
  • 1 ½ cups powdered sugar, sifted
  • 1 cup  (2 sticks) unsalted butter, at room temperature
  • ½ teaspoon kosher salt
  • ½ teaspoon baking powder
  • 2 teaspoons vanilla extract
  • 1 large egg
  • 2 ½ cups all-purpose flour

Cinnamon Filling
  • 6 tablespoons unsalted butter, at room temperature
  • ¼ cup packed dark brown sugar
  • 3 tablespoons all-purpose flour
  • 1 tablespoon honey
  • 1 tablespoon ground cinnamon
  • ½  teaspoon ground nutmeg

Glaze
  • 2 tablespoons honey
  • 1 tablespoon whole milk
  • 1 teaspoon vanilla extract
  • ½-¾  cup powdered sugar, sifted

Optional
  • Ground cinnamon for dusting

Directions
Cookie Dough
  1. Combine powdered sugar, butter, salt, and baking powder in a large bowl. With a hand mixer, start mixing on low speed and slowly increase speed to medium until butter looks creamy and starts to cling to the sides of the bowl (about 2 minutes).
  2. Add vanilla extract and beat on medium speed until incorporated. Add egg and beat until Incorporated. Add flour and mix on low speed, then slowly increase to medium speed until flour is incorporated and a dough forms. The dough will be soft.
  3. Scrape the dough out onto a clean, floured surface and shape into a ball. Flatten into a circle and then square off the edges. Roll out dough into 13 x 14-inch rectangle with a long side facing you. (You will need to occasionally add more flour to the top and bottom of the dough so it doesn’t stick.)

Cinnamon Filling and Baking
  1. In another bowl (use same bowl if you like), combine the butter, brown sugar, flour, honey, cinnamon, and nutmeg. Beat together until the filling is uniform in color, fluffy, and light (about 2 minutes). Scrape the filling out onto the rolled-out dough and spread to cover the entire surface (you may need to use your fingers for this, as the filling will need to be spread thinly). Tightly roll up the dough starting from the bottom edge (you may need to use a little more flour here again so the dough does not stick). Wrap the dough with plastic wrap and freeze for 1 hour.
  2. Preheat the oven to 350 °F. Line baking sheets with parchment paper.
  3. Remove dough from the freezer and unwrap. Carefully slice ¼-inch-thick cookie "disks" from the rolled log, slicing straight down (do not saw back and forth). Place on baking sheets, spacing the cookies about 1 ½ inches apart.
  4. Bake until edges of the cookies start to turn golden brown (12 to 14 minutes). Let cool on the baking sheets for 5 minutes, then transfer to a wire rack to cool completely. Repeat with the remaining dough. NOTE: don't overbake!

Glaze
  1. Combine honey, milk, vanilla and ½ cup powdered sugar in a bowl and stir together. If glaze looks too thin, add more powdered sugar, 1 tablespoon at a time, until it has thickened to the right consistency. Brush glaze onto cooled cookies with a pastry brush. Once glaze has settled, you can dust the cookies lightly with more ground cinnamon (optional).

NOTE:
Make sure the butter for cinnamon filling is truly at room temperature or even slightly warmer than that. It makes spreading the filling easier.
 
You can make and freeze this cookie dough for future baking. Once frozen for an hour, place the log in a labeled zip-top plastic bag. Slice and bake cookies at your convenience. Frozen dough should keep for up to 2 months.
Picture
4 Comments

    Author

    I'm Jacquie, personal chef & recipe developer in the beautiful Pacific Northwest. ​Living life with my wildly funny boyfriend and dog Marlowe. Lover of books, bourbon, chocolate and movies.​

    Archives

    May 2020
    February 2020
    January 2020
    November 2019
    October 2019
    September 2019
    August 2019
    July 2019
    May 2019
    April 2019
    March 2019
    February 2019
    January 2019
    December 2018
    November 2018
    October 2018
    September 2018
    August 2018
    July 2018
    June 2018
    May 2018
    April 2018
    March 2018
    February 2018
    January 2018
    December 2017
    November 2017
    October 2017
    September 2017
    August 2017
    July 2017

    Categories

    All
    Ahi
    Apple
    Apple Pie
    Avocado
    Bars
    BBQ
    Beans
    Beef
    Beets
    Black Bean
    Blackberry
    Blueberries
    Borscht
    Bread
    Brownies
    Brussels Sprouts
    Bundt
    Butter
    Butternut Squash
    Butterscotch
    Cabbage
    Cake
    Caramel
    Carrot
    Challah
    Champagne
    Cheesecake
    Chicken
    Chili
    Chinese
    Chinese New Year
    Chocolate
    Christmas
    Cinco De Mayo
    Citrus
    Cocktail
    Coconut Rice
    Comfort Food
    Cookies
    Corn
    Cranberries
    Crostata
    Crumble
    Cupcakes
    Curry
    Dessert
    Easter
    Egg
    Egg Nog
    Eggplant
    Fish
    Ginger
    Gingerbread
    Gluten Free
    Grain Free
    Green Sauce
    Gumbo
    Halibut
    Halloween
    Hannukah
    Healthy
    Holiday
    Holidays
    Ice Cream
    Indian
    Kale
    Key Lime
    Kohlrabi
    Kosher
    Lamb
    Latkes
    Lemon
    Lentil
    Low Carb
    Mac & Cheese
    Malt
    Mango
    Mango Salsa
    Mardi Gras
    Martini
    Memorial Day
    Mexican
    Miso Chicken
    Moroccan
    Mushrooms
    Naan
    Nectarine
    Noodles
    Olive Oil
    Parsnips
    Passover
    Pasta
    Pavlova
    Peanut Butter
    Penne
    Peppermint
    Pesto
    Pie
    Pizza
    Plums
    Pluot
    Pork
    Potatoes
    Pots De Creme
    Pudding
    Pumpkin
    Pumpkin Cake
    Quinoa
    Rajma
    Raspberries
    Ratatouille
    Risotto
    Root Beer
    Salad
    Salmon
    Salmon Bowl
    Salsa
    Sauce
    Scallops
    Shortbread
    Short Ribs
    Shrimp
    Side Dish
    Soup
    Soy Sauce Eggs
    Spicy
    Spiralized
    Steak
    Strawberries
    Sugar Free
    Summer
    Sweet
    Sweet Potatoes
    Tacos
    Tart
    Thanksgiving
    Tomatoes
    Turkey
    Valentine's Day
    Vegan
    Veganuary
    Vegetable
    Vegetarian
    Veggie Burger
    Whole30
    Whoopie Pies
    Yams
    Yellow Bell Pepper
    Yu Choy

    RSS Feed

Powered by Create your own unique website with customizable templates.
  • home
  • services
  • bio
  • blog
  • contact
  • PHOTOS (summer)
  • photos (winter)
  • PRESS
  • faq