Moveable Feast
  • home
  • services
  • bio
  • blog
  • contact
  • PHOTOS (summer)
  • photos (winter)
  • PRESS
  • faq

Feast Mode

a moveable feast blog

Butterscotch Pots de Crème

2/12/2019

2 Comments

 
Picture
So, Valentine's Day is this week, and at some point I usually make a dinner the BF really loves. [Ed. note: Hey we're going out too! Cripes, now we'll get letters.] The main course is a no-brainer: prime ribeye. [Ed. note: Changing reservation to a more expensive place.] For dessert, want to make a treat that we both swoon over. Well aware that chocolate and Valentine's Day are synonymous, it's just not always the case in our house. Now, the BF likes chocolate but, unlike me, he really has to be in the mood for something super-rich chocolatey. He actually can say no to chocolate—I know, gasp! [Ed. note: Watches hate mail pile up.]

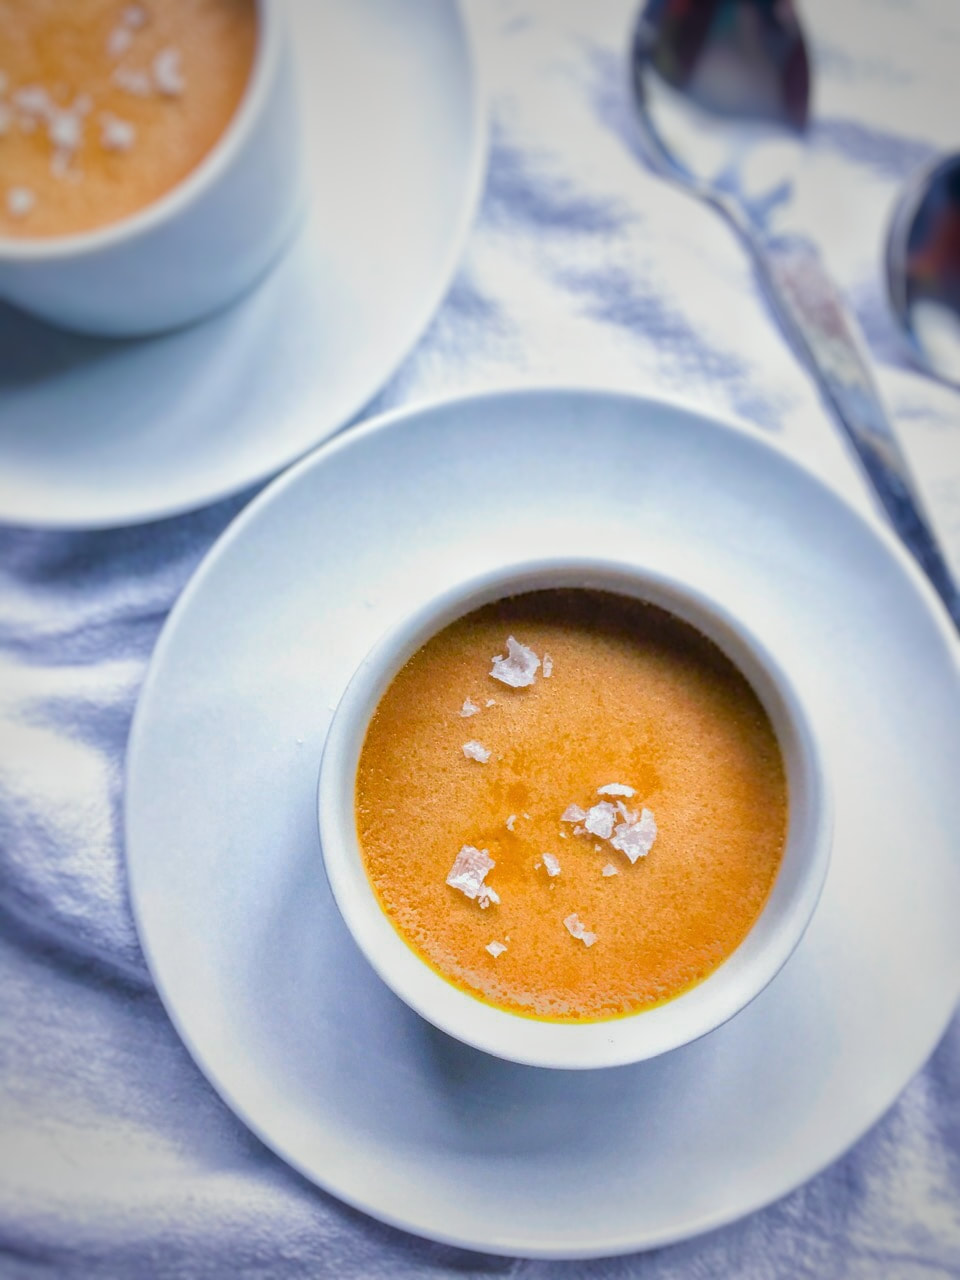
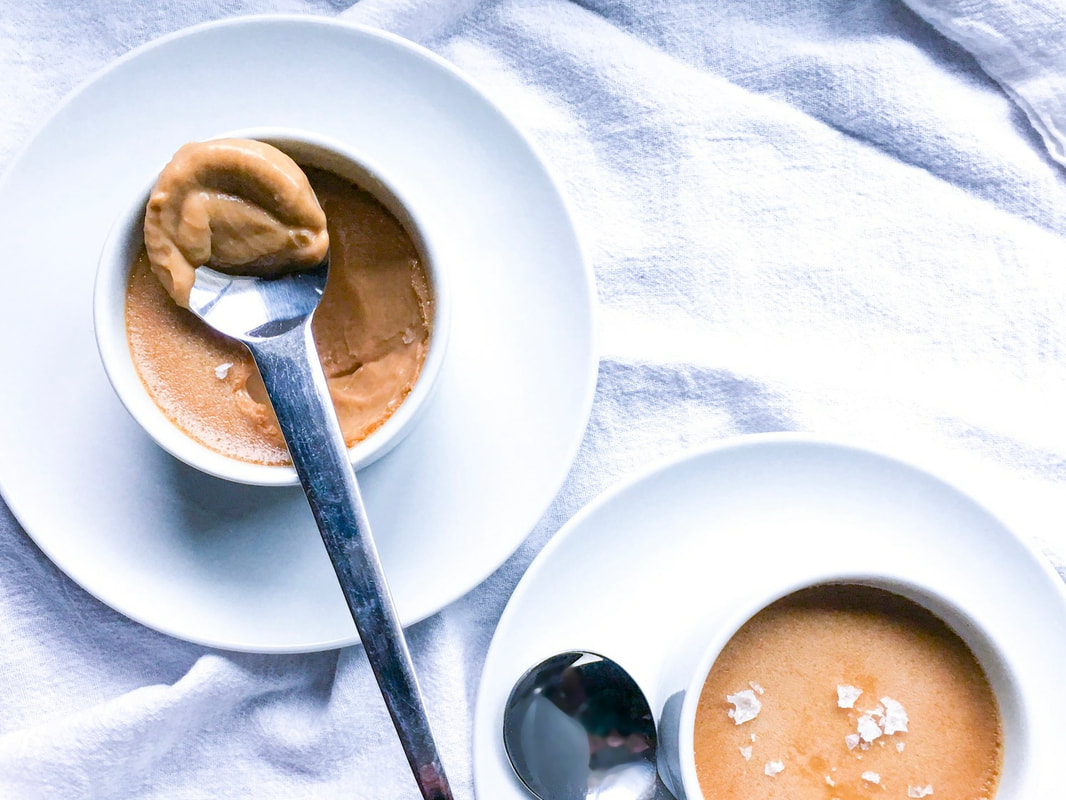
This pot de crème is like a turbo-charged version of butterscotch pudding. A decadent custard that's silky, butterscotchy, caramelly, salty-sweet, with deep notes of brown sugar. Squarely in the BF's wheelhouse, and I definitely don't feel like we have to have chocolate every night. Got to spice things up sometimes, right?

Truthfully, this is a solid go-to dessert for guests as it takes no time at all to prep (talking about ten minutes) and looks-tastes pedantically fancy. As easy and straightforward as the directions are, the only vexing part is dirtying two pots and two mixing bowls. It's worth it.

An added bonus, can halve the recipe so it just makes two small ramekins.  
Picture
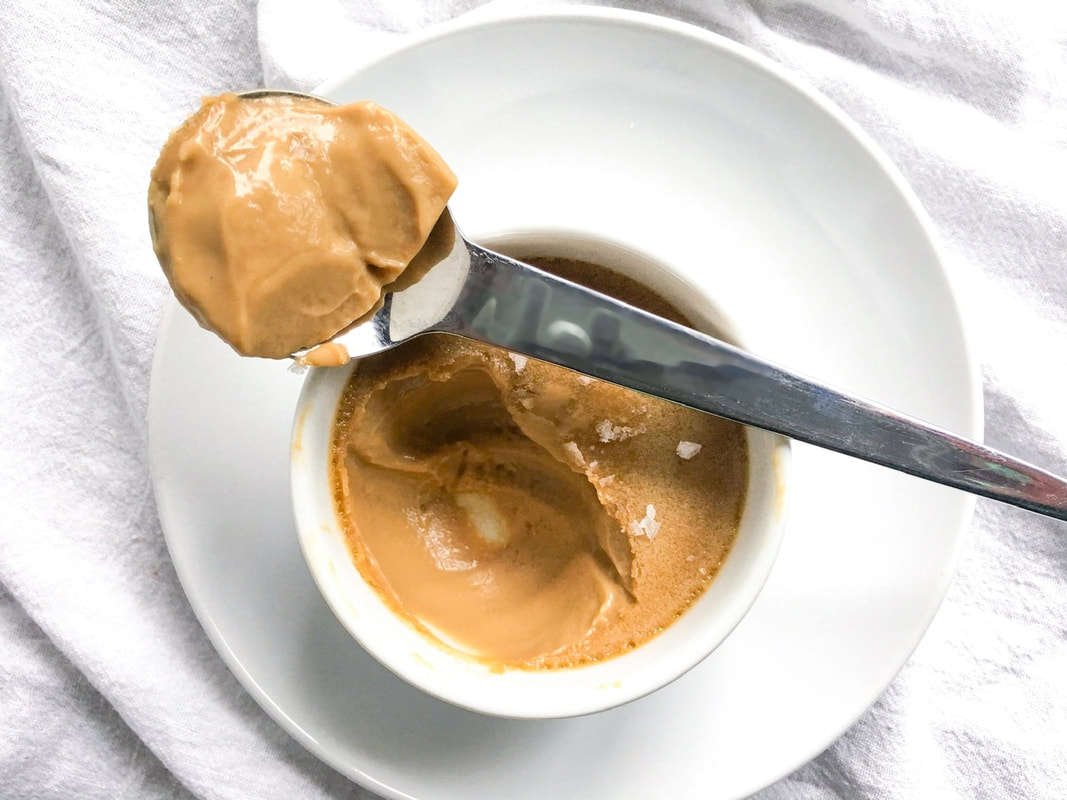
This recipe is adapted from Molly of Orangette, who describes these pots de crème as "Cold and rich and almost hyperbolically creamy, the custard yields under the spoon the way a good down pillow does under your head: with a welcoming, slippery whoosh. The gates to heaven have never opened so easily."

She is not lying.

NOTES:
  • ​This custard gets its deep flavor from the presence of two special sugars: muscovado and demerara. It may sound fussy to call for fancy sugars, but it's truly worth it if you have them on hand. If you don't, you can substitute dark brown sugar for the muscovado and light brown sugar or granulated sugar for the demerara.
  • For the water-and-demerara step, be sure to use a light-colored saucepan. If your pan is made of something dark, it will be almost impossible to see the color of the mixture as it caramelizes.
  • Prep everything before you start cooking.
  • Don't over bake.
Picture
Adapted from: Orangette
Number of servings: 4

Ingredients
  • 1 ½ cups heavy cream
  • 6 tablespoons dark muscovado sugar
  • ¼ teaspoon salt
  • 6 tablespoons water
  • 2 tablespoons demerara sugar
  • 4 large egg yolks
  • ½ teaspoon vanilla extract
  • Fleur de sel (optional)
​
Directions
  1. Set an oven rack in the middle position, and preheat the oven to 300 °F.
  2. In a small heavy saucepan, combine cream, muscovado sugar and salt. Place over medium heat and bring to a simmer, stirring until sugar is dissolved. Remove from heat.
  3. Meanwhile, combine water and demerara sugar in a medium heavy (2-quart) saucepan over medium heat. Cook, stirring until sugar is dissolved. Continue to cook, stirring occasionally, until browned and bubbly, about 5 minutes. (To gauge the color of the mixture, it may help to tilt the pan a little, so that the liquid pools on one side.) Remove from heat and carefully add the cream mixture, whisking until combined.
  4. In a large bowl, whisk together egg yolks and vanilla. Add hot cream mixture in a thin stream, whisking constantly. Set a fine-mesh sieve over a 1-quart glass measuring cup, and pour the custard through the sieve. Skim off any foam with a spoon.
  5. Divide the custard among four 4-ounce ramekins or other oven-safe vessels. Select a baking dish, one large enough to hold the ramekins without any of them touching. (I used a 9” x 13.”) Fold a dish towel to line the bottom of the baking dish; this will protect the delicate custards from touching the hot bottom of the pan. Arrange the ramekins in the pan. Seal the top of each ramekin with a piece of aluminum foil to prevent a skin from forming as they bake.
  6. Slide the pan into the oven, and immediately pour hot tap water into the pan to reach halfway up the side of the ramekins. Bake until custards are set around the edges but still jiggle lightly in the centers when shaken, like firm gelatin, about 40 minutes. (You will have to move the foil to see this.) Using tongs, transfer the ramekins to a rack. Discard foil tops and cool to room temperature. [Ed. note: ROOM TEMPERATURE] The custards will continue to set as they cool. Refrigerate for a couple of hours, or until you’re ready to serve them.
  7. Serve plain or topped with a dollop of unsweetened whipped cream. (I opted to sprinkle with Fleur de sel.)
NOTE: These are best on the first day, but they’ll keep for up to two days, covered with plastic wrap and refrigerated. The texture slowly declines and they develop a thin skin on top.

PS: A year ago I broke out the Paderno Brand 3-Blade Spiralizer for some kohlrabi "noodles" with bacon, carmelized onion and shaved parmesan (www.moveablefeast.me/blog/kohlrabi-noodles-bacon-caramelized-onion-shaved-parmesan).

PPS: For those of you muttering to yourselves through clenched teeth, "Fake vegetable noodles? Forget that and this butterscotch deal, I want chocolate," let's revisit this chocolate oblivion truffle torte (www.moveablefeast.me/blog/chocolate-oblivion-truffle-torte).
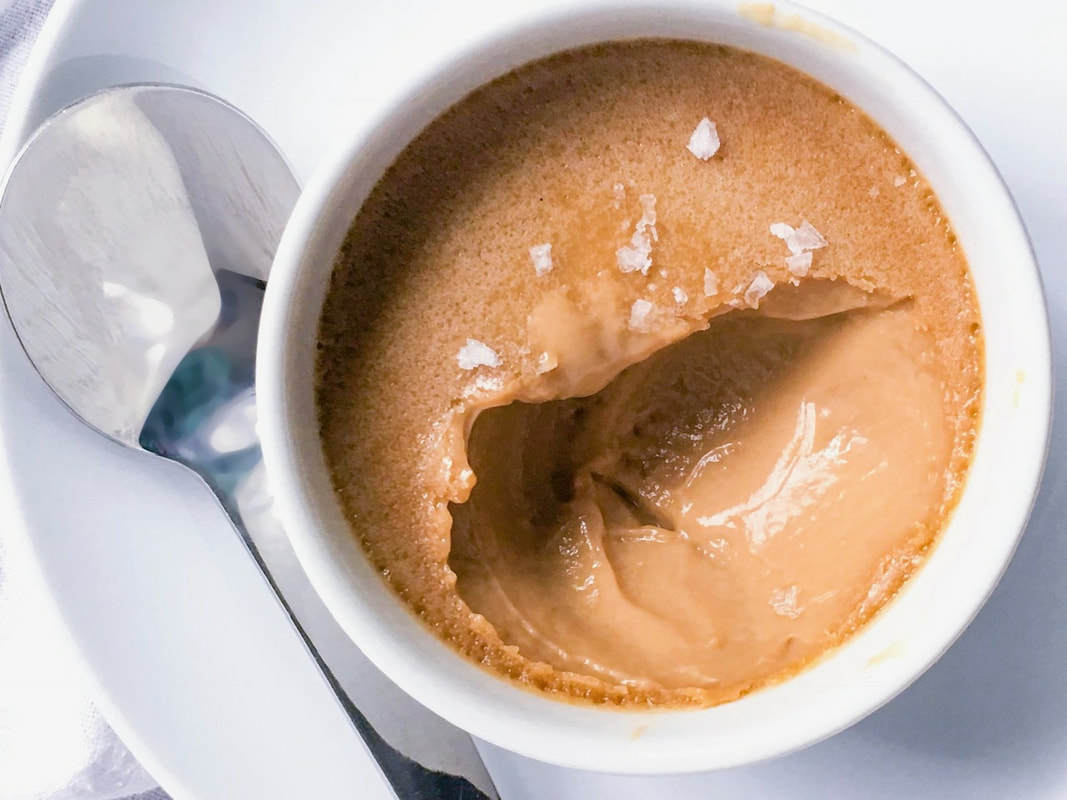
Picture
2 Comments

Caramel Apple Cake

11/8/2017

0 Comments

 
Picture
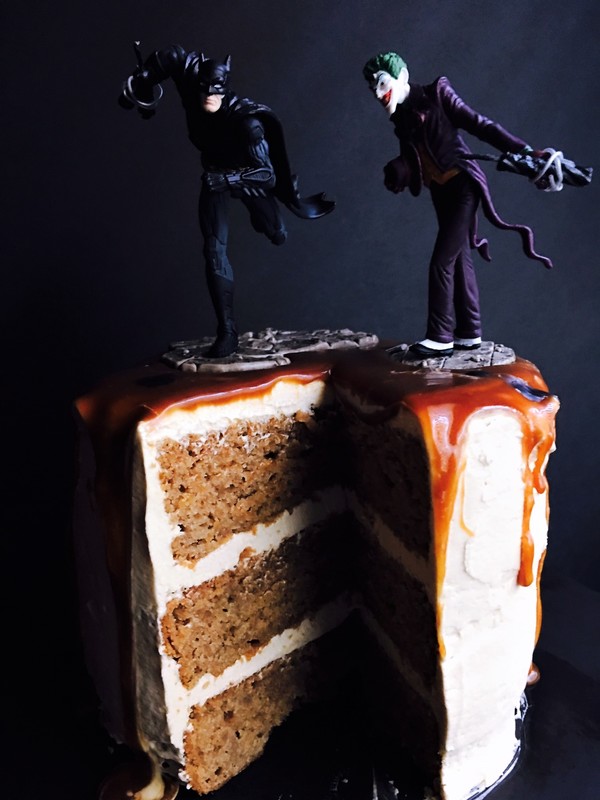
Birthday cakes. Everyone from 1-100 (and up!) should get a homemade one on their special day, and my BF is no exception. I always try to top the previous year's dessert, and for him it usually involves apples and/or caramel of some kind.

This year is no different, and oy this is a delicious cake. Adapted from my favorite baker boys of Baked Explorations, this is pure fall: moist, dense, lightly spiced, covered in caramel buttercream, and then drizzled with more caramel.

​Oh, did I mention that the BF is a Batman fan? [Ed. note: You ever dance with the devil in the pale moonlight?]
Picture
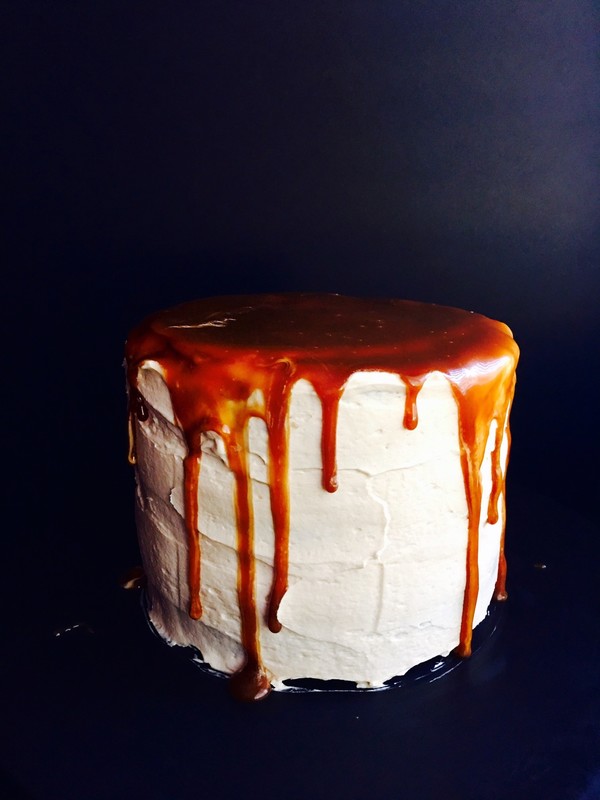
The recipe below is for an 8-inch 3-layer cake, but for my small family I  make the smallest amount possible (in that case a 6-inch 3-layer cake, which is exactly one half of the recipe). I use Williams Sonoma salted caramel that was on hand, and made my own applesauce from my own recipe (I prefer the addition of boiled apple cider for an intense cider flavor), but feel free to save time and use store bought applesauce and/or caramel. No shame in that.
​
The list of ingredients may seem daunting, and yes there are many steps, but fear not, it is actually not as daunting as it seems. It's a cake you'll want in your fall rotation, perfect for a loved one whose birthday falls in the October-November time frame.
Picture
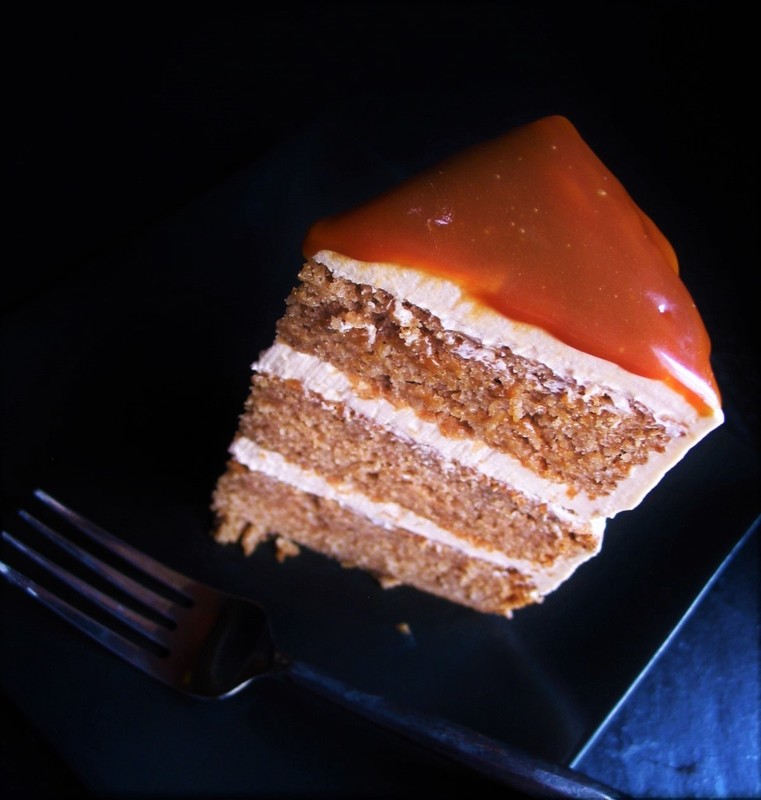
Adapted from: Baked Explorations by Matt Lewis & Renato Poliafito
Number of servings: makes one 8-inch, 3-layer cake

Ingredients
Apple Cake
  • ​4 cups all-purpose flour
  • 2 teaspoons baking soda
  • 1 teaspoon baking powder
  • 1 teaspoon salt
  • 2 teaspoons cinnamon
  • 1 teaspoon ground allspice
  • 1 teaspoon ground cloves
  • 1 ½ cups (3 sticks) unsalted butter, cut into 1-inch cubes, at room temperature
  • 2 ½ cups granulated sugar
  • 2 large eggs
  • 4 cups applesauce (see below for recipe or use store bought unsweetened applesauce)

Caramel Buttercream
  • 1 ½ cups sugar
  • ⅓ cup all-purpose flour
  • 1 ½ cups whole milk
  • ⅓  cup heavy cream
  • 1 ½ cups (3 sticks) unsalted butter, soft but cool, cut into small pieces
  • 1 teaspoon pure vanilla extract
  • ⅓ cup plus 2-4 tablespoons caramel sauce, at room temperature (Williams Sonoma Salted Caramel was used here)
Applesauce
  • 6 fuji apples, peeled, cored and quartered
  • ½ cup apple cider
  • ¼ cup Boiled Apple cider www.kingarthurflour.com/shop/items/boiled-cider-1-pint
  • 2 tablespoons Calvados (optional)
  • Ground cinnamon, to taste

Directions
Applesauce
  1. Place all ingredients in medium saucepan. Cover and cook for about 30 minutes. Uncover and mash as you would potatoes.
  2. Chill sauce to room temperature before adding to cake batter.

Apple Cake
  1. Preheat oven to 325 °F. Butter three 8-inch round cake pans, line the bottoms with parchment paper, and butter the parchment. Dust the parchment with flour and knock out excess flour.
  2. Sift flour, baking soda, baking powder, salt, cinnamon, allspice and cloves together into a large bowl. Set aside.
  3. In bowl of a standing mixer fitted with paddle attachment, beat butter until creamy, about 4 minutes. Add sugar and beat until light and fluffy, about 3 minutes. Add eggs, and beat until combined.
  4. Add flour mixture to mixer bowl in three parts, alternating with the applesauce, beginning and ending with the flour mixture. Scrape down the bowl, then mix on low speed for a few more seconds.
  5. Divide batter among prepared pans and smooth tops. Bake for 40-45 minutes, rotating pans halfway through baking time, until a toothpick inserted in the center of cake comes out clean. Transfer pans to wire rack and let cool for 20 minutes. Turn cakes out onto rack, remove parchment and let cool completely.

Caramel Buttercream
  1. In a medium, heavy bottomed saucepan, whisk sugar and flour together. Add milk and cream and cook over medium heat, whisking occasionally, until mixture comes to a boil and has thickened, about 10-15 minutes.
  2. Transfer mixture to bowl of standing mixer fitted with paddle attachment. Beat on high speed until cool. Reduce speed to low and add butter and vanilla, mix until thoroughly incorporated. Increase speed to medium high and beat until frosting is light and fluffy.
  3. Add ⅓ cup of caramel and continue mixing until combined. If frosting is too soft, put bowl in refrigerator to chill slightly, then beat again until proper consistency is achieved. If frosting is too firm, set bowl over a pot of simmering water and beat with a wooden spoon until it is the proper consistency.

Assembly
  1. Place one cake layer on a serving platter. Trim the top to create a flat surface and evenly spread about 1 ¼ cups of frosting on top. Add next layer, trim and frost, then add third layer.
  2. Spread a very thin layer of frosting over the sides and top of cake and put in refrigerator for about 15 minutes to firm up. (This is known as crumb coating and will help to keep loose cake crumbs under control when you frost the ouside of the cake.)
  3. Frost sides and top with remaining frosting. Drizzle on a few swirls of caramel (I needed to warm it slightly) and refrigerate the finished cake for 15 minutes to firm it up before serving.
  4. This cake will keep beautifully in a cake saver at room temperature for up to 3 days, as long as the weather is cool and humidity free. Otherwise, place cake in a cake saver and refrigerate for up to 3 days. Let chilled cake sit at room temperature for a least 2 hours before serving.
0 Comments

Caramel Apple Cheesecake

10/14/2017

2 Comments

 
Picture
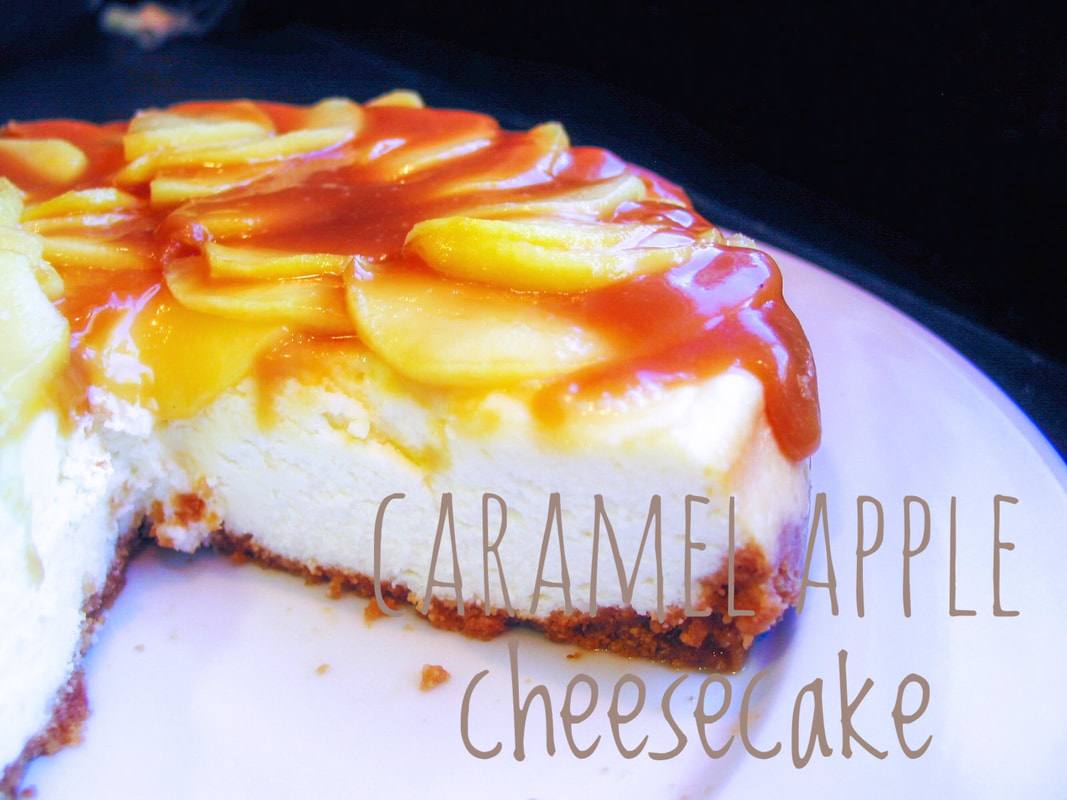
November, 1995. It was my BF's birthday (he was not the BF at that time), and I remember making this first-ever attempt at baking a cheesecake. [Ed. note: To quote Private Hudson from Aliens, "Game over, man. Game over."]

Yes. This is the one. Try not to stick your fork through the screen–I dare you.

This delicious caramel bomb made repeat appearances that Thanksgiving, Chanukah and Christmas, and at different times every year after that. My mamala begged me to make it every year for the holidays, and this year I'm making it for a client's Halloween party.

The body of the cheesecake is incredibly creamy (not dense), with a touch of orange juice and a good amount of sour cream. There is a perfect crust-to-filling ratio, and the caramel apple topping is to die for (the caramel stays soft and does not stick to your teeth and harden).

Keep in mind, this makes a large cheesecake (10 inches diameter). Perfect for any get together, my favorite is to offer this at Thanksgiving.

Funny story/cautionary tale: two years ago I made this for my BF again and cut the ingredients in half to make a smaller 8-inch cake (was also going to give half to a neighbor). Just as I was presenting the entire cake to him on a platter, I dropped it. The platter broke, little shards of glass flaked all over and into the cheesecake–unsalvageable.

We stared at the floor for the longest time. Curse words seethed through clenched teeth. Tears were shed. I will not lie, this is not a 30-minute dessert. There is  preparation and time involved. (Really, you have to start making this the day before you plan on serving it.) However, the process is very straightforward and the end result is so worth the effort.

Just be careful with those glass platters!
Picture
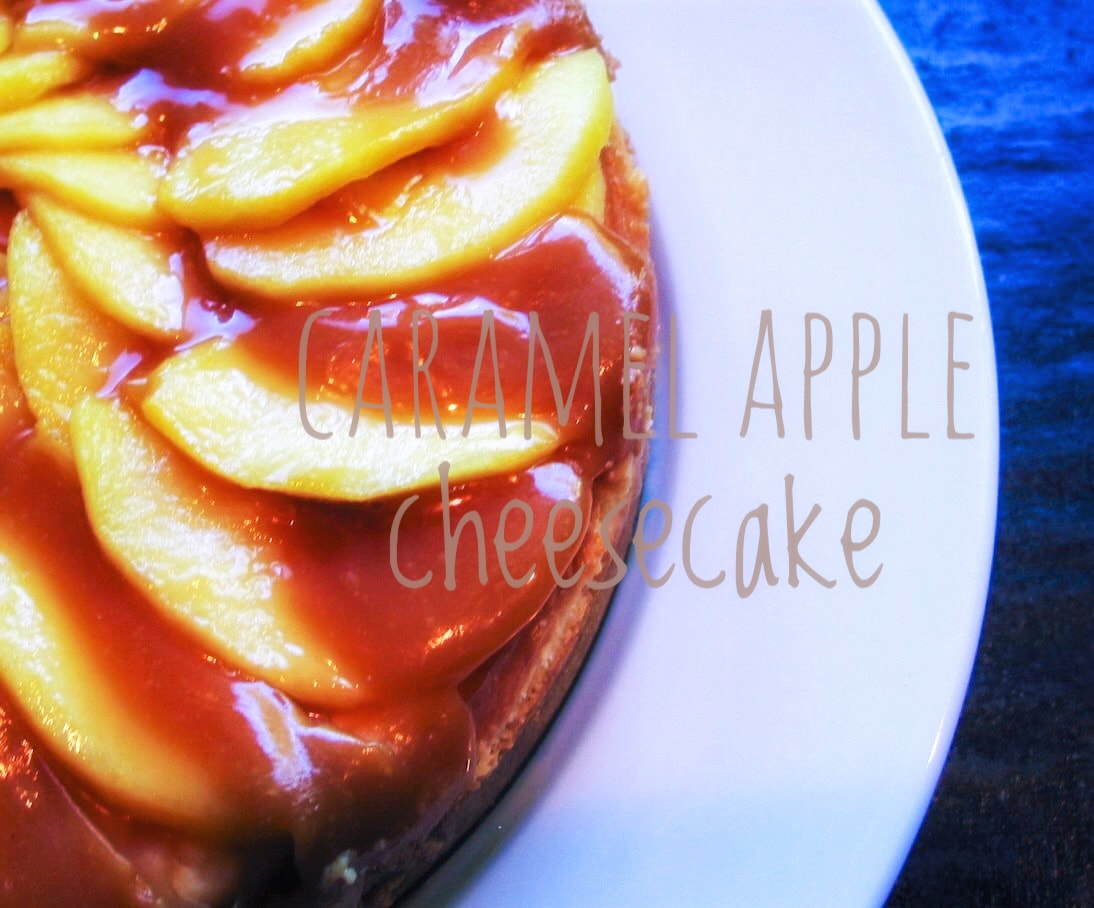
Adapted from: Bon Appetit (September 1995)
Number of servings: 16
​
Ingredients
Crust
  • 3 cups graham cracker crumbs (about 18 whole graham crackers)
  • ¼ cup sugar
  • 10 tablespoons unsalted butter, melted
Filling
  • 2 pounds cream cheese at room temperature
  • 1 ½ cups sugar
  • 2 tablespoons cornstarch
  • 1 16-ounce container sour cream
  • ½ cup orange or tangerine juice
  • ½ teaspoon vanilla extract
  • 4 large eggs
Topping
  • ½ cup (1 stick) unsalted butter
  • 1 ½ pounds Fuji apples (about 4 medium), peeled, cored, cut into ¼-inch-thick wedges
  • 1 cup sugar
  • ⅓ cup whipping cream

Directions
Crust
  1. Preheat oven to 350 °F. Wrap outside of 10-inch diameter spring-form pan with 2 ¾-inch high sides with foil. Combine graham cracker crumbs and sugar in medium bowl. Add melted butter and stir to blend. Press mixture onto bottom and up sides of prepared pan. Bake crust 10 minutes. Transfer pan to rack and cool completely. Maintain oven temperature.

Filling
  1. Using electric mixer, beat cream cheese, sugar and cornstarch in large bowl until smooth. Add sour cream, orange/tangerine juice and vanilla and beat until blended. Add eggs one at a time, beating just until blended after each.
  2. Pour filling into crust. Bake cheesecake until center moves only slightly when pan is shaken, about 1 hour 30 minutes. Transfer to rack and cool. Cover and refrigerate overnight. NOTE: do not overbake or bake at too high heat. If your oven runs hot and you don't adjust for that the cheesecake will not be as creamy, and it might crack. 

Topping
  1. Melt butter in large skillet over high heat. Add apples, stir until apples are coated with butter, about 2 minutes. Add sugar, stir until sugar dissolves and liquid comes to boil, about 3 minutes. Strain apples, reserving liquid. Return reserved liquid to same skillet. Boil until liquid turns deep amber, stirring occasionally, about 6 minutes. Remove from heat. Carefully add cream (mixture will bubble vigorously); whisk to blend. Return to heat and bring to boil, whisking constantly. Remove from heat. Cool until caramel sauce is lukewarm but can still be poured.
  2. Arrange apple wedges in overlapping concentric circles atop cheesecake. Pour caramel sauce over apples, covering top of cheesecake completely. (Can be prepared one day ahead. Cover loosely with foil and refrigerate. Let stand at room temperature 45 minutes before serving.)
  3. Remove foil from pan. Remove pan sides. Cut cheesecake into wedges.
2 Comments

    Author

    I'm Jacquie, personal chef & recipe developer in the beautiful Pacific Northwest. ​Living life with my wildly funny boyfriend and dog Marlowe. Lover of books, bourbon, chocolate and movies.​

    Archives

    May 2020
    February 2020
    January 2020
    November 2019
    October 2019
    September 2019
    August 2019
    July 2019
    May 2019
    April 2019
    March 2019
    February 2019
    January 2019
    December 2018
    November 2018
    October 2018
    September 2018
    August 2018
    July 2018
    June 2018
    May 2018
    April 2018
    March 2018
    February 2018
    January 2018
    December 2017
    November 2017
    October 2017
    September 2017
    August 2017
    July 2017

    Categories

    All
    Ahi
    Apple
    Apple Pie
    Avocado
    Bars
    BBQ
    Beans
    Beef
    Beets
    Black Bean
    Blackberry
    Blueberries
    Borscht
    Bread
    Brownies
    Brussels Sprouts
    Bundt
    Butter
    Butternut Squash
    Butterscotch
    Cabbage
    Cake
    Caramel
    Carrot
    Challah
    Champagne
    Cheesecake
    Chicken
    Chili
    Chinese
    Chinese New Year
    Chocolate
    Christmas
    Cinco De Mayo
    Citrus
    Cocktail
    Coconut Rice
    Comfort Food
    Cookies
    Corn
    Cranberries
    Crostata
    Crumble
    Cupcakes
    Curry
    Dessert
    Easter
    Egg
    Egg Nog
    Eggplant
    Fish
    Ginger
    Gingerbread
    Gluten Free
    Grain Free
    Green Sauce
    Gumbo
    Halibut
    Halloween
    Hannukah
    Healthy
    Holiday
    Holidays
    Ice Cream
    Indian
    Kale
    Key Lime
    Kohlrabi
    Kosher
    Lamb
    Latkes
    Lemon
    Lentil
    Low Carb
    Mac & Cheese
    Malt
    Mango
    Mango Salsa
    Mardi Gras
    Martini
    Memorial Day
    Mexican
    Miso Chicken
    Moroccan
    Mushrooms
    Naan
    Nectarine
    Noodles
    Olive Oil
    Parsnips
    Passover
    Pasta
    Pavlova
    Peanut Butter
    Penne
    Peppermint
    Pesto
    Pie
    Pizza
    Plums
    Pluot
    Pork
    Potatoes
    Pots De Creme
    Pudding
    Pumpkin
    Pumpkin Cake
    Quinoa
    Rajma
    Raspberries
    Ratatouille
    Risotto
    Root Beer
    Salad
    Salmon
    Salmon Bowl
    Salsa
    Sauce
    Scallops
    Shortbread
    Short Ribs
    Shrimp
    Side Dish
    Soup
    Soy Sauce Eggs
    Spicy
    Spiralized
    Steak
    Strawberries
    Sugar Free
    Summer
    Sweet
    Sweet Potatoes
    Tacos
    Tart
    Thanksgiving
    Tomatoes
    Turkey
    Valentine's Day
    Vegan
    Veganuary
    Vegetable
    Vegetarian
    Veggie Burger
    Whole30
    Whoopie Pies
    Yams
    Yellow Bell Pepper
    Yu Choy

    RSS Feed

Powered by Create your own unique website with customizable templates.
  • home
  • services
  • bio
  • blog
  • contact
  • PHOTOS (summer)
  • photos (winter)
  • PRESS
  • faq