Moveable Feast
  • home
  • services
  • bio
  • blog
  • contact
  • PHOTOS (summer)
  • photos (winter)
  • PRESS
  • faq

Feast Mode

a moveable feast blog

Coconut Rice

5/27/2020

10 Comments

 
Picture
It has been a crazy few months, and the BF and I hope everyone has been doing well, amidst the circumstances. How have you all been?

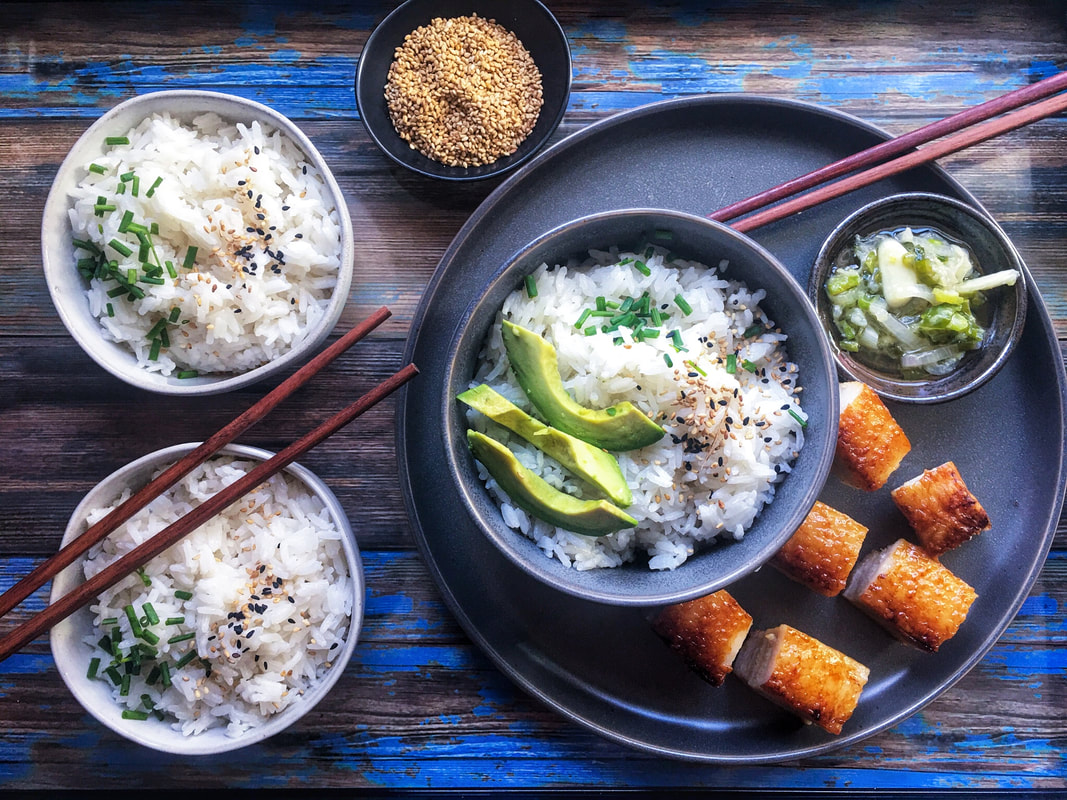
Today I want to give you a supremely versatile comfort food recipe that you can hopefully use with, well, as the BF would say, "ALL TEH THINGZ." [Ed. note: Can confirm.]

Everyone has their own version of comfort food. This coconut rice is a touch of sweet (but not too sweet), with a slightly creamy goodness that pairs well with spicy or salty flavorful toppings. Some of our favorite combos include:
​
  • Soy Sauce Eggs (www.moveablefeast.me/blog/soy-sauce-eggs)
  • BBQ Salmon Bowl (www.moveablefeast.me/blog/category/salmon-bowl)
  • Korean skirt steak with bok choy
  • Roasted pork belly (shown) with avocado and scallion-ginger sauce
  • Vegan Coconut Rice Bowl with grilled shoyu mushrooms, fresh corn and bok choy (a favorite)
Picture
We have had fun Skyping and Zooming with family and friends, but of course are ready to ease back into a more normal swing of things. At the very least, we have been getting outside for fresh air with Marlowe (bottom picture).

Hope you all find many uses for this original recipe, have a safe re-opening wherever you are (support local businesses!), and enjoy many fun reunions with family and friends.
Picture
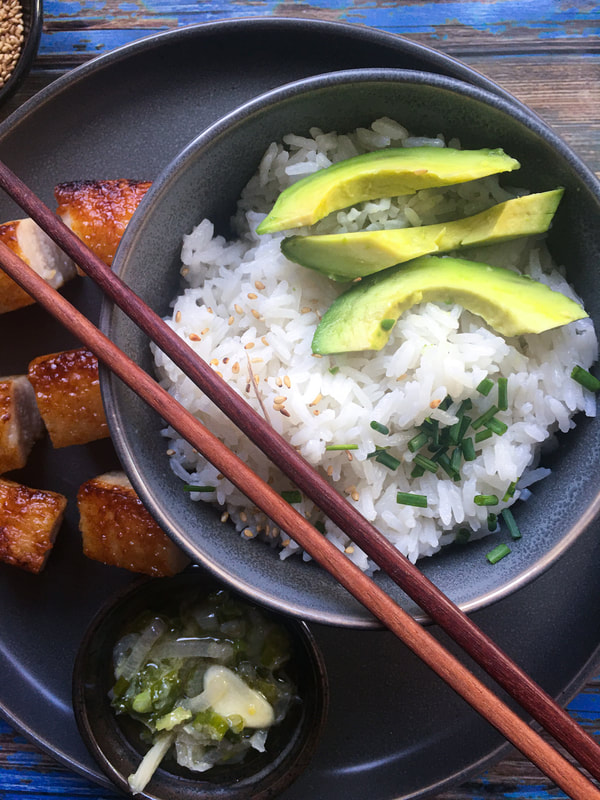
Number of servings: 4-6

Ingredients
  • ​1 ¼ cup water
  • 1 can full-fat coconut milk (not organic)
  • 1 ½ cup Jasmine rice
  • 1 heaping tablespoon granulated sugar 
  • ¼ teaspoon salt
  • Toppings: toasted sesame seeds, toasted coconut, as desired

Directions
  1. Place water, coconut milk, sugar, salt in saucepan. Bring to a boil, while whisking to dissolve sugar and incorporate coconut milk.
  2. Add rice and stir.
  3. Cover and lower to simmer.
  4. Simmer for 18 minutes. Take rice off heat and let stand 10 minutes.
  5. Uncover and fluff.

NOTE:
  • I have made with organic coconut milk, but find it has an unpleasantly greasy taste.
Picture
10 Comments

Soy Sauce Eggs

2/17/2020

2 Comments

 
Picture
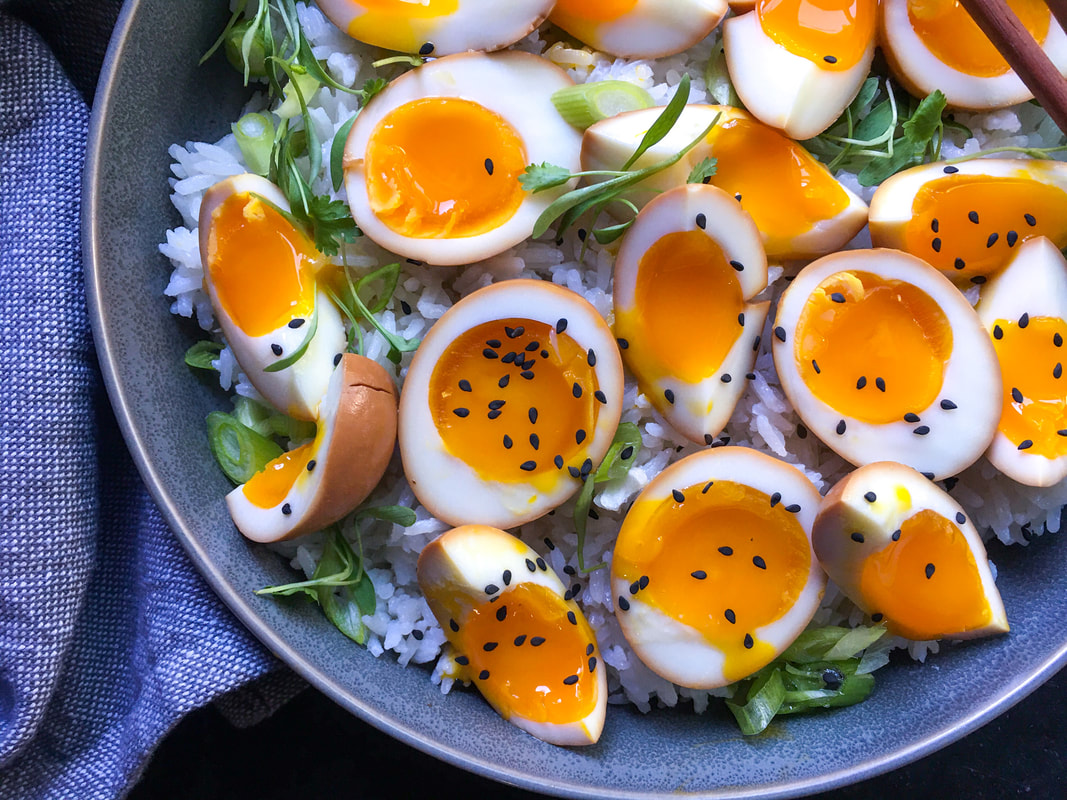
If you love eggs, and can handle an ice bath [Ed. note: Not literally], then there are a thousand different ways you can enjoy these beauties. They work on toast, on a salad, or on their own as a snack. You can also vary the marinade. One of my favorites is comprised of soy sauce, scallions, ginger, and chilies.

When I recently made this for the BF, he suggested adding some chicken to the dish, and then smartly decided against that. [Ed. note: There goes my quota.] I prepared the eggs on top of a bed of coconut rice, sprinkled with scallions, micro-cilantro and black sesame seeds. To quote the great Ina Garten, "How easy is that?"
Picture
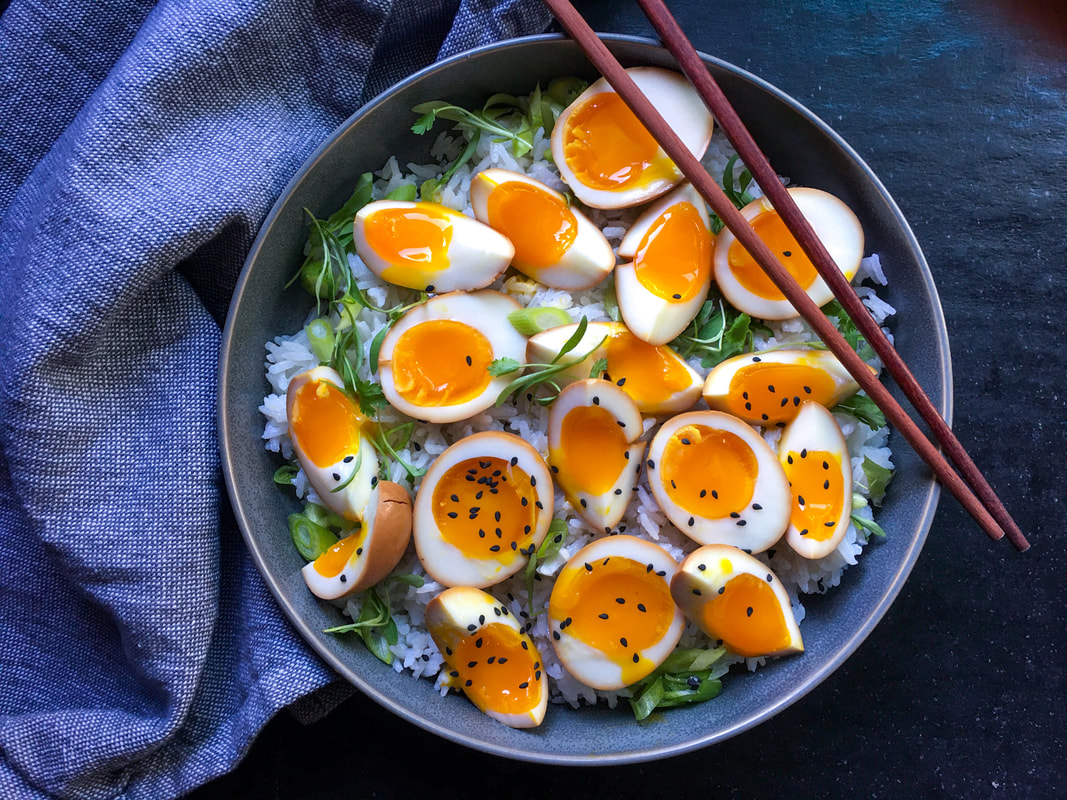
Inspired by: Well Seasoned Studio and Momofuku

Ingredients
  • 6 large eggs
  • 1 cup low-sodium soy sauce
  • 3 ½ tablespoons rice vinegar
  • 1 tablespoon sesame oil
  • 2 medium garlic cloves, thinly sliced
For serving
  • Rice (coconut rice was used here)
  • Avocado, scallions, pickled ginger, seaweed, micro-cilantro, toasted sesame seeds, black sesame seeds

Directions
  1. In a medium bowl, mix soy sauce, rice vinegar, sesame oil and garlic.
  2. Bring a large pot of water to a full boil. Set a timer for 7 minutes and immediately (with a large serving spoon, not your hands!) lower eggs into water.
  3. Meanwhile, make an ice bath (cold water + lots of ice) in a large mixing bowl. When there’s 15 seconds left on the timer, begin transferring eggs to ice bath. Let cool for 10-15 minutes,
  4. Gently crack egg on a hard surface loosening the shell on all sides. Peel egg (if you wish, you can peel the eggs in the water-this will help keep a perfect exterior).
  5. Transfer peeled eggs to soy mixture. Cover and refrigerate 6 hours, turning once halfway through.
  6. To serve, cut eggs in half or quarters. Serve over rice and any accompaniments you desire. 
  7. NOTE: You can save the soy sauce mix for another round of eggs, if you wish. Refrigerated in a tightly sealed container, the eggs will keep for about 4-5 days.

PS: [Ed. Note: Hello it's the BF here, and okay so this is weird. A year ago we got super healthy with this Asian-style kale salad, and I sniffed, guffawed and gave thanks to a true kaleaholic, then-San-Francisco-Giants outfielder Hunter Pence, who was on his way to Arlington to play for the Texas Rangers. WELL, he had a great season with them and here we are a year later and HE'S BACK and I repeat for emphasis: Yes. Yes. Yes.] (www.moveablefeast.me/blog/asian-style-kale-salad)
Picture
2 Comments

Spago Martini & Cinnamon Sugar Rim

2/8/2020

16 Comments

 
Picture
Hello there, it's the BF [bracket-happy Editor], hijacking this entry. Thought we'd kick back into gear with something a little different, a cocktail to lead us into one of Chef Jacquie's favorite nights of the year: Oscar night.

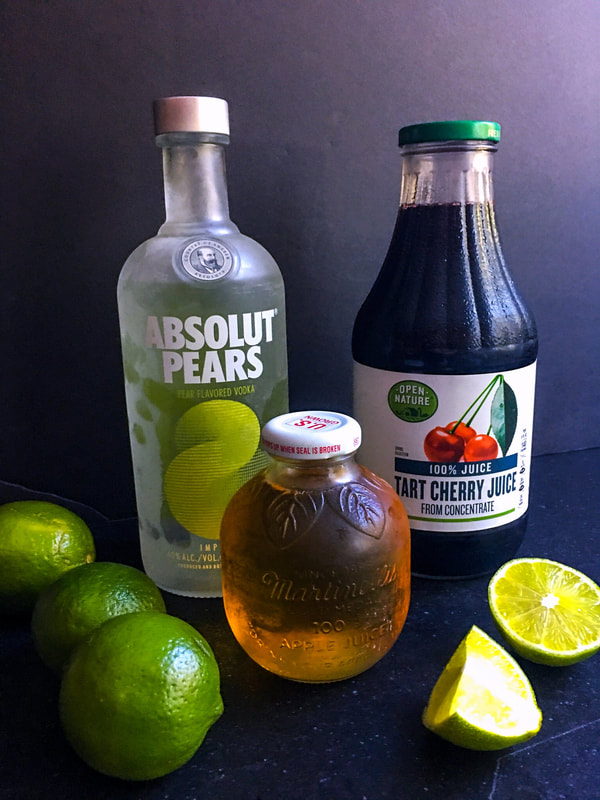
For those unaware, Jacquie and I complement each other beautifully in the creative spaces. I worked for musician/music-industry-oriented magazines for roughly a quarter century, am the product of two San Francisco-based jazz pianists, and like to think I opened up her ears a little bit. She, in turn, helped me appreciate movies on an entirely different level. Still remember walking up the aisle after Pulp Fiction, feeling like I'd ridden a roller coaster with her all day. Since we met, I've been a more discerning movie fan.

And Oscar night? It's her Super Bowl.

For over a decade Chef Jacquie had weekend clients who unfortunately kept her busy on those Sunday nights, but now we settle in with appropriate libations and make our picks (ours are below), while trying to prepare ourselves beforehand by seeing as many of the nominees as we can. This year we were both excited to have so many good pictures to review.

For this Oscar ceremony, we're going a couple decades back to a date we had at Spago in Palo Alto, CA, where she ordered the restaurant's eponymous martini, and after started making her own version of it whenever she could.

It's Jolly Rancher good.

So we hope you enjoy this year's Oscars, and here are our picks for some of the major categories. Let us know yours in the comments!

Director
Chef Jacquie: Quentin Tarantino, Once Upon A Time...In Hollywood
The BF: Quentin Tarantino, Once Upon A Time...In Hollywood

Costume Design
CJ: Jacqueline Durran, Little Women
BF: Mayes C. Rubeo, Jojo Rabbit

Cinematography
CJ: Roger Deakins, 1917
BF: Roger Deakins, 1917

Actress In A Supporting Role
CJ: Kathy Bates, Richard Jewell
BF: Kathy Bates, Richard Jewell

Actor In A Supporting Role
CJ: Brad Pitt, Once Upon A Time...In Hollywood
BF: Joe Pesci, The Irishman

Actress In A Leading Role
CJ: Renée Zellweger, Judy
BF: Renée Zellweger, Judy

Actor In A Leading Role
CJ: Joaquin Phoenix, Joker
BF: Joaquin Phoenix, Joker

Best Picture
CJ: Once Upon A Time...In Hollywood [but pretty sure 1917 will win]
BF: Joker
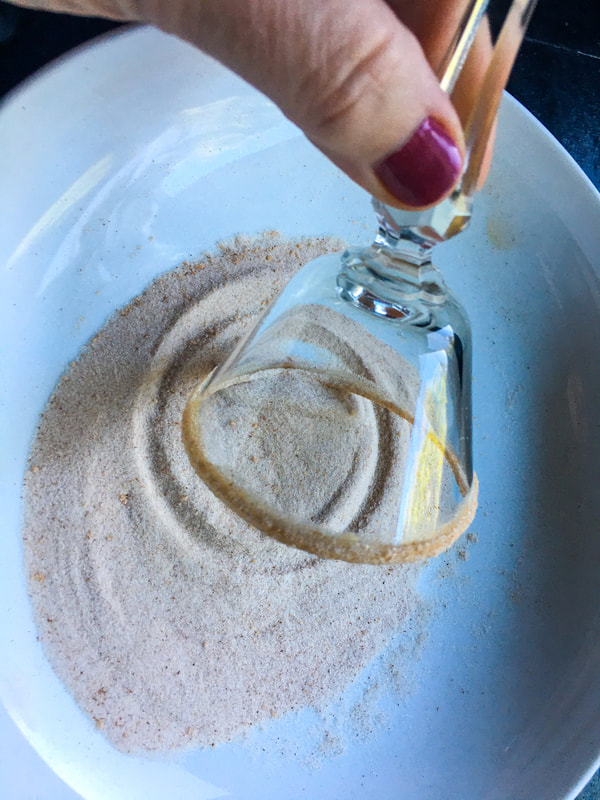
Picture
Picture
Picture
NOTES:
  • You can use apple vodka instead of pear. If you do this, use pear juice instead of apple.
  • Original recipe calls for Vodka infused with both pear and apple. Recipe was adjusted to add pear or apple juice to your desired vodka as that specific combo can be difficult to find. This drink is slightly less boozy because of this. If you want more kick, add more vodka. 
Stolen from: Spago's Restaurant [Ed. note: Not literally.]
Number of servings: 2-3 martinis

Ingredients
Cocktail
  • ​4 ounces pear-infused vodka
  • 2 ounces apple juice 
  • 1 ounce tart cherry juice
  • Squeeze of fresh lime juice
Cinnamon Sugar Rim
  • 2 tablespoons fine granulated sugar
  • ¼ teaspoon cinnamon
  • Lime wedge
Garnish
  • Bing or maraschino cherry garnish

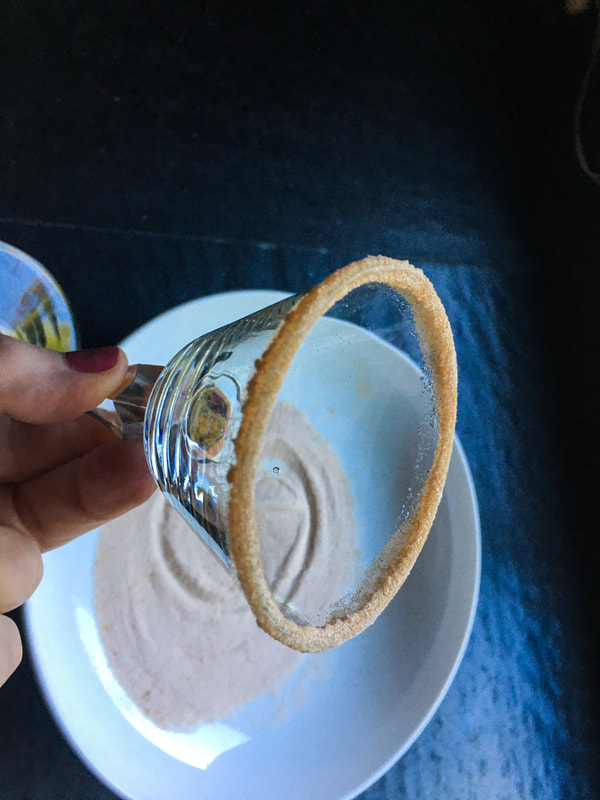
Directions
Cinnamon Sugar Rim
  1. Place sugar and cinnamon in a shallow wide bowl or plate. The point, use a larger diameter than your glass. Mix well.
  2. Wet the rim of your martini glass with a lime wedge. 
  3. Dip and roll the rim of the glass into the cinnamon sugar.
  4. Set aside.
Cocktail
  1. Place vodka, apple juice, cherry juice and squeeze of lime into a 2-cup measuring cup with a spout (make sure it has a defined spout). Give it a stir.
  2. Pour into glasses.
  3. Add cherry for garnish if using. Viola!
Picture
Picture
Good to the last drop.
16 Comments

Red Kidney Bean Curry (Rajma)

1/3/2020

4 Comments

 
Picture
Happy New Year!

Have you heard of Veganuary? No? It's a 30-day challenge of eating plant-based foods. Won't be doing it straight for a month, but two-three times per week is great. [Ed. note: Through the NFL playoffs? Are you insane, woman?]
​
This red kidney bean curry (a.k.a. Rajma) is like a vegetarian chili, but with Indian spices. Adapted from Smitten Kitchen, this super-easy-to-make (20 minutes, start to finish), freezer-friendly and budget-conscious dish is fantastic served with rice, quinoa or naan bread. Great veggie sides include roasted yams, roasted cauliflower or sauteed greens like spinach, kale, or chard (if you're trying to be low carb).

Full disclosure, I was a little hesitant to offer this to the BF. Not because he doesn't like vegan meals, but because he's not a huge chili fan; he likes, but doesn't love beans. So I can't tell you how surprised I was that he loved this. I mean, really, really, truly inhale-a-bowl-and-ask-for-more loved this. [Ed. note: You tricked me! Curses!] #Winning

NOTES:
  • Several ingredient quantities were changed, as was a bit of the method. Very adaptable recipe. You can adjust to your preferences.
  • If you want less heat, leave out the serrano or jalapeno and cut back on the cayenne. You can always have minced chili that you can sprinkle on your own curry bowl.

Adapted from: Smitten Kitchen
Number of servings: 6

Ingredients
  • 2 tablespoons extra virgin olive oil 
  • 3 tablespoons minced fresh ginger (if you're adverse to ginger, use 2 tablespoons)
  • 1 medium onion, finely chopped
  • 1 plum tomato, de-seeded and diced
  • 3 cloves garlic, minced
  • 1 large serrano or jalapeno chili, minced (optional, if you can't take the heat)
  • 1 teaspoon salt
  • 1 teaspoon ground cumin
  • 1 teaspoon ground coriander
  • ¼​ teaspoon cumin seeds (if you don't have cumin seeds on hand--leave out)
  • ½ teaspoon ground turmeric
  • ¼ teaspoon cayenne (less if you want less heat)
  • 8 ounce can or 1 cup of tomato sauce  
  • 3 cups cooked red kidney beans or 2 15-ounce cans, drained and rinsed
  • 2 cups vegetable broth (original recipe calls for water, I like broth, either works)
  • ½ cup chopped fresh cilantro (or parsley, if you prefer)
Suggested Sides and Toppings
  • Rice, quinoa, naan bread
  • Roasted cauliflower or roasted yams
  • Sauteed greens (spinach, chard, kale)
  • Yogurt

Directions
  1. Heat oil in a deep sauce pan over medium heat for one minute. Add ginger, garlic, onion, green chile, and let sizzle for one minute. Add dry spices and cook over medium low heat for five minutes, or until onion is softened.
  2. Add the tomato sauce and cook for an additional five minutes, stirring frequently.
  3. Add red kidney beans, 2 cups vegetable broth or water, and diced tomato. Bring it to a boil, then reduce to medium heat and let cook uncovered for 10 minutes.
  4. Remove from heat. Garnish with cilantro.
  5. Serve over rice or with naan. A dollop of plain yogurt (if not keeping the dish vegan) on top is heavenly.​
Picture
Should Old Acquaintance be forgot, ang nefer took da treat...
4 Comments

Crisp-Skinned Spatchcocked (Butterflied) Roast Turkey

11/22/2019

2 Comments

 
Picture
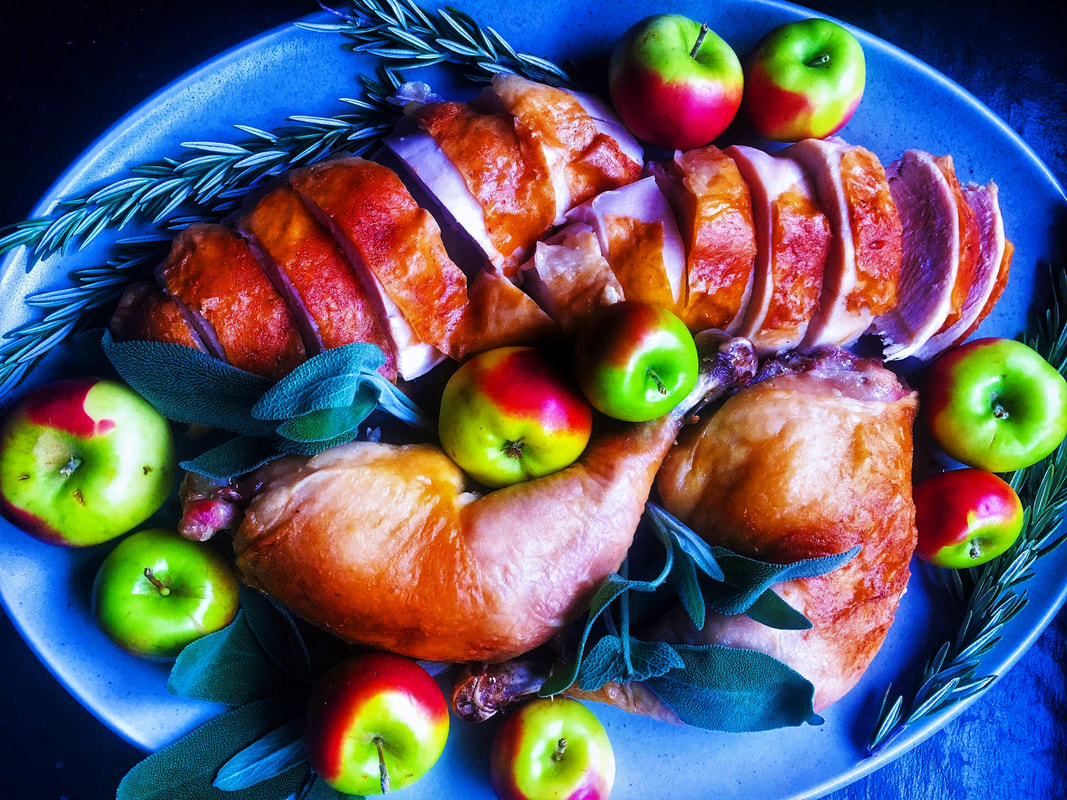
A 14-pound Thanksgiving turkey? Roasted in less than 90 minutes? [Ed. note: You're really jumping the shark with this one.]

No, it's true! This turkey is truly a Thanksgiving life-saver. No wet brining (a nightmare) or basting (keep that oven door closed). Last week's "blog test" bird was so sumptuous the BF forgave me for not serving stuffing with it. 

The secret: butterflying (a.k.a. spatchcocking) the bird and giving it a dry salt brine. You get a crispy, salty skin, juicy meat on the inside, and boy my brother Mike loves the word "spatchcock."


For directions on how to spatchcock a turkey, J. Kenji Lopez-Alt has the perfect walk-through here: www.seriouseats.com/2012/11/how-to-spatchcock-cook-turkey-thanksgiving-fast-easy-way-spatchcocked.html. The bird will have to be prepared this way before you make the dry salt and baking powder brine.

Last year for Thanksgiving, the BF and I hosted six guests and served a 14-pound spatchcocked turkey. Baked it at high heat for 85 minutes. The skin practically cracked when you picked at it, the meat was succulent and moist. This is now the one and only way I ever roast chicken or turkey.

Need further testimony? Serious Eats' Lopez-Alt explains, "Spatchcocking is a method of removing the turkey's backbone to flatten its body prior to putting in the oven. This flatter shape ensures that the meat cooks more evenly and more quickly, allowing the legs to reach a safe temperature without overcooking the breast. The result is hands-down the easiest, most reliable route to a juicy, moist turkey with incredibly crisp skin. It may not look like a traditional Thanksgiving centerpiece, but your tastebuds will certainly thank you."


The BF, Marlowe and I thank you and wish you all a very Happy Thanksgiving!

​NOTES:
  • For perfectly cooked turkey, always use a good thermometer. I use a Thermapen. It has saved my butt from overcooked meats too many times to count.
  • Start the dry brine at least 24-48 hours prior to roasting​. The longer the brine, moister the meat.

PS: A year ago we geared up for the holidays with this gingerbread roll with eggnog whipped cream (www.moveablefeast.me/blog/gingerbread-roll-with-eggnog-whipped-cream). Everyone wants a log. [Ed. note: From Blammo™.]
Picture
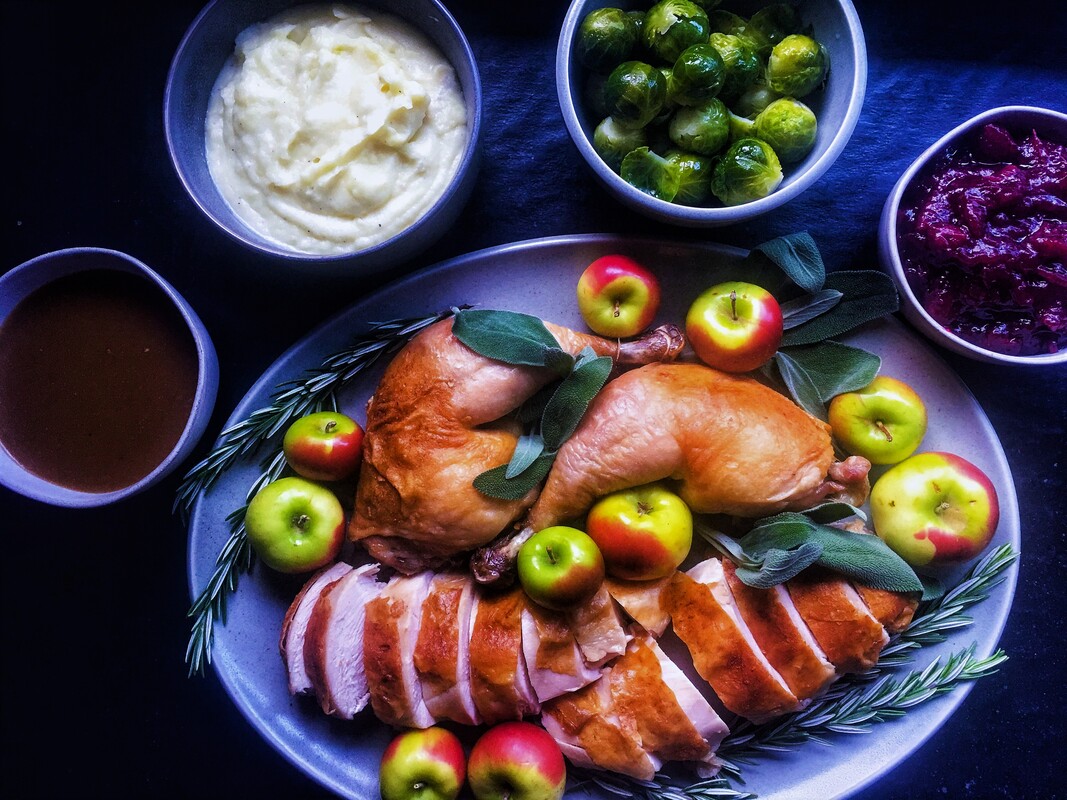
Adapted from: J. Kenji Lopez-Alt, Serious Eats
Number of servings: 10-12

Directions - Butterflying/Spatchcocking Turkey
www.seriouseats.com/2012/11/how-to-spatchcock-cook-turkey-thanksgiving-fast-easy-way-spatchcocked.html

Ingredients - Dry-Brine (prepare 24-48 hours ahead of time)
  • ½  cup of Diamond Crystal kosher salt, or six tablespoons Morton's kosher salt
  • 2 tablespoons of baking powder
Directions
  1. Combine ½ cup of Diamond Crystal kosher salt (or six tablespoons Morton's kosher salt) with two tablespoons of baking powder in a bowl.
  2. Carefully pat your turkey dry with paper towels.
  3. Generously sprinkle salt mixture on all surfaces: pinch mixture between your thumb and fingers, hold 6-10 inches above the bird, and sprinkle mixture as evenly as possible. Turkey should be well coated with salt, though not completely encrusted. (NOTE: You will most likely not need all of the salt. In some cases, half will be okay; it depends on the size of your bird and your salt preferences.)
  4. Transfer the turkey to a rack set in a rimmed baking sheet, and refrigerate, uncovered, for 24-48  hours. 

Ingredients​ - Turkey
  • 2 large onions, roughly chopped 
  • 3 large carrots, peeled and roughly chopped 
  • 2 stalks celery, roughly chopped 
  • 8-10 thyme sprigs
  • 1 whole turkey (12-14 pounds), butterflied according to the instructions above, backbone, neck, and giblets reserved (if you're making gravy)
  • 1 tablespoon grapeseed or vegetable oil

Roasting Directions
  1. Preheat oven to 450 °F. Adjust oven rack to middle position.
  2. Line a rimmed baking sheet or broiler pan with aluminum foil.
  3. Scatter onions, carrots, celery and thyme sprigs across bottom of pan. Place slotted broiler rack or wire rack directly on top of vegetables.
  4. Pat turkey dry with paper towels and rub on all surfaces with 1 tablespoon oil. Tuck wing tips behind back. Place turkey on top of rack, arranging so that it does not overlap the edges, pressing down on the breast bone to flatten the breasts slightly.
  5. Transfer turkey to oven and roast, rotating occasionally, until an instant-read thermometer inserted into the deepest part of the breast registers 150 °F, and thighs register at least 165 °F, about 80 minutes for a 14-pound turkey.
  6. When turkey is done, remove from oven and transfer rack to a new baking sheet. Allow to rest at room temperature [Ed. note: ROOM TEMPERATURE] for 20 minutes before carving.
  7. Carefully pour any collected juices from roasting pan through a fine-mesh strainer into a liquid measuring cup. Skim off excess fat and discard. Presto, gravy.
  8. Carve it!
Picture
2 Comments

Apple Pie Bars

11/16/2019

6 Comments

 
Picture
I probably drive the BF crazy [Ed. note: like no one else, and for some reason I can't help myself], but I start asking him to choose his birthday cake-dessert about a month before his birthday. Usually give a choice of some great found recipe that includes either apples, caramel, butterscotch or lemon. Love hunting for the perfect recipe, with the goal of getting his eyes to bug out.

These apple pie bars are a client favorite, and whenever I make them the BF ends up in the kitchen, plaintively staring and asking if there are "extras." [Ed. note: "Oh those were for the clients?"] Needless to say the dessert has become one of his favorites, so I decided to make it for his birthday in lieu of a traditional cake. This was a very special birthday, by the way. [Ed. note: #LOLOLD]

One of the great things about this dessert is the shortbread dough is used for both the bottom crust and crumble on top. (Meaning there's no pie crust to roll out.) As the brilliant Ina Garten likes to say, "How easy is that?"

To really send it over the top, drizzle the bars with gooey caramel (optional, but recommended). Perfectly okay to eat with your hands, or dish/bowl them up with a scoop of vanilla ice cream.
Picture
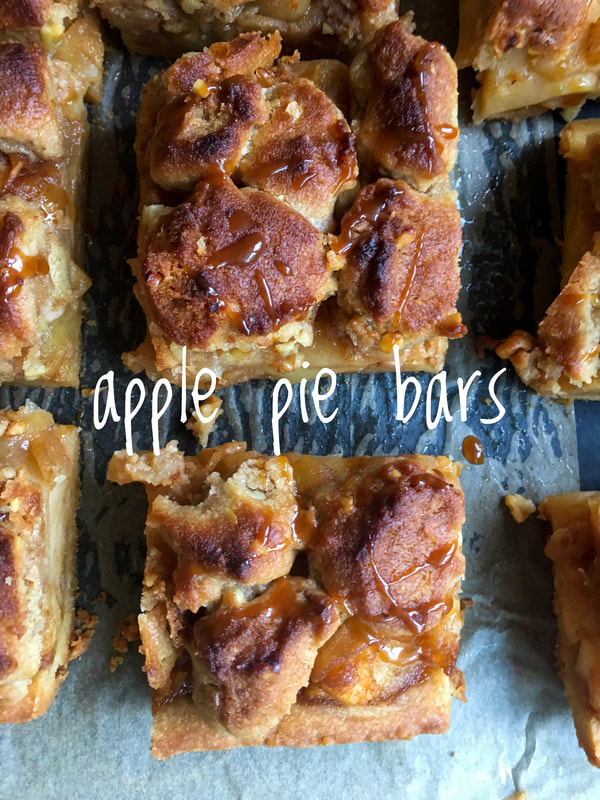
In addition to offering an alternative to your everyday pedestrian cookie, these bars have another perk: they travel well. Simply wrap up the baking pan and cut the bars when you get to your destination. As for optimal portion size, Garten advises, "I cut the bars in fairly large 3 x 3-inch squares if I'm serving them on a plate with a scoop of vanilla ice cream on the side. If I'm serving them on a platter of small petits fours to pick up with your fingers, I'll cut them in smaller bite-size pieces."

NOTES:
  • You can cut this recipe in half  by preparing it in an 8 x 8-inch pan.
  • After baking, cool completely, wrap tightly and store at room temperature for up to two days.  Great for birthdays, every day, and is a perfect make-ahead dessert for Thanksgiving.​

PS: Speaking of Thanksgiving, a year ago we were thinking ahead with this whipped cranberry butter (www.moveablefeast.me/blog/whipped-cranberry-butter). Also, Adam Sandler sings!

PPS: Another client-approved holiday-time dessert, your friends and family won't know this yummy mini pumpkin cheesecake is sugar-free and low-carb. That is, unless you tell them. So don't. (www.moveablefeast.me/blog/mini-pumpkin-cheesecake-sugar-free-and-low-carb)
Picture
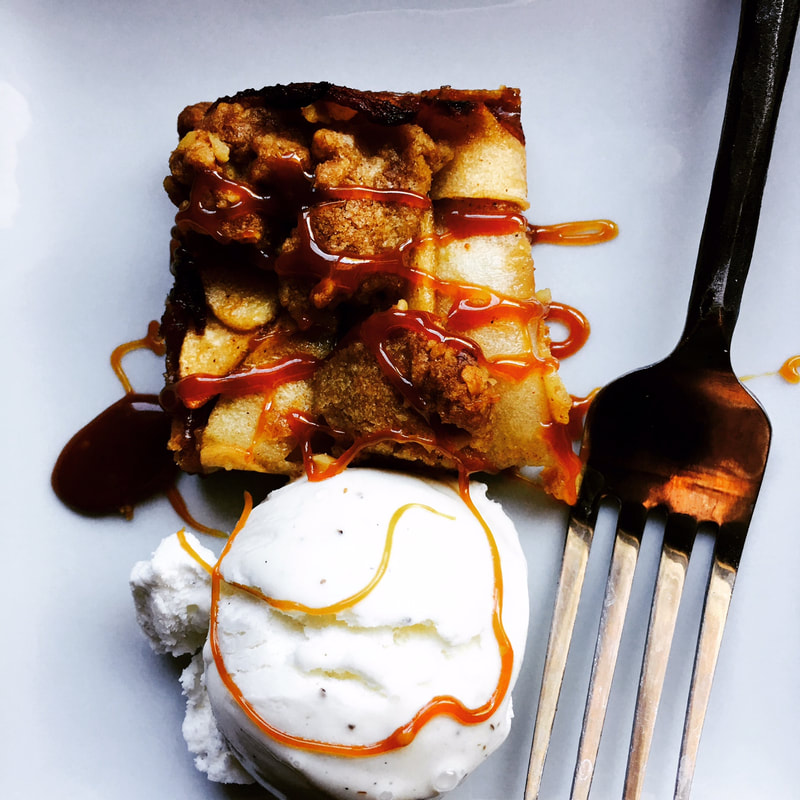
Adapted from: Ina Garten, Cooking For Jeffrey
Number of Servings: Makes one 9 x 13-inch pan

Ingredients
Crust
  • 1 pound (4 sticks) unsalted butter, at room temperature [Ed. note: ROOM TEMPERATURE]
  • ¾ cup granulated sugar
  • ½ cup light brown sugar, lightly packed
  • 2 teaspoons pure vanilla extract
  • 4 cups all-purpose flour
  • 1 ½ teaspoons kosher salt
  • ½ cup chopped walnuts
  • 1 teaspoon ground cinnamon
Apple Filling
  • 3 pounds Granny Smith apples, peeled, quartered, cored, and sliced ⅛-inch thick (6 large)
  • 2 tablespoons freshly squeezed lemon juice
  • ¼ cup granulated sugar
  • 1 teaspoon ground cinnamon
  • ⅛ teaspoon ground nutmeg
  • 4 tablespoons (½ stick) unsalted butter
To Serve
  • Vanilla ice cream
  • Caramel sauce

Directions
Crust
  1. Place a rack in the center of oven and preheat to 375 ºF. Line a 9 x 13-inch baking pan with parchment paper so that paper hangs over two edges of the pan by about two inches. This will make the pie bars easier to remove after it’s baked.
  2. Place the butter, granulated sugar, brown sugar, and vanilla in the bowl of an electric mixer fitted with the paddle attachment. Beat on medium speed for 2 minutes, until light and creamy. Sift the flour and salt together and, with the mixer on low, slowly add to the butter-sugar mixture, beating until combined.
  3. Scatter ⅔ of the dough, in clumps, into your baking pan, and press it lightly with floured hands on the bottom and ½ inch up the sides. Refrigerate for 20 minutes.
  4. Bake for 18-20 minutes, until crust is golden brown. Set aside to cool.
  5. Put mixing bowl with the remaining dough back in the mixer, add walnuts and cinnamon, and mix on low speed to combine. Set aside.
  6. Reduce the oven to 350 ºF.
Apple Filling
  1. Combine the Granny Smith apples and lemon juice into a very large bowl. Add granulated sugar, cinnamon, and nutmeg and mix well.
  2. Melt the butter in a large (10-inch-diameter) pot, add the apples, and simmer over medium to medium-low heat, stirring often, for 12-15 minutes, until apples are tender and the liquid has mostly evaporated.
  3. Spread the apples evenly over the crust, leaving a ½-inch border.
  4. Pinch medium pieces of the remaining dough with your fingers and drop them evenly on top of the apples (they will not be covered). Bake for 25-30 minutes, until the topping is browned. NOTE: I sometimes place the pan under the broiler to get the topping a little more browned.  Watch carefully so it doesn't burn.
To Serve
  1. Cool completely and cut into bars.
  2. Drizzle with caramel and serve with ice cream, or just pick 'em up with your hands.
Picture
6 Comments

Pommes Duchesse (French Piped Potatoes)

11/8/2019

2 Comments

 
Picture
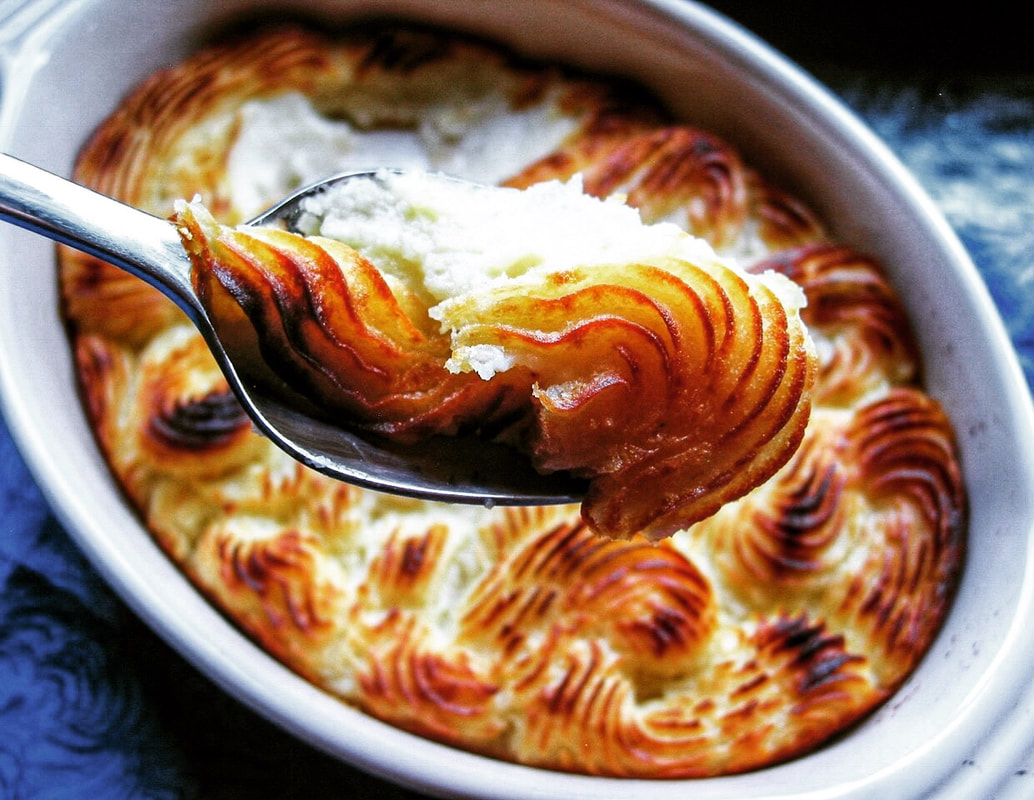
Pommes Duchesse. Sounds fancy. Looks fancy. But really, this is simply a fun way of "piping" mashed potatoes into a baking dish, just in time for the Thanksgiving countdown (in my book, never too soon).

These potatoes are an always-requested Thanksgiving staple in our household, and also a perfect accompaniment to any poultry or red meat (as one of our relatives is not fond of turkey). Another regular vegetarian guest annually asks, "You're making the potatoes, right?"

Looking more elegant than regular mashed, they work well for any special occasion, and aren't any more difficult to make. [Ed. note: Don't say this to your guests. Lie. Lie and tell them it took you months to prepare this and those ingrates should kiss the ground you walk on and okay I'll shut up.]

Picture
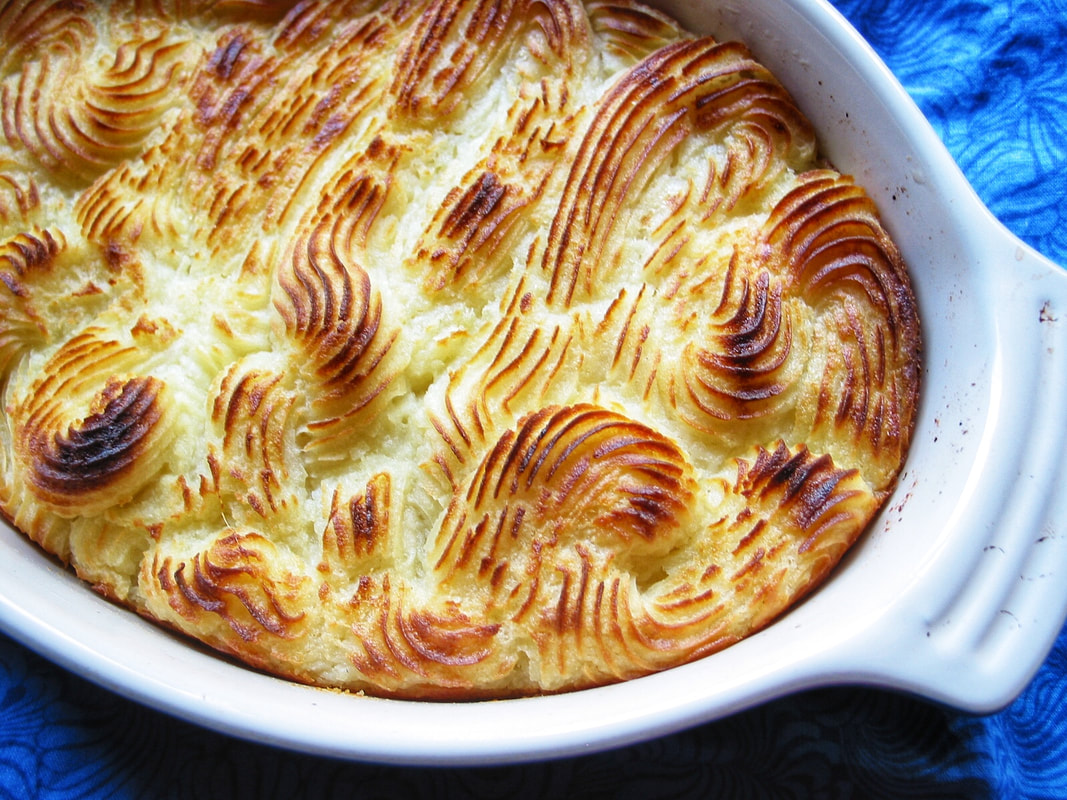
The original recipe calls for piping the potatoes into eight puffs of potato swirls. Those are glorious, and I've made them that way many times, but here I decided to freestyle the swirls and  just make a decorative pattern in the baking dish. Either way you decide to do it, it's good.

If you don't have a pastry bag and a piping tip, just spoon the mashed potatoes into the baking dish and create decorative swirls with the tines of a fork. The end result will still be crispy on the outside and soft and buttery on the inside.

However you decide to present them, Pommes Duchesse will be an impressive addition to any holiday (or everyday) feast.

PS: A year ago we were feeling pretty healthy with this butternut squash soup with red curry croutons (www.moveablefeast.me/blog/butternut-squash-soup-with-red-curry-croutons).
Picture
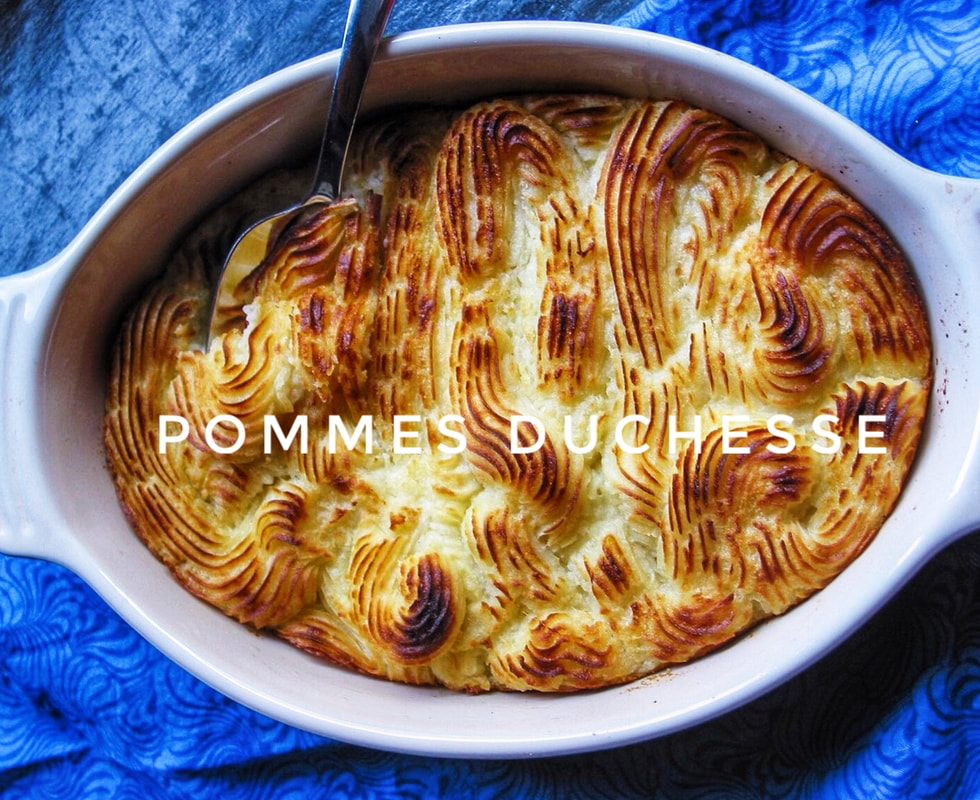
Adapted from: Geoffrey Zakarian, The Kitchen (Food Network)
Number of servings: 8

Ingredients
  • 2 pounds (about 4 medium) russet or Yukon gold potatoes, peeled and cut into 1-inch pieces
  • Kosher salt and freshly ground black pepper
  • ¼ cup heavy cream 
  • 1 stick (8 tablespoons) unsalted butter, plus more for greasing the baking dish
  • 2 egg yolks 
  • ½ cup finely grated Gruyere cheese (if you're adverse to Gruyere, try finely grated Parmesan)
  • Freshly grated nutmeg

Directions
  1. In a large pot, combine the potatoes, 1 teaspoon salt and enough cold water to cover. Bring to a boil over high heat. Lower the heat and simmer until fork tender, 10-12 minutes. Drain potatoes and then press through a ricer or food mill back into the pot they were cooked in. Place over low heat for a few minutes to dry the potatoes.
  2. Heat the cream and ½ stick of the butter in a saucepan over medium-low heat until the butter melts and the cream is warm but not hot. Stir mixture into the potatoes. Mix in the egg yolks and season with salt and pepper. Add cheese and nutmeg.
  3. Preheat the oven to 400° F. Grease a medium baking dish with butter.
  4. Melt the remaining ½ stick butter in a small pot over low heat (or the microwave).
  5. Fill a piping bag fitted with a large-star tip with the mashed potatoes. Into the prepared baking dish, pipe the potatoes in a circular motion, about 3 inches in diameter, starting from the outside and filling in a circle. Finish by piping upwards for a nice swirl on top. Repeat to fill the entire baking dish. Brush each circle with the melted butter.
  6. Bake in oven until golden brown, 30-40 minutes.
Picture
2 Comments

Pumpkin Spice Buttermilk Bundt

10/29/2019

5 Comments

 
Picture
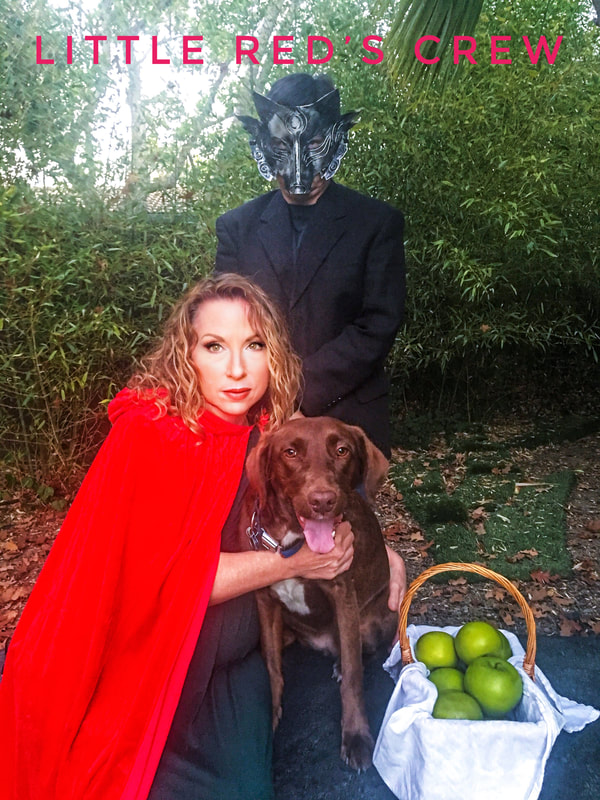
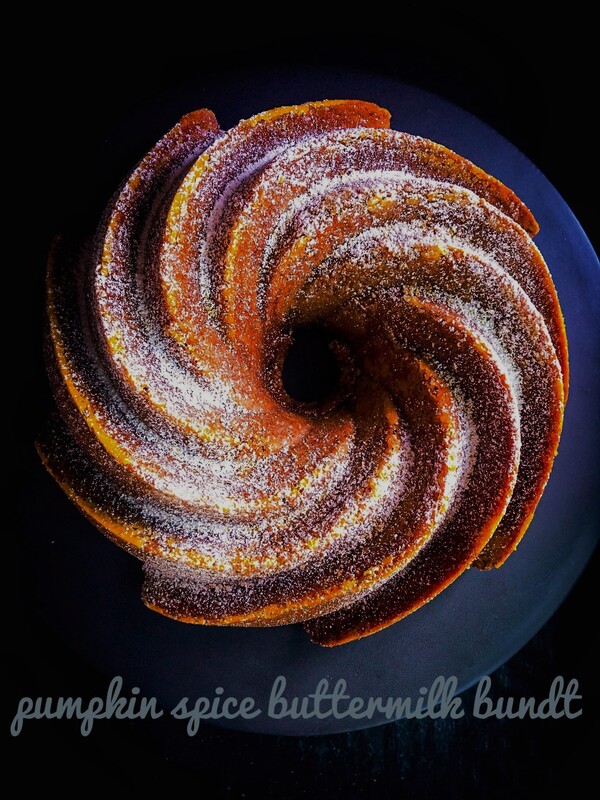
[Ed. note: Once again, since it's Halloween, our four-pawed special-guest blogger returns.]

Okay. Hello. Marlowe here. Mom and Dad say it okay to write because I has a did last Halloween (www.moveablefeast.me/blog/mini-butterscotch-apples) and then also as well again repeated here (www.moveablefeast.me/blog/sauteed-white-beans-with-kale). Dad better give me raise of more treats or I bite him. [Ed. note: We'll talk.]

Mom say Halloween one of her favorites times of year, which I no understand because weird little people ring doorbell all night and everybody tell me to stop barking. But I guess okay since little people very nice to me and give me lots of pets and scritches. Howevers nobody let me have any of small packages that they put in their bags, maybe I need to talk to union repersentartive.

Since it Halloween, Mom and Dad dress me up. You may remember I was UPS driver last year. This year I something called Little Red Riding Hood, and also a lumberjack. Mom like Riding Hood since good story, Dad like lumberjack because he keeps singing some silly song and I no know what a Monty Python is. Also not want speculate what Dad do in spare time. [Ed. note: More treats, yes! I think we can work something out.]

Mom says to tell you this cake like "little bite of autumn on your plate," which strange since though I a dog even I know you no can put a season on dinnerware. Duh. Oh, she also say this no need frosting and what the fresh hell who are you Mom?
Picture
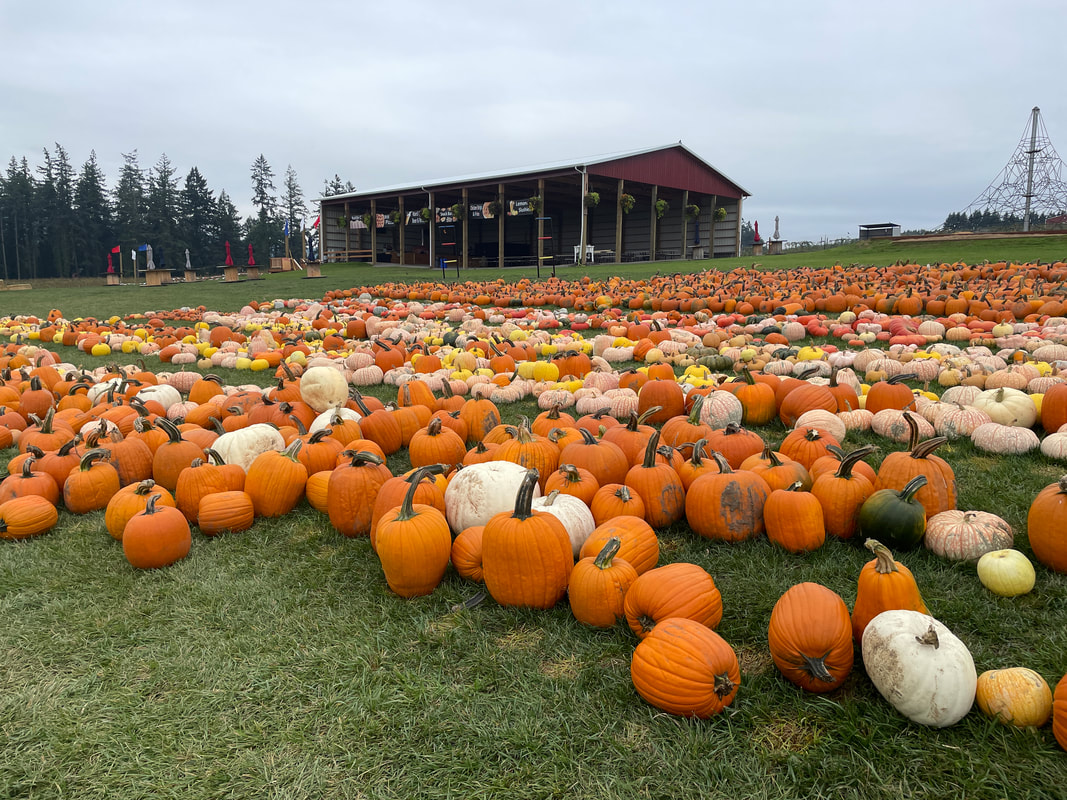
Besides weird little people ringing doorbell, Mom and Dad like to put on even weirder movies like Hocus Pocus, The Blair Witch Project, Shaun Of The Dead, and The Shining. Me no like when that guy puts face through the door.

Mom and Dad say wish you all Happy Halloween, and Dad say please click ads on right-hand side because that give me more minty treats that good for teeth.

Thank you for reading and hope you like bundt cake!

PS: Last year Mom also went crazy with pumpkin motif and this quote-unquote epic pumpkin bread (www.moveablefeast.me/blog/epic-pumpkin-bread).

PPS: We no just stuffing ourselves with pumpkin stuff and candy, also try be healthy with this butternut squash chickpea stew, which Dad should have more of because he taking shape of school bus I always afraid of (www.moveablefeast.me/blog/butternut-squash-chickpea-moroccan-stew).

Me also not know what up with "Amok Amok Amok."
Picture
I wish I were a kitteh, just like my dear Papa!

Adapted from: Cozy Cakes Cottage
Number of servings: 10-12

Ingredients
  • 2 ¼ cups flour
  • 2 teaspoons baking powder
  • 1 teaspoon baking soda
  • 2 teaspoon cinnamon
  • 1 teaspoon ground allspice
  • ¾ teaspoon nutmeg
  • ½ teaspoon ground ginger
  • ¼ teaspoon ground cloves
  • ½ teaspoon salt
  • 1 ⅓ cups canned pumpkin
  • ¾ cup buttermilk
  • 1 teaspoon vanilla
  • 1 cup unsalted butter, room temperature [Ed. note: God yes it's back ROOM TEMPERATURE]
  • 1 cup granulated sugar
  • ¼ cup brown sugar
  • 3 eggs (large)​
  • Powdered sugar (for sprinkling)

Directions
  1. Preheat oven to 350° F.
  2. Spray bundt pan (10-11 cup capacity) with Baker's Joy (or butter and flour). Set aside.
  3. Mix the flour, baking powder, baking soda, cinnamon, allspice, nutmeg, ginger, cloves, and salt in a bowl. Set aside.
  4. Mix pumpkin, buttermilk and vanilla in another bowl. Set aside.
  5. In the bowl of a stand-alone mixer (I used a hand mixer), beat the butter and sugars until fluffy (about 3 minutes). Add eggs and beat until incorporated. Reduce speed to low and add flour and pumpkin mixtures, alternating (beginning and ending with flour mixture).
  6. Pour batter into prepared bundt pan. Bake for about 45 minutes (check at 40 minutes) or until a toothpick inserted in the center comes out clean (crumbs on the toothpick are okay since it should be moist).
  7. Cool about 10 minutes and remove from pan. Let cool completely. Sprinkle with powdered sugar.
5 Comments

Black Bean Pumpkin Soup

10/25/2019

4 Comments

 
Picture
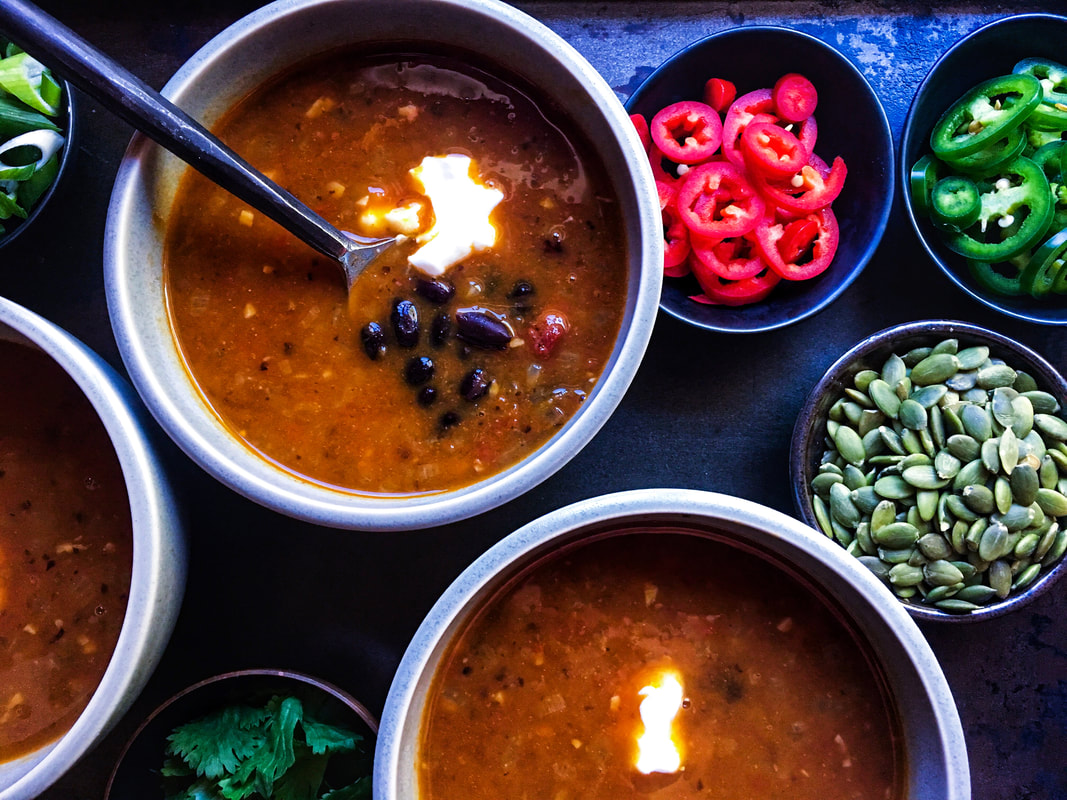
Halloween looms [Ed. note: OoooOoOooOooo], and I love making this soup every October. Recently, the BF and I had a good friend over for dinner, and she specifically requested it. I served biscuits with jalapeno butter, a crispy green salad, and various soup toppings for everyone to add what they like. 

If you're familiar with the blog, you know I don't like super thick, heavy soups, so I lightened this up to my liking. The recipe also calls for ham, which I left out. Usually I prepare this vegetarian, but this time included crispy pancetta as a topping. You can leave it out, of course.

The pumpkin is really a nice background flavor. Key word is "background," as both the BF and guest did not realize pumpkin was one of the main ingredients. 

Speaking of ingredients, I made a ton of changes to the original recipe:
  • Left the majority of beans whole. 
  • Added one more cup of broth, to make it lighter. If you prefer a thicker soup, don't add it.
  • Subbed pancetta for ham and only used it as topping. Did not add meat back in the soup as our guest does not eat pork or red meat. 
  • Subbed chicken broth for beef broth, only because our guest does not eat red meat.
  • Cut back on the butter.
  • Replaced onion with shallots.
  • ​Nixed the sherry vinegar at the end.
  • Added cayenne pepper. It will not be too spicy. It's just a little kick.

My favorite stress-free kind of dinner party.

[Ed. note: Chef Jacquie loves her Halloween. How much? ↓↓↓]
Picture
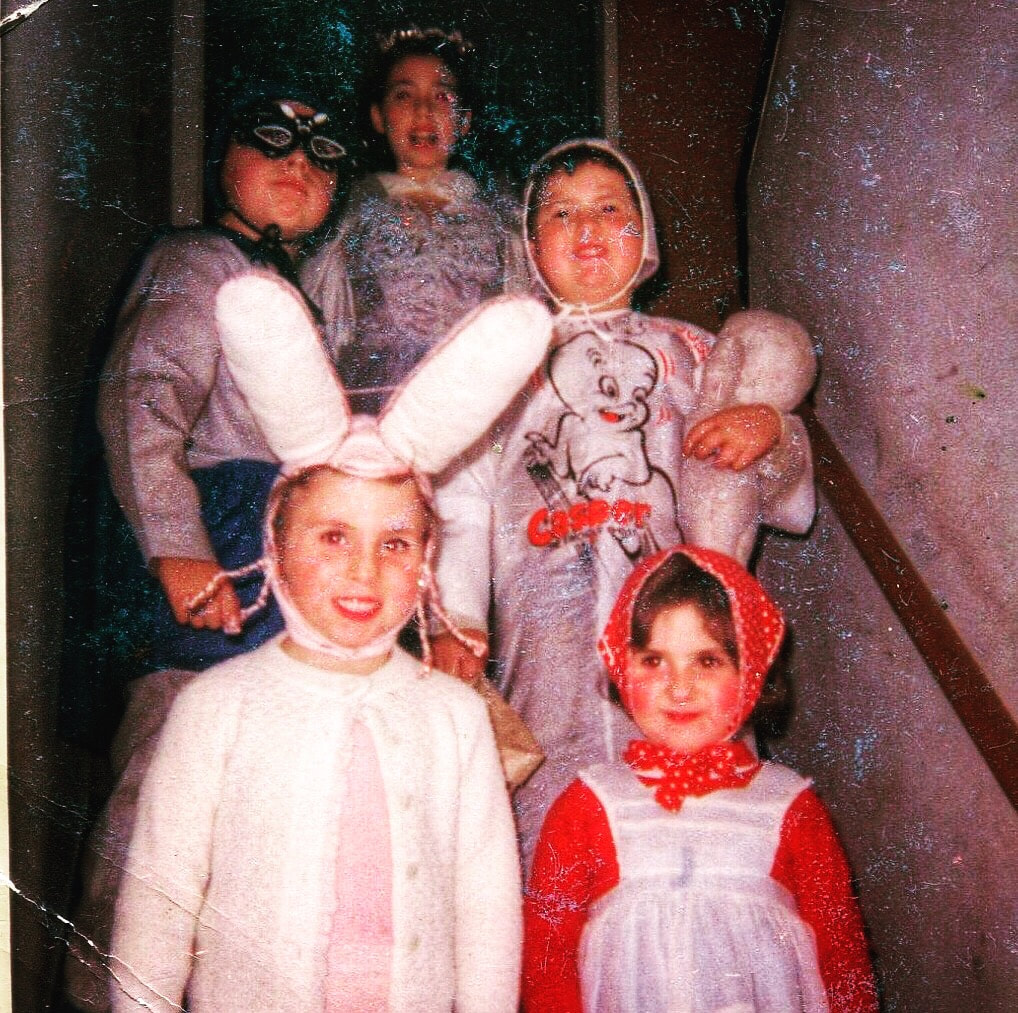
​A very vintage Steiner Halloween (Portland, 1966).

Adapted from: Smitten Kitchen
Number of servings: 9 cups, approximately 6 servings

Ingredients
  • ½ pound pancetta, diced small (you can find diced pancetta in your grocery store)
  • Three 15 ½ ounce cans black beans (about 4 ½ cups), rinsed and drained
  • 1 ¼ cup canned diced tomatoes
  • 2 cups shallots, minced
  • 4 garlic cloves, minced
  • 1 tablespoon plus 2 teaspoons ground cumin
  • 1 teaspoon salt
  • ½ teaspoon cayenne pepper (if you're heat averse, use less)
  • 2 tablespoons unsalted butter and 2 tablespoons extra virgin olive oil
  • 4 cups beef, chicken or vegetable broth (Add one more cup broth if you like a brothier soup like I do)
  • One 16-ounce can pumpkin puree (about 1 ½ cups)
  • ½ cup dry Sherry
Topping Suggestions
  • Crispy pancetta
  • Avocado, chopped
  • Sour cream
  • Jalapeno, Fresno or Serrano peppers, thinly sliced
  • Scallions, thinly sliced
  • Pumpkin seeds
  • Cilantro leaves
  • Shredded cheddar or jack cheese
  • Corn or tortilla chips

Directions
  1. In a food processor, coarsely puree ¾ cup black beans and 1 ¼ cup diced tomatoes.
  2. In a 6-quart heavy pot, cook the pancetta (if using) until slightly crispy, rendering out most of the fat. With a slotted spoon, remove pancetta, place on plate and set aside. Pour the rendered fat out and wipe pot with a paper towel.
  3. Place pot back on burner. Heat butter and extra virgin olive oil until shimmering. Throw in shallots, garlic, cumin, salt, and cayenne. Cook over moderate heat, stirring until shallots are softened and beginning to brown.
  4. Stir in beans and tomato puree.
  5. Stir in broth, pumpkin, Sherry, and the rest of the whole black beans, until combined. Simmer, uncovered, stirring occasionally, for 25 minutes or until thick enough to coat the back of a spoon.
  6. Season soup with salt and pepper.
  7. Serve soup garnished with toppings of your choice.
Picture
Soon. The guest blogger returns.
4 Comments

Miso Marinated Chicken

10/16/2019

3 Comments

 
Picture
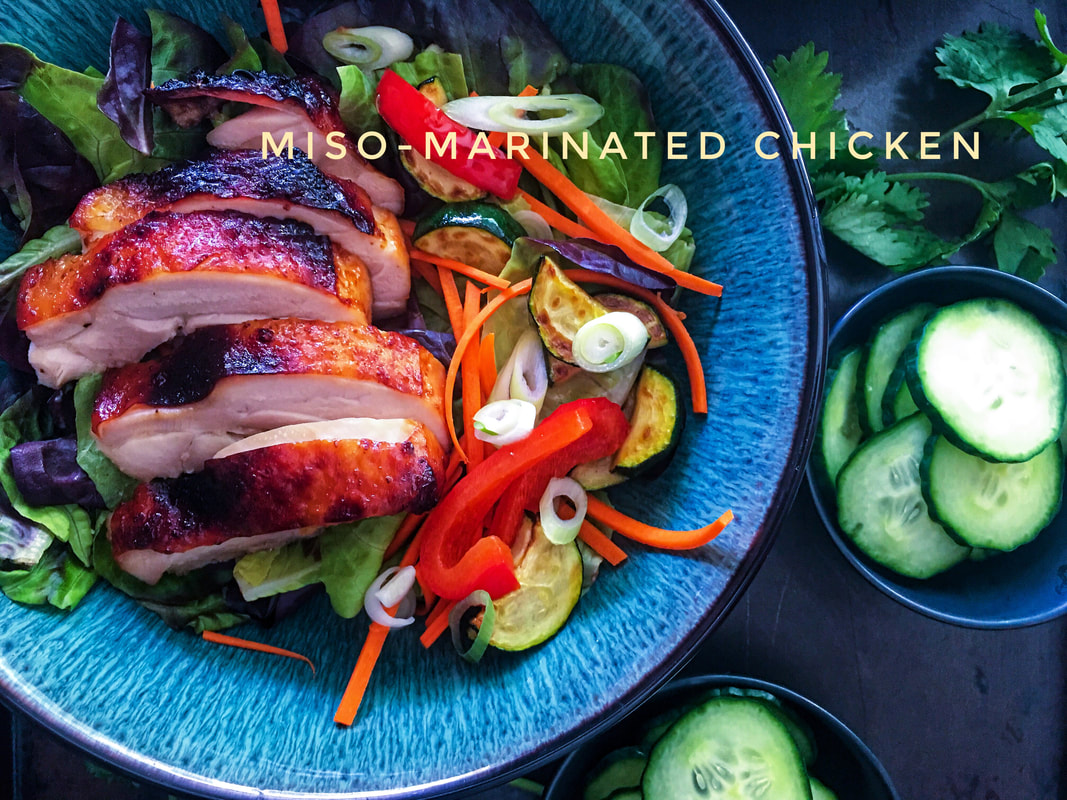
Most evenings, it's just the BF and I having dinner, so I typically halve recipes.

This is an exception.

The full portions are made here because, well, the leftovers are incredible. It also means that our Marlowe can enjoy some bits with her kibble. [Ed. note: CHIMKINNNN! Yes, I speak dog.] The finished product comes out juicy, flavorful, with a crispy skin.

NOTES:
  • Skin-on, boneless chicken thighs were used here.  
  • Don't own a grill, so mine are baked in the oven. Included directions for both below.

PS: Last year we were really in an Oktoberfest kinda mood when we broke out the sautéed cabbage with caraway (www.moveablefeast.me/blog/sauteed-cabbage-with-caraway). Even worked in the movie Strange Brew. [Ed. note: Take off!]

PPS: The BF spun off the planet when I made these salted espresso fudge brownies. [Ed. note: CAN I HAVE SOME MORE MAN I NEED SOME ELSINORE BEER TO COME DOWN FROM THE RRRRRRRRR] (www.moveablefeast.me/blog/salted-espresso-fudge-brownies).
Picture
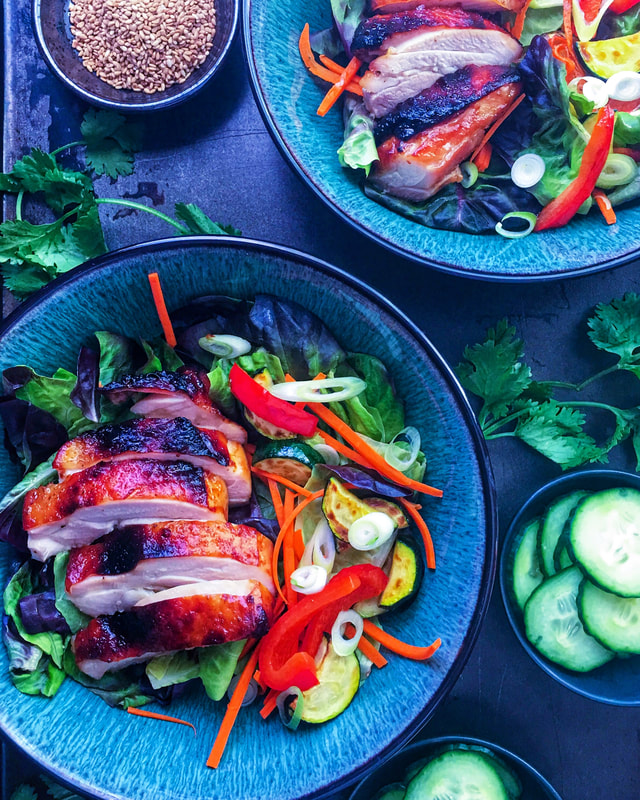
​Adapted from: Dennis the Prescott
Number of servings: 6–8

Ingredients
Miso Chicken
  • 10 skin-on, boneless chicken thighs
  • 1 cup white miso
  • 1 cup mirin
  • ½ cup sake
  • 2 tablespoons soy sauce
  • 2 tablespoons honey
  • 2 teaspoons toasted sesame oil

Pickles
  • 1 English cucumber, thinly sliced
  • ⅓ cup rice vinegar
  • 2 tablespoons sugar
  • 2 teaspoons kosher salt
  • 2 tablespoons sesame seeds

Serving Suggestions
  • Cooked Jasmine rice 
  • Steamed greens, i.e., baby bok choy 
  • Salad greens
  • Toasted sesame seeds, sliced green onions, and hot sauce, to serve
 
Directions
Marinade
  1. NOTE: make the marinade the night before. 
  2. Combine miso, mirin, sake, soy, honey, and sesame oil in a bowl and mix well.
  3. Place chicken in a freezer bag and pour in marinade. Chill overnight in fridge (at least 4 hours, but overnight is best). Get a little under the skin, if possible.
 
Pickles
  1. Combine cucumbers and salt in a bowl, toss, and let sit for 20 minutes. Rinse the salt off of the pickles, then place back in a bowl.
  2. Add rice vinegar, sugar, and sesame seeds, mix well, then cover and chill overnight.
 
Chicken
Oven Directions:
  1. Preheat to 450 °F. 
  2. Line baking sheet with foil and place a flat roasting/baking rack on the baking sheet. 
  3. Remove chicken from  marinade (discard marinade), place chicken on rack, skin-side down.
  4. Bake 10 minutes, then flip and continue baking 10 minutes, or until crispy on the outside and perfectly cooked through on the inside (reaching an internal temp of 165 °F using a meat thermometer). 
  5. If your skin is not crispy, stick it under the broiler and keep a careful eye on it.
  6. Place chicken on counter on let rest for 10-15 minutes. Slice into strips.
  7. Serve alongside your pickles, rice, veggies or salad. Whatever you like!

Grill Directions:
  1. Start your grill according to grill instructions. Set the temperature to 450 °F; allow to preheat, lid closed, for 10-15 minutes. 
  2. Remove the chicken from the marinade (discard marinade), then place chicken on grill, skin-side down. Grill, lid closed, for 10 minutes, then flip and continue grilling an additional 10 minutes, or until crispy on the outside and perfectly cooked through on the inside (reaching an internal temp of 165 °F using a meat thermometer). 
  3. ​Slice the chicken into thin strips, then serve alongside your pickles, some steamed rice, veggies, and extra fixings. Delicious! 
3 Comments
<<Previous

    Author

    I'm Jacquie, personal chef & recipe developer in the beautiful Pacific Northwest. ​Living life with my wildly funny boyfriend and dog Marlowe. Lover of books, bourbon, chocolate and movies.​

    Archives

    May 2020
    February 2020
    January 2020
    November 2019
    October 2019
    September 2019
    August 2019
    July 2019
    May 2019
    April 2019
    March 2019
    February 2019
    January 2019
    December 2018
    November 2018
    October 2018
    September 2018
    August 2018
    July 2018
    June 2018
    May 2018
    April 2018
    March 2018
    February 2018
    January 2018
    December 2017
    November 2017
    October 2017
    September 2017
    August 2017
    July 2017

    Categories

    All
    Ahi
    Apple
    Apple Pie
    Avocado
    Bars
    BBQ
    Beans
    Beef
    Beets
    Black Bean
    Blackberry
    Blueberries
    Borscht
    Bread
    Brownies
    Brussels Sprouts
    Bundt
    Butter
    Butternut Squash
    Butterscotch
    Cabbage
    Cake
    Caramel
    Carrot
    Challah
    Champagne
    Cheesecake
    Chicken
    Chili
    Chinese
    Chinese New Year
    Chocolate
    Christmas
    Cinco De Mayo
    Citrus
    Cocktail
    Coconut Rice
    Comfort Food
    Cookies
    Corn
    Cranberries
    Crostata
    Crumble
    Cupcakes
    Curry
    Dessert
    Easter
    Egg
    Egg Nog
    Eggplant
    Fish
    Ginger
    Gingerbread
    Gluten Free
    Grain Free
    Green Sauce
    Gumbo
    Halibut
    Halloween
    Hannukah
    Healthy
    Holiday
    Holidays
    Ice Cream
    Indian
    Kale
    Key Lime
    Kohlrabi
    Kosher
    Lamb
    Latkes
    Lemon
    Lentil
    Low Carb
    Mac & Cheese
    Malt
    Mango
    Mango Salsa
    Mardi Gras
    Martini
    Memorial Day
    Mexican
    Miso Chicken
    Moroccan
    Mushrooms
    Naan
    Nectarine
    Noodles
    Olive Oil
    Parsnips
    Passover
    Pasta
    Pavlova
    Peanut Butter
    Penne
    Peppermint
    Pesto
    Pie
    Pizza
    Plums
    Pluot
    Pork
    Potatoes
    Pots De Creme
    Pudding
    Pumpkin
    Pumpkin Cake
    Quinoa
    Rajma
    Raspberries
    Ratatouille
    Risotto
    Root Beer
    Salad
    Salmon
    Salmon Bowl
    Salsa
    Sauce
    Scallops
    Shortbread
    Short Ribs
    Shrimp
    Side Dish
    Soup
    Soy Sauce Eggs
    Spicy
    Spiralized
    Steak
    Strawberries
    Sugar Free
    Summer
    Sweet
    Sweet Potatoes
    Tacos
    Tart
    Thanksgiving
    Tomatoes
    Turkey
    Valentine's Day
    Vegan
    Veganuary
    Vegetable
    Vegetarian
    Veggie Burger
    Whole30
    Whoopie Pies
    Yams
    Yellow Bell Pepper
    Yu Choy

    RSS Feed

Powered by Create your own unique website with customizable templates.
  • home
  • services
  • bio
  • blog
  • contact
  • PHOTOS (summer)
  • photos (winter)
  • PRESS
  • faq